


My QuickTime movie doesn’t play in Office for Windows—from Microsoft
Understanding QuickTime Issues in PowerPoint
Why QuickTime Not Available in PowerPoint Occurs
Many users encounter the error powerpoint quicktime not available when trying to play or embed videos in older PowerPoint versions. This issue is common in Microsoft PowerPoint QuickTime not available scenarios and especially affects presentations containing MOV files.
QuickTime not available PowerPoint errors typically indicate missing codecs, deprecated software, or compatibility issues between PowerPoint and macOS/Windows multimedia frameworks. Users often see messages like QuickTime is not available PowerPoint or powerpoint 2010 quicktime not available.
⚠️Warning: Repeatedly attempting to open affected presentations without addressing the underlying issue may corrupt the file.
Common Causes of QuickTime Errors in PowerPoint
Unsupported Video Formats
Older PowerPoint versions rely on QuickTime to play MOV files. With QuickTime deprecated on Windows, QuickTime not available PowerPoint errors appear because the system cannot decode the video.
Missing Codecs
Even on macOS, missing codecs may prevent powerpoint video quicktime not available errors. Files encoded with uncommon audio or video codecs may fail to play, despite appearing correctly outside PowerPoint.
Corrupted PowerPoint File
A damaged presentation can trigger quicktime not available on PowerPoint errors. Repairing or recovering the file often restores proper playback.
Software Compatibility Issues
Older presentations or those created on macOS may not run smoothly in Windows PowerPoint. For instance, PowerPoint 2010 QuickTime not available is a common issue when transferring MOV-based presentations from Mac to Windows.
Methods to Fix PowerPoint QuickTime Not Available
Method 1: Convert MOV to MP4 Format
Converting videos to MP4 with H.264 video and AAC audio ensures compatibility with modern PowerPoint versions.
Steps to Convert Video
- Identify MOV files causing quicktime not available in PowerPoint errors.
- Use a video converter to convert to MP4.
- Save the new file locally.
- Insert the MP4 video into PowerPoint.
- Test playback.
Test Environment:
Windows 10, PowerPoint 2019, local SSD.
This resolves most codec-related issues without needing QuickTime installed.
Method 2: Reinstall QuickTime (Windows Only)
For older systems relying on QuickTime, reinstalling may restore playback functionality.
Steps to Reinstall QuickTime
- Uninstall existing QuickTime installation.
- Download QuickTime from a trusted source.
- Install and restart your computer.
- Open PowerPoint and insert the MOV video.
- Test playback.
Test Environment:
Windows 7/8, PowerPoint 2010, MOV files.
⚠️Warning: QuickTime for Windows is deprecated and may pose security risks. Use this method only in controlled environments.
Method 3: Repair the PowerPoint File
Corrupted presentations can block video playback.
Steps to Repair PowerPoint
- Open PowerPoint > “File” > “Open.”
- Select the affected file.
- Click the arrow next to “Open” > “Open and Repair.”
- Save the repaired presentation under a new name.
- Reinsert the video and test playback.
Test Environment:
Windows 10, PowerPoint 2021, SSD storage.
This addresses quicktime not available on PowerPoint errors caused by file corruption.
Method 4: Update PowerPoint and System Codecs
Updating software can restore video functionality.
Steps to Update Software
- Open PowerPoint > “File” > “Account” > “Update Options.”
- Click “Update Now.”
- Update Windows or macOS for the latest media codecs.
- Test video playback to ensure QuickTime not available PowerPoint errors are resolved.
Test Environment:
Windows 11, PowerPoint 365, local SSD.
Modern formats like MP4 or WMV do not rely on QuickTime and are fully compatible.
Method 5: Use Pandaoffice Drecov to Recover Presentations
If MOV-based presentations are corrupted, Pandaoffice Drecov can recover corrupted PowerPoint file and restore proper video playback.
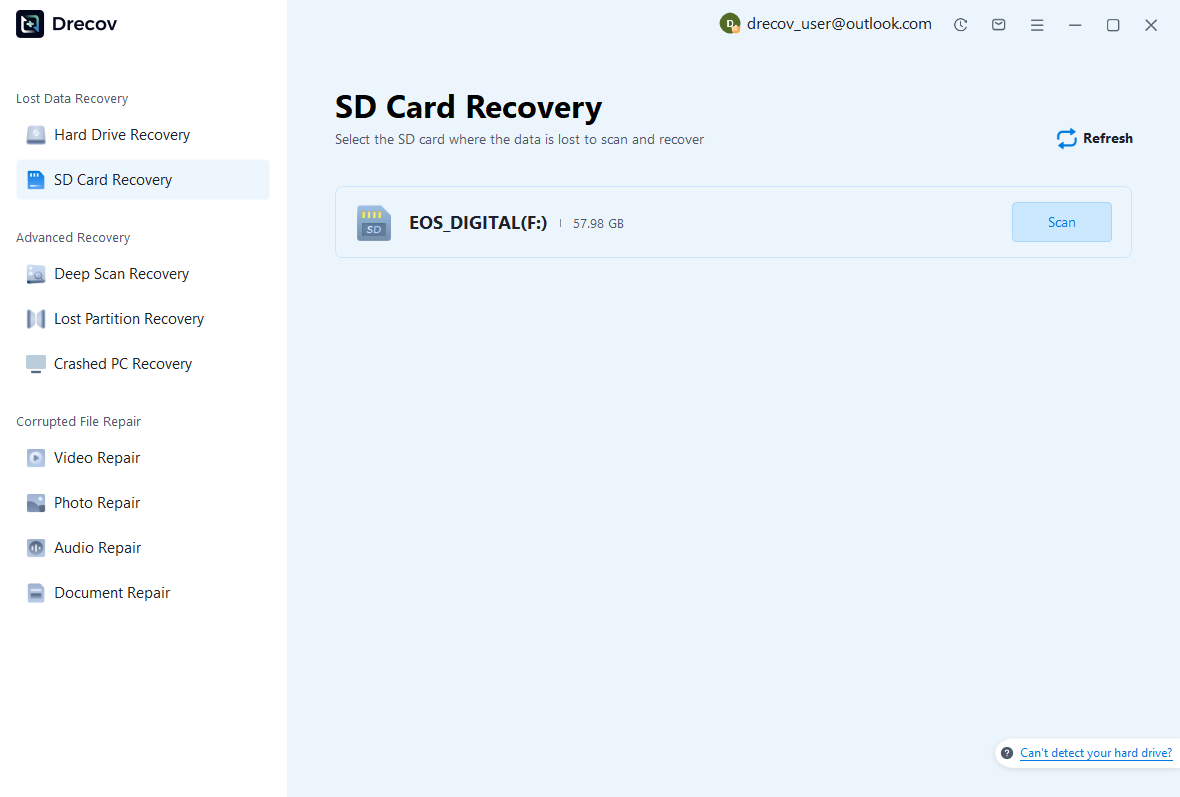
Download DrecovSteps Using Drecov
- Install and open Pandaoffice Drecov.
- Select the drive containing the presentation.
- Click “Scan” to detect recoverable files.
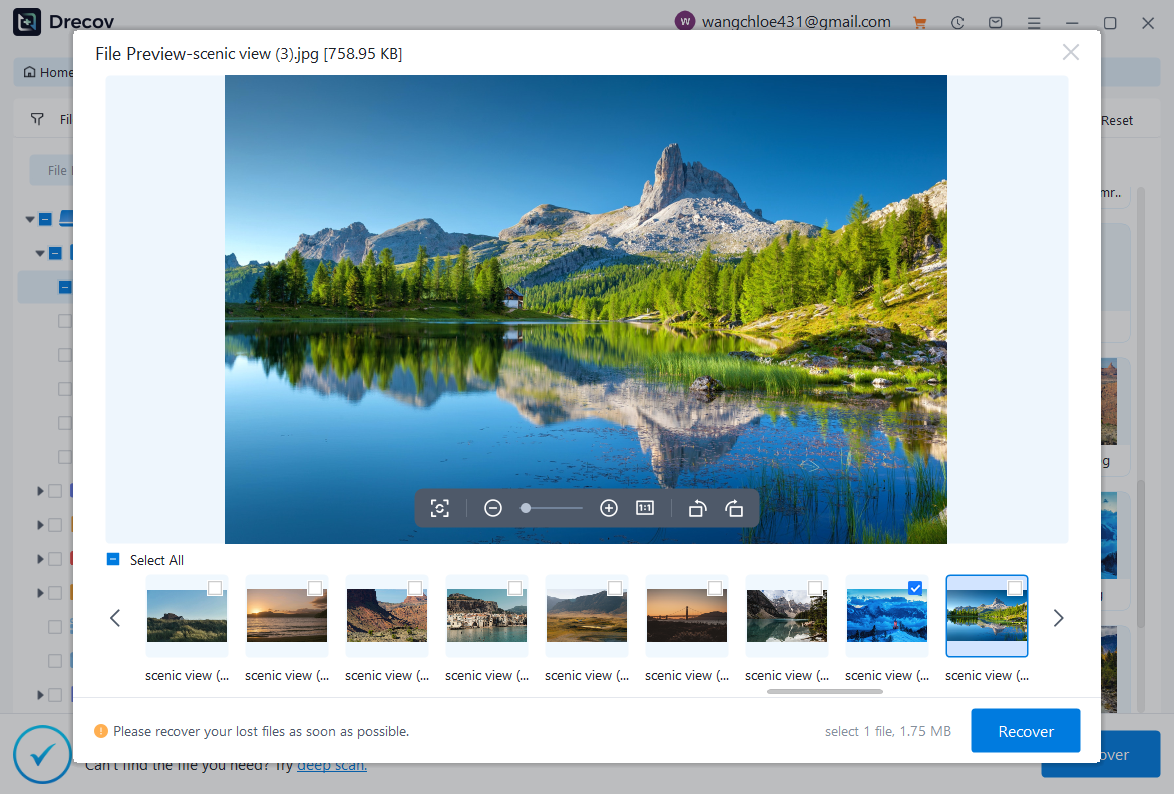
- Preview and select the affected presentation.
- Click “Recover” and save the file.
- Reinsert video and test playback.
Test Environment:
Windows 11, 16GB RAM, SSD storage.

Why Choose PandaOffice Drecov?
When it comes to reliable file data recovery, PandaOffice Drecov offers a balanced combination of performance, ease of use, and broad compatibility. Whether you’ve lost important business files or personal memories, it provides an efficient way to restore data from various loss scenarios, including system crashes, accidental deletion, and formatted drives.
For users looking for advanced Photo Data Recovery Software, PandaOffice Drecov supports a wide range of image formats and storage devices. It can recover high-quality photos from SD cards, cameras, and internal drives while preserving original resolution and file structure. This makes it especially useful for photographers and everyday users alike.
If you are dealing with storage device issues, its external hard drive recovery capability ensures that data can be retrieved from USB drives, HDDs, and SSDs with minimal effort. The software performs deep scans to locate hidden or lost files, even in complex situations like partition loss.
In addition, PandaOffice Drecov excels in Document Recovery, helping users restore essential files such as Word, Excel, and PDFs. It also supports powerpoint recovery, allowing you to retrieve unsaved or deleted presentation files quickly—ideal for professionals working under tight deadlines.
This method is ideal for restoring presentations when other fixes fail.
Method 6: Check Video Placement and File Paths
Long file paths or special characters can trigger quicktime not available PowerPoint errors.
Steps to Adjust File Path
- Move videos to a simple local folder (e.g., C:\Videos).
- Rename files to short names without special characters.
- Reinsert into PowerPoint.
- Test playback.
Test Environment:
Windows 10, PowerPoint 2019, local drive.
Correcting paths often resolves powerpoint video quicktime not available errors.
Method 7: Disable Hardware Graphics Acceleration
Hardware acceleration may conflict with older MOV playback.
Steps to Disable Hardware Acceleration
- Open PowerPoint > “File” > “Options” > “Advanced.”
- Scroll to “Display.”
- Check “Disable hardware graphics acceleration.”
- Restart PowerPoint.
- Insert video and test playback.
Test Environment:
Windows 11, integrated graphics, PowerPoint 2021.
Disabling acceleration reduces playback errors in quicktime is not available PowerPoint cases.
Method 8: Reinsert the MOV Video
Sometimes, simply reinserting the video resolves playback errors.
Steps to Reinsert Video
- Delete the problematic MOV file from the slide.
- Save and close the presentation.
- Reopen PowerPoint.
- Click “Insert” > “Video” > “This Device.”
- Select the video and insert it.
- Test playback to confirm audio and video functionality.
Test Environment:
Windows 10, PowerPoint 2019, local SSD storage.
Reinserting resolves quicktime not available in PowerPoint caused by minor glitches or temporary file locks.
Method 9: Convert Presentation to a New Format
Older PowerPoint formats (.ppt) may not support modern video playback.
Steps to Convert Format
- Open the presentation.
- Click “File” > “Save As.”
- Choose .pptx format.
- Save the presentation in a local folder.
- Reinsert the video and test playback.
Test Environment:
Windows 11, PowerPoint 2016/2019, local SSD.
Converting to a newer format addresses powerpoint quicktime not available errors due to legacy compatibility issues.
Method 10: Update Graphics and Audio Drivers
Outdated drivers may prevent MOV videos from playing properly.
Steps to Update Drivers
- Press “Windows + X” > “Device Manager.”
- Expand “Display Adapters” and “Sound, video, and game controllers.”
- Right-click each device > “Update driver.”
- Restart the computer.
- Test video playback in PowerPoint.
Test Environment:
Windows 10, integrated GPU + sound card, PowerPoint 2019.
Updating drivers ensures QuickTime not available on PowerPoint errors caused by hardware conflicts are resolved.
Method 11: Test MOV File Outside PowerPoint
Verify the video itself is not corrupted.
Steps to Test Video
- Open MOV video in QuickTime or VLC.
- Ensure video and audio play correctly.
- If file is corrupted, repair or convert the video before reinserting.
- Retry insertion in PowerPoint.
Test Environment:
Windows 11, QuickTime Player, VLC 3.x.
Testing the file prevents unnecessary troubleshooting of powerpoint video quicktime not available issues caused by damaged media.
Method 12: Use Embedded Playback Settings
Ensure PowerPoint is set to play videos automatically or on click.
Steps to Configure Playback
- Select the video in PowerPoint.
- Go to “Playback” tab.
- Choose “Start: Automatically” or “On Click.”
- Enable “Play Full Screen” if desired.
- Test video playback.
Test Environment:
Windows 10, PowerPoint 2021.
Proper playback settings reduce quicktime not available in PowerPoint errors during presentations.
⚠️Warning: Avoid embedding excessively large videos in older presentations, as they may fail to play.
Best Practices to Avoid QuickTime Errors in PowerPoint
- Use MP4 instead of MOV for Windows presentations.
- Keep videos in local drives with short file paths.
- Convert older .ppt files to .pptx.
- Update Office, Windows/macOS, and drivers regularly.
- Backup presentations before embedding videos or making major changes.
Following these practices ensures powerpoint video quicktime not available errors are minimized.
FAQ: QuickTime Issues in PowerPoint
Why is QuickTime not available in PowerPoint?
QuickTime has been deprecated on Windows, MOV files may use unsupported codecs, or the presentation may be corrupted.
How to fix PowerPoint video QuickTime not available?
Convert videos to MP4, repair the presentation, update software, disable hardware acceleration, or use Pandaoffice Drecov to recover corrupted files.
Does QuickTime still work in PowerPoint 2010?
MOV playback is limited, and you may see PowerPoint 2010 QuickTime not available errors on modern Windows systems. Conversion or recovery is recommended.
Can corrupted MOV files cause QuickTime errors?
Yes, corrupted MOVs may trigger quicktime is not available PowerPoint errors. Repair or convert the file before reinserting.
Conclusion: Key Takeaways
Summary of Effective Solutions
PowerPoint QuickTime not available is a common problem, especially for older presentations with MOV files. Effective solutions include:
- Convert MOV files to MP4 (H.264/AAC).
- Repair presentations or recover files using Pandaoffice Drecov.
- Reinsert videos and check playback settings.
- Update Office, Windows/macOS, and device drivers.
- Disable hardware acceleration and test videos outside PowerPoint.
Following these methods ensures smooth video playback, restores compatibility across devices, and prevents quicktime not available in PowerPoint errors in future presentations.
⚠️Warning: Always backup presentations before performing repairs, format conversions, or inserting large multimedia files.


