


Understanding Gmail Recovery Email and Account Security
What a Gmail Recovery Email Does
Many Gmail users add a backup email address to their accounts to improve security and simplify account recovery. This backup address is known as a recovery email. It allows Gmail to send verification codes, password reset instructions, and security alerts if suspicious activity occurs.
A recovery email plays a vital role in protecting the account. If a user forgets their password or cannot access their account, Google can send recovery instructions to the backup address. This mechanism helps prevent permanent account loss.
However, there are situations when users may want to gmail remove recovery email information from their account. For example, the backup email may no longer be active, it may belong to a previous employer, or it may simply no longer be necessary.
Removing an outdated recovery email is part of maintaining good account security. Old or unused backup addresses could become security risks if they fall into the wrong hands. Therefore, updating or removing them is sometimes recommended.
Many users search for instructions on how to remove recovery email from gmail because Gmail stores recovery details within the Google account security settings. While the process is straightforward, it is important to understand the security implications before removing the backup email address.
⚠️ Warning: Removing a recovery email may reduce your ability to regain account access if you forget your password.
Why Users Remove Recovery Emails from Gmail
Common Situations That Require Removing a Recovery Email
There are several reasons why users decide to remove recovery email from gmail accounts. In many cases, the change is related to improving account privacy or replacing outdated contact information.
One common scenario involves an email address that is no longer active. For example, users may have added a school or workplace email address as a recovery email. When they graduate or leave the company, they may lose access to that email account.
Another situation occurs when users want to maintain stronger privacy control. Some people prefer not to link multiple email accounts together because it increases the risk of unauthorized access if one account becomes compromised.
Users may also update their security settings when switching devices or changing digital habits. Instead of keeping an old backup address, they might prefer adding a phone number or another secure recovery option.
In certain cases, the recovery email may belong to another person who previously helped manage the account. Removing that email ensures the account remains private and secure.
Many users specifically search for how to remove a recovery email from gmaill after noticing that the recovery address listed in their security settings is outdated or incorrect.
Regularly reviewing account recovery options is an important security practice. Updating or removing outdated recovery information helps ensure that only trusted recovery methods remain connected to the account.
⚠️ Warning: Before removing a recovery email, make sure another recovery option such as a phone number is configured.
Solutions to Remove Recovery Email from Gmail
Method 1: Remove Recovery Email Through Google Account Settings
The most common way to remove recovery email gmail is through the Google Account security settings. This method allows users to edit or delete recovery contact information directly.
Test Environment
Device: Windows 11 laptop
Browser: Google Chrome
Account Type: Personal Gmail account
Network: Stable internet connection
Steps
- Open a web browser and go to the Google Account page.
- Sign in to your Gmail account.
- Click Security from the left menu.
- Scroll down to the Ways we can verify it’s you section.
- Locate the recovery email address listed in the account.
- Click the recovery email field.
- Remove the existing address or clear the field.
- Save the changes.
Once the changes are saved, the recovery email will no longer be linked to the Gmail account.
This method is the most direct approach and works for most Gmail users. It allows users to update security settings without affecting other account features.
⚠️ Warning: If you remove your only recovery option, you may have difficulty recovering your account later.
Method 2: Remove Recovery Email Using the Gmail Mobile App
Users who primarily manage their accounts on smartphones can also remove recovery email from gmail using the Gmail mobile application. The process is similar to the desktop method but occurs within the account management interface.
Test Environment
Device: Android smartphone
App Version: Gmail latest version
Account Type: Gmail personal account
Steps
- Open the Gmail app on your smartphone.
- Tap your profile picture in the top right corner.
- Select Manage your Google Account.
- Navigate to the Security tab.
- Scroll to the recovery email section.
- Tap the recovery email entry.
- Remove or edit the listed email address.
- Confirm the change.
After confirming the change, the recovery email will be removed from the account settings.
Using the mobile app provides a convenient way to manage security settings while traveling or working on mobile devices. The steps remain similar because the Gmail app connects directly to Google’s account management system.
Many users prefer this approach because it allows them to adjust security settings quickly without using a computer.
Method 3: Replace the Recovery Email Instead of Removing It
Instead of completely removing the backup email, users may choose to replace it with a new address. This approach keeps the account secure while removing outdated contact information.
Test Environment
Device: Windows 10 desktop computer
Browser: Microsoft Edge
Account Type: Gmail business account
Steps
- Open the Google Account security page.
- Log in to your Gmail account.
- Navigate to the recovery email settings.
- Enter a new backup email address.
- Confirm the new address through the verification code.
- Save the updated settings.
Replacing the recovery email is often safer than deleting it entirely. The account still retains a reliable recovery method while removing the outdated address.
Many users who search for gmail remove recovery email ultimately decide to replace the recovery address rather than delete it completely.
⚠️ Warning: Always verify the new recovery email before removing the old one.
Method 4: Remove Recovery Email from Gmail via Personal Info Settings
Another effective way to remove recovery email from Gmail is by updating your Google Account personal information settings. In some cases, Gmail stores backup contact details in the personal profile section rather than directly inside the main security dashboard. Editing this section can help users update or remove recovery email gmail without affecting other account settings.
This method is useful when the recovery email was originally added as a contact method or identity verification address.
Test Environment
- Operating System: Windows 11
- Browser: Google Chrome
- Gmail Version: Web interface
Steps
- Sign in to your Gmail account.
- Click your profile picture in the upper-right corner.
- Select Manage your Google Account.
- Navigate to the Personal Info section.
- Scroll to the Contact Information category.
- Locate the backup or secondary email address.
- Click the edit option and remove the email address.
- Confirm the changes when prompted.
After completing these steps, the backup address will no longer appear in your account profile.
Although this method is slightly different from modifying the security section, it still allows users to successfully remove recovery email from Gmail when the email is stored as profile contact information.
⚠️ Warning: If the removed email was previously used as the primary recovery method, make sure another recovery option such as a phone number remains active.
Method 5: Remove Recovery Email from Gmail Using the Google Security Checkup Tool
Google provides a built-in Security Checkup feature that helps users review and manage account security settings, including recovery options.
Test Environment
- Device: Desktop PC
- Operating System: Windows 10
- Browser: Microsoft Edge
Steps
- Visit the Google Security Checkup page.
- Log into your Gmail account.
- Review the Account Recovery Information section.
- Find the recovery email currently linked to your account.
- Select the option to remove recovery email gmail.
- Confirm your identity if Google requests verification.
The Security Checkup tool is useful because it provides a quick overview of your account security status. It also highlights potential vulnerabilities, such as outdated recovery information or suspicious login activity.
Using this method ensures that your recovery settings remain accurate and that unauthorized users cannot access your recovery email.
⚠️ Warning: If your account is used for work or school, some recovery settings may be controlled by an administrator.
Method 6: Recover Accidentally Deleted Gmail Backup Files with Pandaoffice Drecov
When users manage Gmail security settings, they sometimes export or download email archives before removing recovery options. During this process, Gmail backup files such as .mbox, .zip, or attachments may accidentally be deleted from the computer.
In such situations, Pandaoffice Drecov can help recover those lost files.
Download DrecovTest Environment
- Operating System: Windows 10
- Storage Device: SSD internal drive
- File Type Tested: Gmail exported archive
Steps
- Install and launch Pandaoffice Drecov.
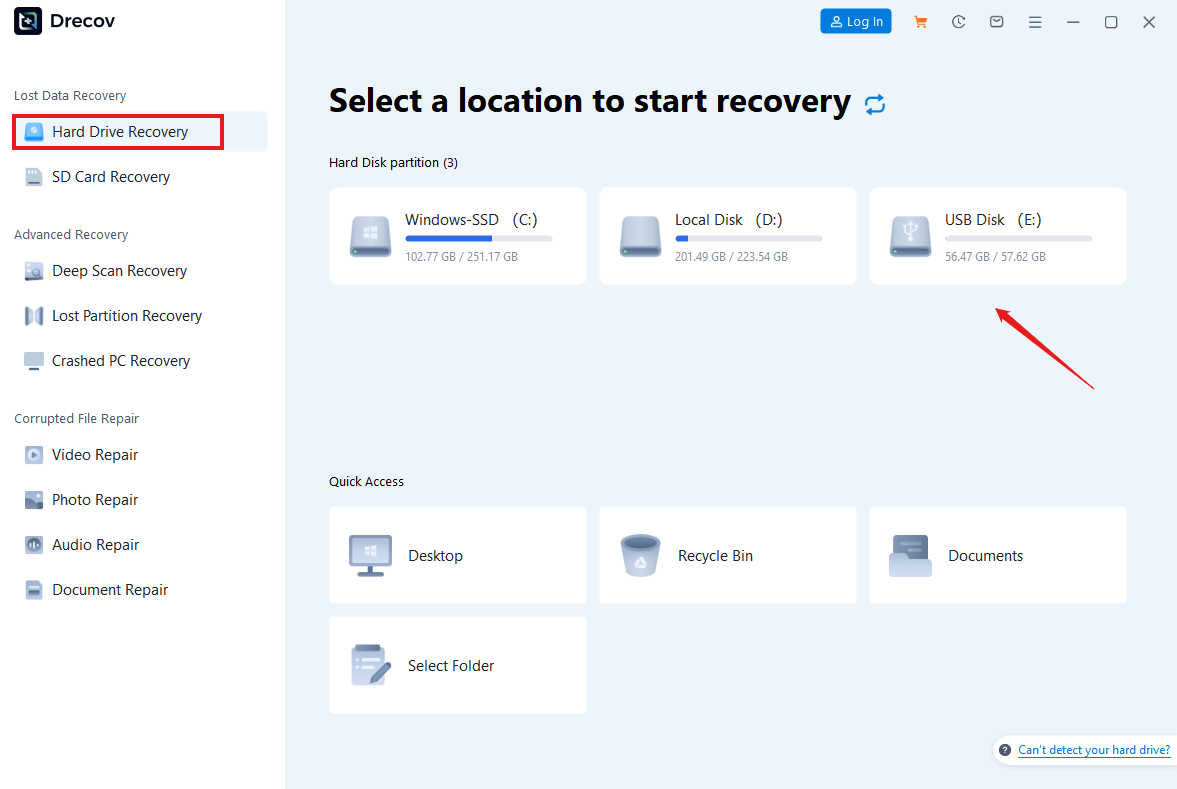
- Select the storage drive where the Gmail backup files were originally saved.
- Start a deep scan to search for deleted files.
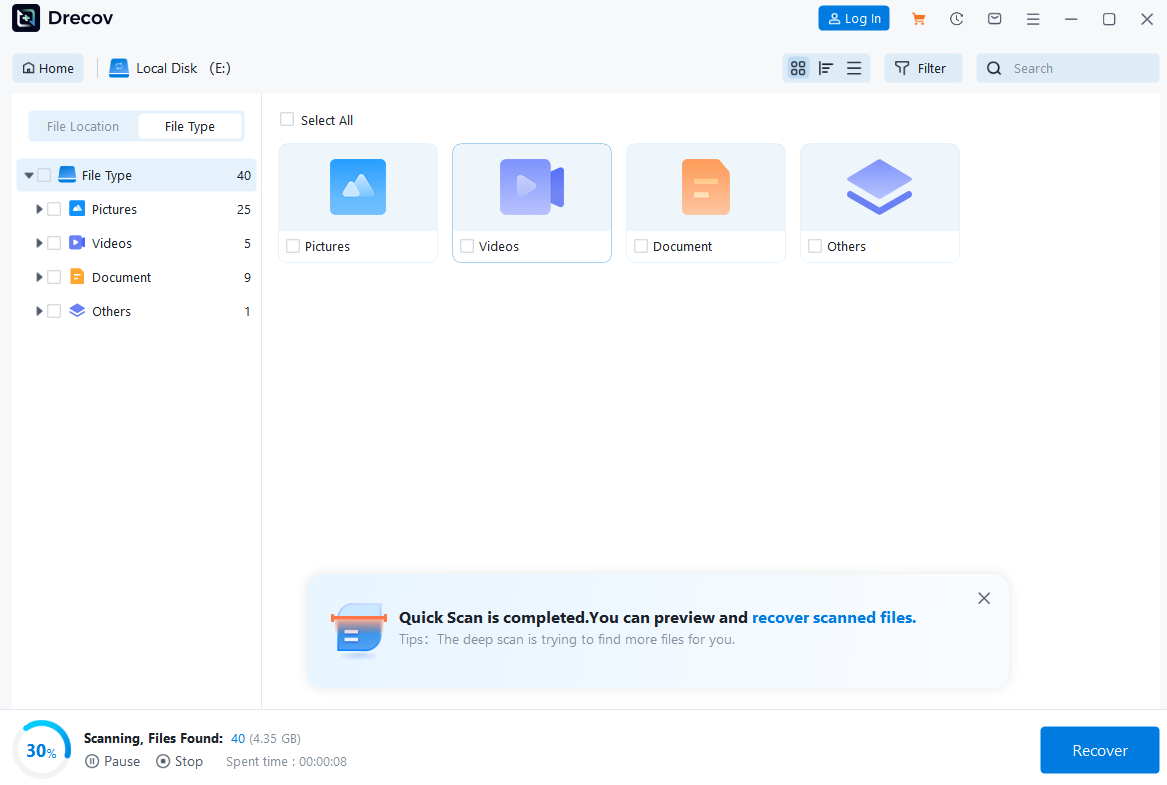
- Wait for the scanning process to finish.
- Preview the recoverable Gmail archive files.
- Select the files and click Recover to restore them.

Why Choose Pandaoffice Drecov?
When it comes to recovering lost or deleted files, reliability, speed, and ease of use are paramount. Pandaoffice Drecov stands out as a comprehensive solution for individuals and businesses alike, offering a seamless experience for data recovery. Whether you’ve accidentally formatted a USB drive or lost crucial documents, this software ensures your files are back in your hands quickly and safely.
With Formatted USB Drive Recovery, Drecov effortlessly restores files from drives that have been reformatted, protecting important data from permanent loss. Its advanced scanning engine also excels at Word Document Recovery, retrieving unsaved or deleted documents without compromising formatting or content. For office users, Deleted PowerPoint Recovery and Excel Recovery Files are equally straightforward, letting you recover presentations and spreadsheets critical for work or study.
Beyond individual file types, Drecov covers broader recovery needs. Its Recycle Bin Recovery Software feature allows you to restore files emptied from the Recycle Bin, ensuring that even accidental deletions don’t result in permanent loss. The software’s intuitive interface guides users through each step, making complex recovery processes simple, even for those with minimal technical experience.
Security is another cornerstone of Pandaoffice Drecov. All recovery processes are read-only, meaning your original data remains untouched while the software works to restore files. The high success rate and compatibility with multiple storage devices—from USB drives to external hard drives—make Drecov a versatile tool for any data recovery scenario.
Compared with command-line solutions, graphical windows recovery file utilities reduce the risk of errors and make recovery accessible for beginners.
⚠️ Warning: Always recover files to a different location to prevent overwriting the deleted data.
FAQ About Removing Recovery Email from Gmail
Can I Add a New Recovery Email After Removing One?
Yes. After performing remove recovery email from Gmail, you can easily add a new recovery email through your Google Account security settings. Many users replace outdated addresses with a more reliable backup email.
Updating the recovery email for Gmail helps ensure that security notifications and password reset instructions are delivered to a valid account.
Why Can’t I Remove My Gmail Recovery Email?
There are several possible reasons:
- The account requires at least one recovery method
- Additional identity verification is required
- The account is managed by an organization
If Gmail prevents the change, you may need to verify your identity or add another recovery method first.
Conclusion
Understanding how to remove recovery email from Gmail is important for maintaining accurate and secure account settings. Over time, many users accumulate outdated recovery addresses that may no longer be accessible.
Gmail allows users to manage recovery information through several tools, including the Google Account security page and the Security Checkup feature. These tools make it easy to remove recovery email gmail and update account protection settings.
However, it is always recommended to maintain at least one recovery option such as a phone number or trusted device. Doing so ensures that you can regain access to your account if login issues occur.
Additionally, if Gmail archives or downloaded email files are accidentally deleted during account changes, recovery tools like Pandaoffice Drecov can help restore those files from your storage device.
By regularly reviewing your recovery settings and keeping them up to date, you can maintain strong Gmail account security and avoid future access problems.


