


Imagine this: You’ve spent three weeks perfecting a presentation. You plug your USB stick into a library computer to print it, and in a moment of rush or a simple misclick, you hit “Delete” instead of “Open.” You check the Recycle Bin, but it’s empty. Because USB drives are treated as removable storage, Windows often bypasses the bin entirely.
Panic sets in. Is the file gone forever? The short answer is: No. Whether you accidentally formatted the drive or hit “Shift + Delete,” you can still undo delete on usb stick if you act quickly. This guide will walk you through the “magic” of data recovery, from the hidden science of bits to the best tools available today.
The Library Metaphor: How Data Recovery Actually Works
To understand how to undo delete on usb stick, think of your flash drive as a massive library.
When you “save” a file, the library’s librarian (the File System, like FAT32 or NTFS) writes the book and records its location in a Table of Contents (Index). When you “delete” that file, the librarian doesn’t actually burn the book. Instead, they simply erase the entry in the Table of Contents and mark the shelf space as “Available.”
The book (your data) stays on the shelf until a new book is written over it. This is the golden rule of recovery: Stop using the drive immediately. If you keep saving new files, you are essentially letting the librarian put new books on top of the old ones, making it impossible to undo delete on usb stick.
Proven Methods to Undo Delete on USB Stick
We have categorized these methods from simple system commands to professional-grade software. Follow these steps carefully to maximize your chances of success.
Method 1: The Command Prompt (CMD) Utility
This method is effective if the files are not actually deleted but are hidden by a virus or a system glitch.
- Step 1: Plug your USB stick into your PC.
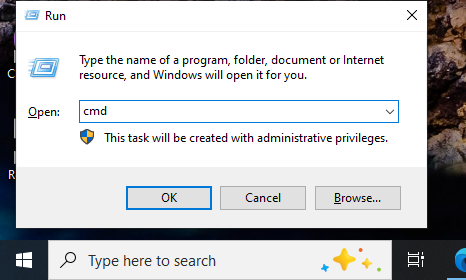
- Step 2: Press
Win + R, typecmd, and press Enter.
- Step 3: In the black window, type the drive letter of your USB (e.g.,
E:) and hit Enter. - Step 4: Type the following command:
attrib -h -r -s /s /d *.*and press Enter.
Note: This command clears the “Hidden,” “Read-only,” and “System” attributes from your files. If your files reappear, you have successfully managed to undo delete on usb stick.
Method 2: Using PandaOffice Drecov
When standard commands fail, you need a professional-grade engine. PandaOffice Drecov is specifically designed to handle deep-sector scanning, which looks past the “Table of Contents” directly at the “Bookshelves.”This makes it an indispensable tool for a wide range of data loss scenarios, including:
- Accidental Desktop Deletions: Instantly retrieving files wiped from your local workspace.
- Disk Formatting Errors: Salvaging files from drives that have been completely wiped or reformatted.
- External Media Rescue: Recovering lost data from formatted or corrupted SD cards and USB flash drives.
- Sync Conflict Resolution: Reversing data loss caused by synchronization errors between your PC and the OneDrive cloud.
- Browser Metadata Recovery: Restoring lost Chrome bookmarks and other essential application data.”
- Step 1: Installation. Download and install PandaOffice Drecov . Ensure you install it on your hard drive, not the USB stick itself.
- Step 2: Select Location. Launch the program. Under the “External Devices” tab, select your USB drive.

- Step 3: Deep Scan. Click on the Scan button. PandaOffice Drecov will perform a “Quick Scan” followed by a “Deep Scan” to find fragmented file parts.

- Step 4: Preview and Filter. One of the best features of PandaOffice Drecov is the preview function. You can view images or documents before recovering them to ensure they aren’t corrupted.

- Step 5: Execute Recovery. Select the files you wish to restore and click Recover.
⚠️ CRITICAL WARNING: Always save the recovered files to your Desktop or another drive. Never save them back to the original USB stick during the recovery process, as this will overwrite the very data you are trying to save.
Method 3: Windows File Recovery (Microsoft’s Tool)
Microsoft offers a command-line app available in the Microsoft Store. It is more powerful than CMD but requires specific syntax.
- Step 1: Download Windows File Recovery.
- Step 2: Open the app and use the following syntax:
winfr source-drive: destination-folder: /regular
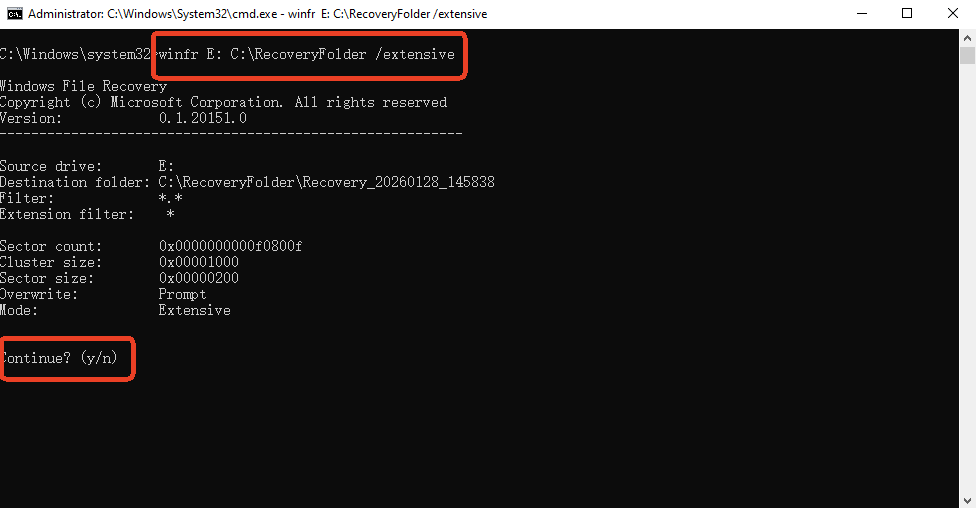
- Step 3: For a USB stick (which often uses FAT32), use the “extensive” mode:
winfr E: C:\RecoveredFiles /extensive
While this tool is free, it lacks the intuitive interface and preview capabilities found in PandaOffice Drecov, making it harder for non-technical users to undo delete on usb stick.
Method 4: Checking Hidden Temp Folders
Sometimes, applications like Word or Excel save a “shadow copy” of your file in a local temp folder.
- Step 1: Navigate to
C:\Users\[YourUsername]\AppData\Local\Temp. - Step 2: Search for files ending in
.tmpor starting with a tilde~. - Step 3: Copy these to your desktop and change the file extension back to
.docxor.xlsx.
Comparing Recovery Methods
Choosing the right way to undo delete on usb stick depends on your technical comfort and the importance of the data.
| Feature | CMD Attrib | PandaOffice Drecov | Windows File Recovery | Temp Folders |
| Success Rate | Low (Hidden files only) | Extremely High | Medium | Low |
| Ease of Use | Moderate (CLI) | Very Easy (GUI) | Difficult (CLI) | Moderate |
| File Preview | No | Yes (High Resolution) | No | No |
| Deep Scanning | No | Yes (Sector-by-Sector) | Yes | No |
| Best For | Virus-hidden files | Any Data Loss Scenario | Experienced Users | Office Documents |
Why PandaOffice Drecov stands out: Unlike manual methods, it reconstructs file headers that have been partially damaged. While CMD only changes file visibility, Drecov actually reassembles the bits of data that the OS no longer recognizes.
Preventive Measures: How to Never Lose Data Again
The best way to undo delete on usb stick is to ensure you never have to. Follow these proactive steps:
- Enable “Cloud Mirroring”: Use tools like Dropbox or OneDrive to automatically sync your USB contents when plugged in.
- The “Safely Remove” Habit: Never pull a USB out while the LED is flashing. This prevents “Logical Corruption” where the Table of Contents gets scrambled.
- Regular Backups: Use the 3-2-1 Rule: 3 copies of data, on 2 different media, with 1 copy off-site.
- Write-Protection: If you are only reading files at a public kiosk, use a USB with a physical write-protection switch to prevent accidental deletion or virus infection.
Undo delete on usb stick FAQs
Can I undo delete on usb stick if I formatted it?
Yes. A “Quick Format” only erases the index. A tool like PandaOffice Drecov can scan the raw data sectors to recover files even after a format.
Does “Shift + Delete” make recovery impossible?
No. On a USB drive, a standard delete and a “Shift + Delete” behave similarly; both bypass the Recycle Bin. The data remains on the drive until overwritten.
Why are my recovered files “Corrupted”?
This usually happens if new data was written to the USB after the deletion. The new data “stepped” on pieces of the old file. This is why immediate action is required to undo delete on usb stick.
Is there a free way to undo delete on usb stick?
The CMD method and Windows File Recovery are free. However, for high-stakes data, professional software is recommended because it handles file fragmentation much better than free system tools.
Conclusion
Losing files can feel like a disaster, but the ability to undo delete on usb stick is a reality thanks to how modern file systems operate. By understanding that “deleted” doesn’t mean “destroyed,” you can approach the situation calmly. Start with simple checks like hidden attributes, but for a reliable and user-friendly experience, tools like PandaOffice Drecov offer the most robust path to getting your digital life back.
Remember: Stop using the drive, scan immediately, and always keep a backup!


