


Imagine this: You’ve just finished a grueling two-week project. To celebrate, you decide to clean up your cluttered desktop. You drag dozens of old drafts to the Trash, right-click, and hit “Empty Recycle Bin” with a satisfying click. Suddenly, your stomach drops. You realize your final, polished presentation was tucked inside one of those “old” folders.
It feels like the file is gone forever, swallowed by the digital void. However, I have good news for you. Understanding how to recover files from recycle bin after emptying is not just a dream for IT experts; it is a practical reality for everyday users. In this guide, we will explore the “magic” behind data storage and provide a roadmap to rescue your lost work.
The Library Metaphor: How Data Recovery Actually Works
To understand why recovery is possible, think of your hard drive as a massive library and your files as books.
When you save a file, the computer does two things:
- It places the “book” (the data) on a shelf.
- It records the book’s location in the “catalog” (the File Allocation Table or Master File Table).
When you delete a file and empty the Recycle Bin, Windows does not shred the book. Instead, it simply takes a pen and crosses the entry out of the catalog. It marks that specific shelf space as “Empty” or “Available for reuse.”
As long as you don’t save a new book on that exact same shelf, the old book is still sitting there! This is the fundamental principle of data recovery. The goal is to find the “books” that no longer have a “catalog entry.”
Critical First Steps: The “Golden Rule” of Recovery
Before we dive into the methods, you must follow the Golden Rule: Stop using the device immediately.
If you continue to browse the web, download new apps, or even move files around, your computer might write new data over the “empty” space where your deleted file still lives. Once data is overwritten, it is gone for good.
Proven Methods: How to Recover Files From Recycle Bin After Emptying
We have categorized these methods from simple system-based tricks to professional-grade solutions.
Method 1: Restore from File History (The Windows Backup)
Windows has a built-in “time machine” called File History. If you had this enabled before the deletion, you can roll back the folder to a previous state.
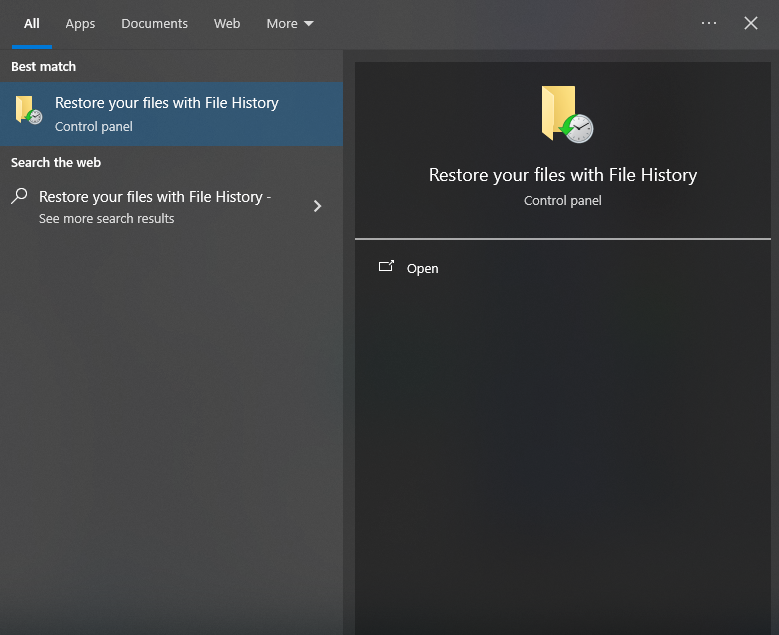
- Step 1: Click the Start menu and type “Restore your files with File History.”
- Step 2: Locate the folder where your deleted file was originally stored (e.g., Desktop or Documents).
- Step 3: Use the arrow buttons at the bottom to browse through different versions of that folder.
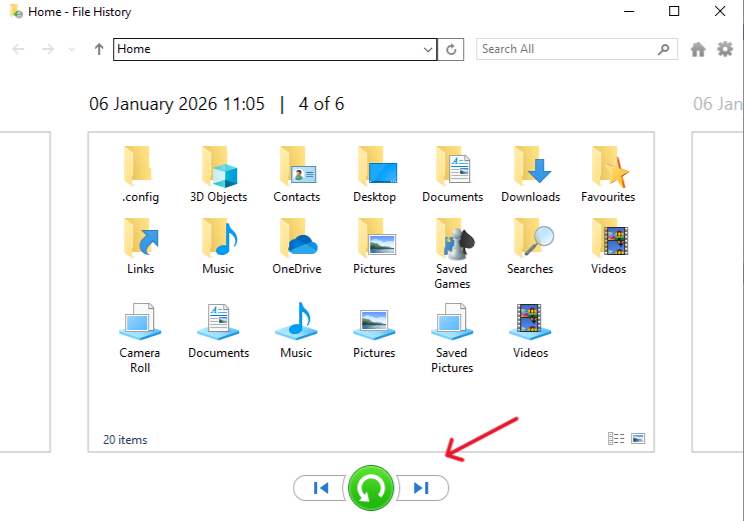
- Step 4: Once you find the version containing your file, select it and click the green Restore icon.
Method 2: Professional Recovery with PandaOffice Drecov
If you didn’t have a backup, don’t panic. This is where specialized software shines. PandaOffice Drecov is a premier tool designed specifically for deep-scanning drives to find those “catalog-less” files. It is particularly effective for those wondering how to recover files from recycle bin after emptying when Windows’ own tools come up short.
Why choose PandaOffice Drecov? Unlike basic tools, Drecov uses an advanced algorithmic engine to reconstruct fragmented files that other programs might miss. This makes it an indispensable tool for a wide range of data loss scenarios, including:
- Accidental Desktop Deletions: Instantly retrieving files wiped from your local workspace.
- Disk Formatting Errors: Salvaging files from drives that have been completely wiped or reformatted.
- External Media Rescue: Recovering lost data from formatted or corrupted SD cards and USB flash drives.
- Sync Conflict Resolution: Reversing data loss caused by synchronization errors between your PC and the OneDrive cloud.
- Browser Metadata Recovery: Restoring lost Chrome bookmarks and other essential application data.”
Tip: Install it on a USB drive or a different partition (like Drive D: instead of C:) to avoid overwriting your lost data.
Step-by-Step Guide for PandaOffice Drecov:
- Step 1: Select Location. Launch the software. On the main interface, select “Recycle Bin” or the specific drive where the file lived.

- Step 2: Scan. Click the Scan button. The software will perform a Quick Scan followed by a Deep Scan to locate every recoverable bit.

- Step 3: Filter and Preview. Use the search bar or file type filters to narrow down the results. Drecov allows you to preview photos and documents before recovery to ensure they aren’t corrupted.

- Step 4: Recover. Check the boxes next to your files and hit Recover. Choose a save destination different from the original drive to ensure safety.
Method 3: Using the Windows File Recovery Tool (Command Line)
For those who are comfortable with a bit of coding, Microsoft offers a free command-line utility.
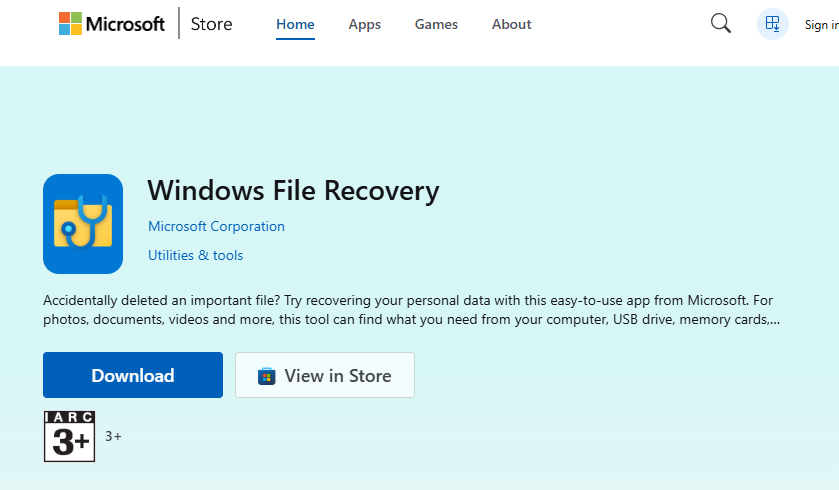
- Step 1: Download “Windows File Recovery” from the Microsoft Store.
- Step 2: Open the app, which launches a Command Prompt.
- Step 3: Enter the following command structure:
winfr source-drive: destination-drive: /regular /n \Users\<username>\Documents\ - Step 4: Follow the on-screen prompts to allow the tool to scan the clusters.
Method 4: Recovering via OneDrive or Cloud Sync
If your “Recycle Bin” folder was synced with a cloud service like OneDrive or Google Drive, the file might still be in the Cloud’s own Recycle Bin.
- Step 1: Log in to the web version of your cloud provider (e.g., OneDrive.com).
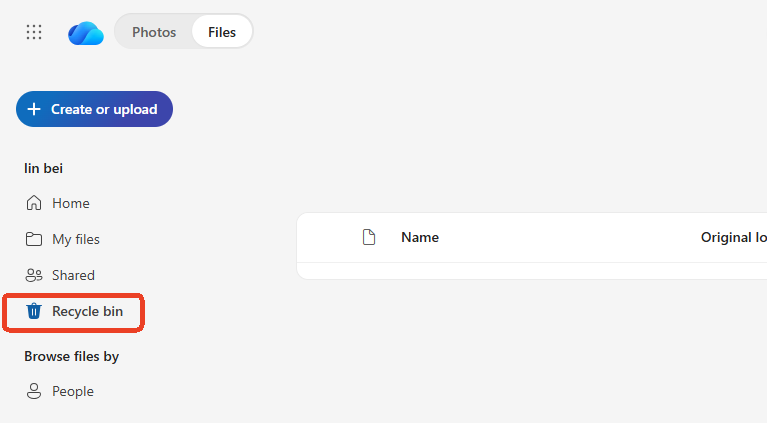
- Step 2: Look for the Recycle Bin link on the left-hand sidebar.
- Step 3: Select your file and click Restore. Often, cloud services keep deleted files for 30 days regardless of your local PC settings.
Comparison of Recovery Methods
| Method | Success Rate | Ease of Use | Best For |
| File History | High | Medium | Users with existing backups |
| PandaOffice Drecov | Highest | High (UI-based) | Empty Recycle Bin / No Backups |
| WinFR (CMD) | Medium | Low | Technical users / Free option |
| Cloud Restore | High | High | Sync-enabled folders |
Proactive Protection: How to Prevent Future Data Loss
The best recovery strategy is never needing one. Follow these preventative steps:
- Adjust Recycle Bin Size: Right-click the Recycle Bin > Properties. Increase the “Maximum size” so large files aren’t immediately deleted.
- Enable “Delete Confirmation”: In the same Properties menu, check “Display delete confirmation dialog” to prevent accidental clicks.
- Automate Backups: Use the 3-2-1 Rule: Keep 3 copies of data, on 2 different media, with 1 copy off-site (cloud).
- Regular Health Checks: Use tools to monitor your SSD/HDD health to prevent data loss due to hardware failure.
How to recover files from recycle bin after emptying FQAs
Q: Can I recover files if I used “Shift + Delete”?
A: Yes! Shift + Delete bypasses the Recycle Bin entirely, but the “Library Metaphor” still applies. The data is still on the disk until overwritten. Use PandaOffice Drecov for the best chance of recovery in this scenario.
Q: Does an SSD make recovery harder than an HDD?
A: Generally, yes. SSDs use a command called TRIM, which proactively clears “deleted” data. If you have an SSD, you must act instantly to have any chance of recovery.
Q: How long do I have to recover a file?
A: There is no set time limit—it is a “usage limit.” If you don’t use the computer, the file could stay there for years. If you download a large game, it could be gone in seconds.
Conclusion
Learning how to recover files from recycle bin after emptying is a vital digital skill. While Windows provides some basic safety nets like File History, professional tools like PandaOffice Drecov offer the most robust solution for when things go truly wrong. Remember: stop writing new data, act fast, and always keep a backup for the future!


