


Imagine this: You’ve just returned from a once-in-a-lifetime safari or a breathtaking wedding. You plug your SD card into your laptop, eager to relive those memories, only to be met with a chilling message: ‘Drive is not formatted. Do you want to format it now?’ or worse, the folder is simply empty. Your heart sinks as you realize you might desperately need a reliable sd card recovery tool to save your work. Whether it’s a professional photoshoot or critical documents stored on an sd card, data loss feels like a digital catastrophe.
However, losing access to your files doesn’t mean they are gone forever. In the world of digital forensics, an sd card recovery tool acts as a bridge between a “lost” file and its restoration. This guide will walk you through the inner workings of data storage and provide a comprehensive roadmap to reclaiming your digital life.
The “Library” Metaphor: Understanding How Data Recovery Works
To master an sd card recovery tool, you first need to understand why recovery is even possible. Think of your SD card as a massive university library.
When you “delete” a file, the computer doesn’t immediately send a shredder to destroy the pages of the book. Instead, it goes to the library’s Card Catalog (the File Allocation Table or Master File Table) and erases the entry for that book. It also marks the shelf space as “Available.”
The “book” (your data) is still sitting on the shelf! It remains there until a new book is placed on that exact same spot. This is why timing is critical. If you continue using the device, you risk “overwriting” the old data with new files. An sd card recovery tool ignores the broken card catalog and walks straight into the “shelves” to see what’s actually sitting there.
Crucial First Steps: The “Do’s and Don’ts” of Data Loss
Before we dive into the specific sd card recovery tool options, you must follow these golden rules to prevent permanent data destruction:
- Stop using the device immediately: Every second of use increases the risk of overwriting.
- Do not format: If a pop-up asks you to format the drive, click “Cancel.”
- Check connections: Sometimes the issue is a faulty card reader or a loose USB cable, not the data itself.
Method 1: Using Recuva for Basic File Retrieval
Recuva is a well-known, free sd card recovery tool developed by CCleaner. It is excellent for accidental deletions where the file system is still relatively healthy.
How to use Recuva:
- Step 1: Download and install Recuva. Ensure you install it on your computer’s main drive, never on the SD card you are trying to fix.
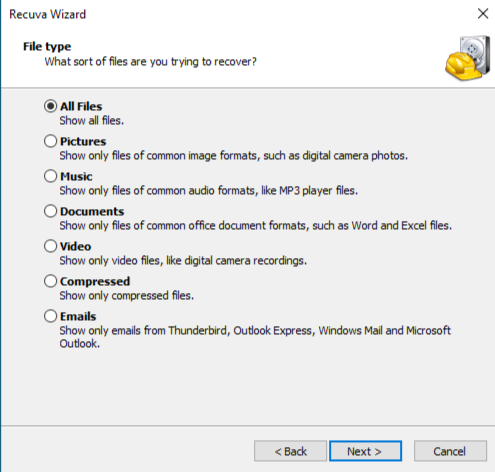
- Step 2: Launch the Recuva Wizard. Select the file type you are looking for (e.g., Pictures, Videos, or All Files).
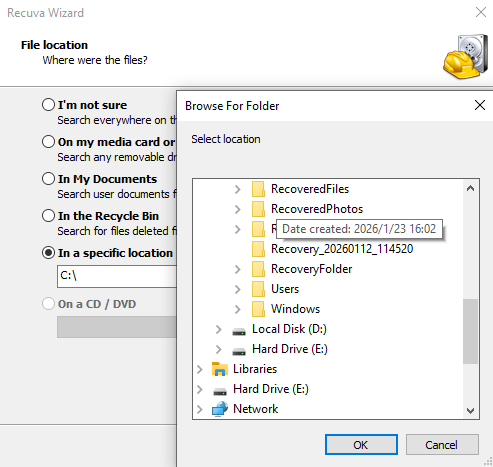
- Step 3: Specify the location. Choose “On my media card or iPod” or browse to the specific drive letter of your sd card.
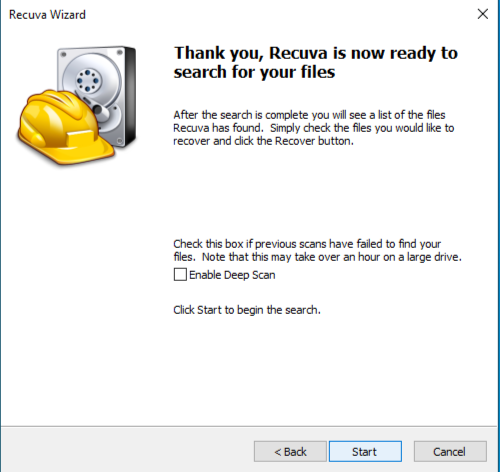
- Step 4: Enable “Deep Scan” if a quick scan fails. This takes longer but searches the drive sector by sector.
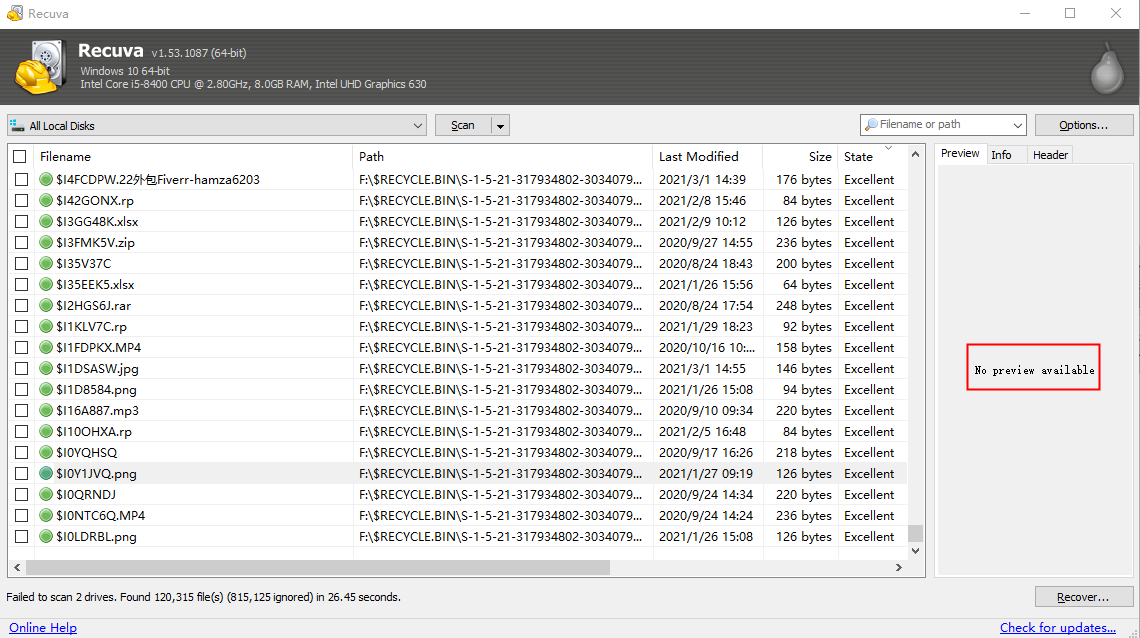
- Step 5: Review the results. Recuva uses a traffic light system: Green (Excellent health), Orange (Poor), and Red (Unrecoverable). Select your files and click “Recover.”
Method 2: High-Efficiency Recovery with PandaOffice Drecov
When basic tools fall short, you need a more robust sd card recovery tool. PandaOffice Drecov has gained popularity for its high success rate and its incredibly simplified “Three-Step Operation.”
Benefits of the Graphical Approach:
| Feature | Advantage Description |
| Universal Format Support | Supports the recovery of over 1,000 formats, including JPG, PNG, CR2, MP4, MOV, and DOCX. |
| Deep Scan Technology | Capable of retrieving files through sector-by-sector scanning, even if the partition table is missing. |
| Free Preview Function | Allows you to preview photos in full screen before recovery to ensure the files are intact and usable. |
| 100% Data Safety | Employs a “Read-Only” recovery process, ensuring no secondary damage or overwriting occurs on your original SD card. |
- Versatility: It recovers photos, videos, audio, compressed files (ZIP/RAR), and even system files like EXEs.
- Accidental deletion from your computer desktop.
- Files lost after emptying the Recycle Bin.
- Data loss from disk formatting.
- Accidental deletion or formatting of SD cards/U disks.
- Sync error occurring with deleted OneDrive files
- Restore deleted Chrome bookmarked
- Privacy First: All recovery happens locally on your machine, so you don’t have to worry about your private data leaking to the web.
The Three-Step Process for PandaOffice Drecov:
- Step 1: Select the Target Drive.Open PandaOffice Drecov. The interface will display all connected drives, including internal disks, SD cards, and external hard drives. Click on the icon representing your corrupted or deleted SD card.
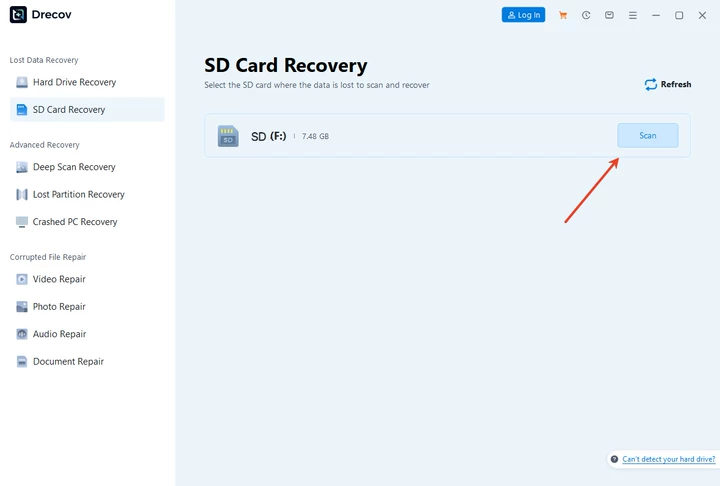
- Step 2: Initiate the Intelligent Scan.Click the “Scan” button. Unlike basic tools, PandaOffice Drecov uses a proprietary algorithm to reconstruct fragmented file headers. It will categorize found files by type (PNG, DOCX, MP4, etc.) in real-time, allowing you to see what’s being found while the scan is still running.

- Step 3: Preview and Restore.Once the scan finishes, you can double-click photos or documents to preview them. This ensures the file is intact before you recover it. Select the files you need and click “Recover,” saving them to a different location (like your desktop) to avoid data loops.
Pro Tip: PandaOffice Drecov is often preferred by users who aren’t tech-savvy because it automates the complex “deep scan” settings that other tools require you to configure manually.
Method 3: Command Line (CMD) for Files Hidden by Malware
Sometimes, your files aren’t deleted; they are just hidden by an “Attrib” virus. You don’t necessarily need a third-party sd card recovery tool for this; Windows has a built-in method.
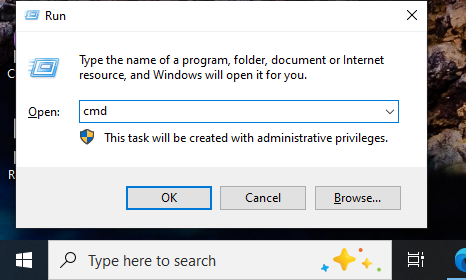
- Step 1: Type
cmdin the Windows search bar, right-click, and “Run as Administrator.”
- Step 2: Type the drive letter of your SD card (e.g.,
E:) and hit Enter.
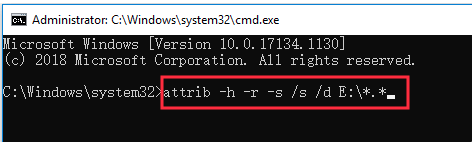
- Step 3: Type the following command:
attrib -h -r -s /s /d *.*and press Enter.-h: Clears the Hidden attribute.-r: Clears the Read-only attribute.-s: Clears the System attribute.
- Step 4: Check your SD card. If the files were just hidden, they will reappear in a nameless folder.
Method 4: Professional Data Recovery Services (The Last Resort)
If your sd card is making clicking, grinding, or whirring noises, no sd card recovery tool software can help. These are signs of mechanical failure. In this case, you must send the drive to a cleanroom laboratory where technicians can manually replace the physical components (like the actuator arm or the platters).
Comprehensive Comparison: Which Tool Should You Choose?
Selecting the right sd card recovery tool depends on your specific scenario. Below is a comparison to help you decide.
| Feature | Recuva | PandaOffice Drecov | CMD (Attrib) |
| Best For | Casual accidental deletions | Formatted, RAW, or corrupted drives | Files hidden by viruses |
| Ease of Use | Moderate (Wizard-based) | High (3-Step Process) | Low (Requires typing code) |
| Deep Scan Ability | Good | Excellent (Proprietary) | N/A |
| Preview Feature | Limited | Full File Preview | None |
| Success Rate | Medium | High | Low (Specific cases only) |
Proactive Prevention: How to Never Lose Data Again
While having a reliable sd card recovery tool is vital, prevention is your best defense.
- The 3-2-1 Backup Rule: Keep 3 copies of your data, on 2 different media types, with 1 copy stored offsite (Cloud storage).
- Safely Eject Always: Never pull an SD card out while the camera is on or the computer is writing data. This is the #1 cause of “RAW” partition errors.
- Replace Cards Every 2 Years: Flash memory has a limited lifespan of write cycles. If you use your SD card daily, it will eventually wear out.
- Use High-Quality Readers: Cheap, $2 card readers can cause voltage spikes that fry the controller chip of your SD card.
Here is a step-by-step guide to setting up automatic cloud backups for Windows and Mac users.
Phase 1: Preparation
Before you begin, ensure the following:
- You have a cloud storage client installed (e.g., Google Drive for Desktop or OneDrive).
- You have a stable SD card reader.
- Your cloud account has sufficient storage space for your media.
Phase 2: Guide for Windows Users (Using Google Drive)
Google Drive for Desktop features a powerful “External Drive” detection tool that triggers backups the moment a device is connected.
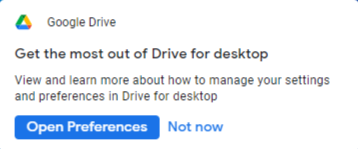
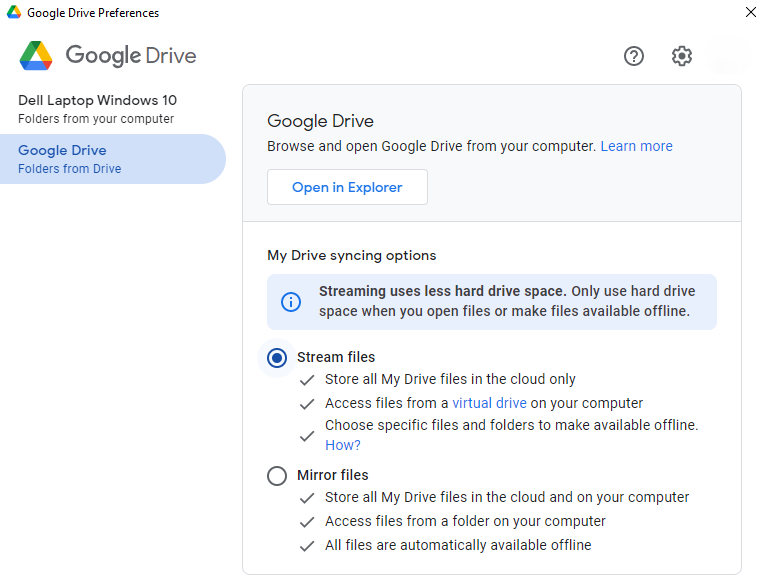
- Step 1: Open Preferences Locate the Google Drive icon in your system tray (bottom right corner), click the Settings (gear icon), and select Preferences.
- Step 2: Configure External Devices In the left-hand menu, select Computers or My Laptop. Look for an option that says Add Device or wait for the pop-up notification when you plug in your SD card.
- Step 3: Enable Auto-Backup Once the system detects your SD card, check the box for Sync to Google Drive. You can choose “Back up to Google Photos” (optimized for photos/videos) or “Sync with Google Drive” (preserves the original folder structure).
- Step 4: Save and Automate Click Done and Save. From now on, every time you insert this specific SD card, Google Drive will automatically scan for new files and upload them to the cloud.
Phase 3: Guide for Mac Users (Using Automator)
macOS users can use the built-in Automator tool to run a backup script whenever an SD card is mounted.
- Step 1: Create a “Folder Action” Open Automator, select New Document, and choose Folder Action.
- Step 2: Choose the Target Folder At the top of the workflow, select the mount point of your SD card (typically found under
/Volumes). - Step 3: Add “Get Specified Finder Items” Drag the Get Specified Finder Items action into the workflow, followed by the Copy Finder Items action.
- Step 4: Set the Destination In the Copy Finder Items block, set the destination to your local cloud sync folder (e.g.,
~/OneDrive/SD_Backup). - Step 5: Save and Activate Save the script. Now, whenever the SD card is plugged in, macOS will automatically copy the files to your cloud-synced folder, which will then trigger the cloud software to upload them.
Frequently Asked Questions
1.Can an sd card recovery tool recover overwritten data?
In most cases, no. Once new binary data (0s and 1s) occupies the physical space of the old file, the original information is gone. This is why you must stop using the card immediately upon discovering data loss.
2.My SD card shows as “0 bytes.” Can it be fixed?
Yes! When a drive shows 0 bytes or “RAW,” it usually means the file system is corrupted. A powerful sd card recovery tool like PandaOffice Drecov can bypass the file system and read the data directly from the NAND flash chips.
3.Is it safe to use a free sd card recovery tool?
Free tools like Recuva are safe if downloaded from official sources. However, be wary of “cracked” versions of premium software, as these often contain malware that could further encrypt or steal your data.
4.Why does my external hard drive keep disconnecting during a scan?
This often indicates a hardware issue with the USB port or the drive’s internal bridge board. Try using a different cable or plugging the drive into a port directly on the motherboard (for desktops) rather than a USB hub.
Conclusion
The panic of losing files is universal, but the solution is often just a few clicks away. Whether you choose the simplicity of a specialized sd card recovery tool like PandaOffice Drecov or the manual approach of Recuva, the key is to act quickly and calmly. By understanding that “deleted” doesn’t mean “destroyed,” you can approach data recovery with the confidence of a pro.


