


Imagine this: You have spent the last seventy-two hours meticulously crafting a business proposal. It is the kind of work that defines a career. You go to move the folder to your backup drive, but in a moment of caffeine-deprived clumsiness, you hit “Shift + Delete” instead of “Copy.” Your screen flickers, the progress bar vanishes, and your heart drops into your stomach. You scour the Recycle Bin, but it is empty. The file is gone. Or is it?
In the world of modern computing, “deleted” does not always mean “destroyed.” Whether you are dealing with a crashed hard drive, a formatted SD card, or a simple accidental deletion, understanding recuva for windows and the mechanics of data retrieval can turn a digital catastrophe into a minor hiccup. Today, we will explore how you can reclaim your lost data using the industry’s most trusted tools.
The Invisible Library: How Data Recovery Actually Works
To understand how recuva for windows performs its “magic,” we need to look under the hood of your hard drive. Think of your Windows File System (NTFS or FAT32) as a massive library.
When you save a file, the system does two things:
- It writes the actual data (the “chapters” of your book) onto the physical shelf of the hard drive.
- It creates an entry in a “Master File Table” (the library’s index card), which tells the computer exactly where those chapters are located.
When you delete a file, Windows is actually quite lazy. It doesn’t go to the shelf and burn the book. Instead, it simply walks over to the index card and scribbles “Available” over the entry. The “book” stays on the shelf until the library gets so crowded that a new book needs that exact spot.
The Golden Rule of Recovery: > Because the data remains on the “shelf” until it is overwritten, your success depends entirely on speed. If you keep using your PC, Windows might save temporary files or updates right on top of your lost document. Stop writing new data immediately!
Essential Precautions Before You Begin
Before we dive into the specific steps for data recovery for Windows, follow these safety protocols to ensure you don’t accidentally destroy your data during the rescue attempt:
- Avoid the “C” Drive: If you lost a file on your main system drive (C:), try to run recovery software from a portable USB drive.
- Don’t Reboot Constantly: Every time Windows boots up, it writes dozens of small log files. These “invisible” writes are the enemies of data recovery.
- Stay Calm: Panic leads to clicking “Format” or “Initialize,” which can make recovery significantly harder.
Method 1: Using Recuva for Windows for Standard Recovery
When people search for a reliable, free solution, recuva for windows is usually the first name that appears. Developed by CCleaner, it is designed for speed and simplicity. It is particularly effective for files deleted from the Recycle Bin or external USB sticks.
Step 1: Installation and Startup
Download the official version of recuva for windows. During installation, be careful to decline any bundled extra software. Once installed, launch the program. You will be greeted by the “Recuva Wizard,” which simplifies the process for non-technical users.
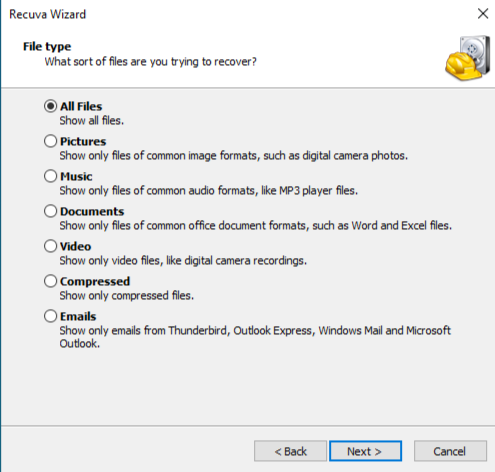
Step 2: Define the File Type
The wizard will ask, “What are you trying to recover?” You can choose Pictures, Music, Documents, Video, Compressed, or Emails. If you have lost multiple types of files, select “All Files.”
Step 3: Identify the Last Known Location
To save time, tell recuva for windows exactly where to look. You can specify a folder path like C:\Users\Name\Documents or select “On my media card” if you are targeting a removable drive.
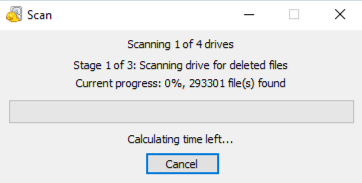
Step 4: The Scan Phase
Click “Start.” A standard scan takes only seconds. If your file doesn’t appear, you can re-run the process and check the “Enable Deep Scan” box. While this can take several hours, it scans the raw clusters of your drive for file signatures, often finding data that the index has totally forgotten.
Step 5: Secure Your Recovery
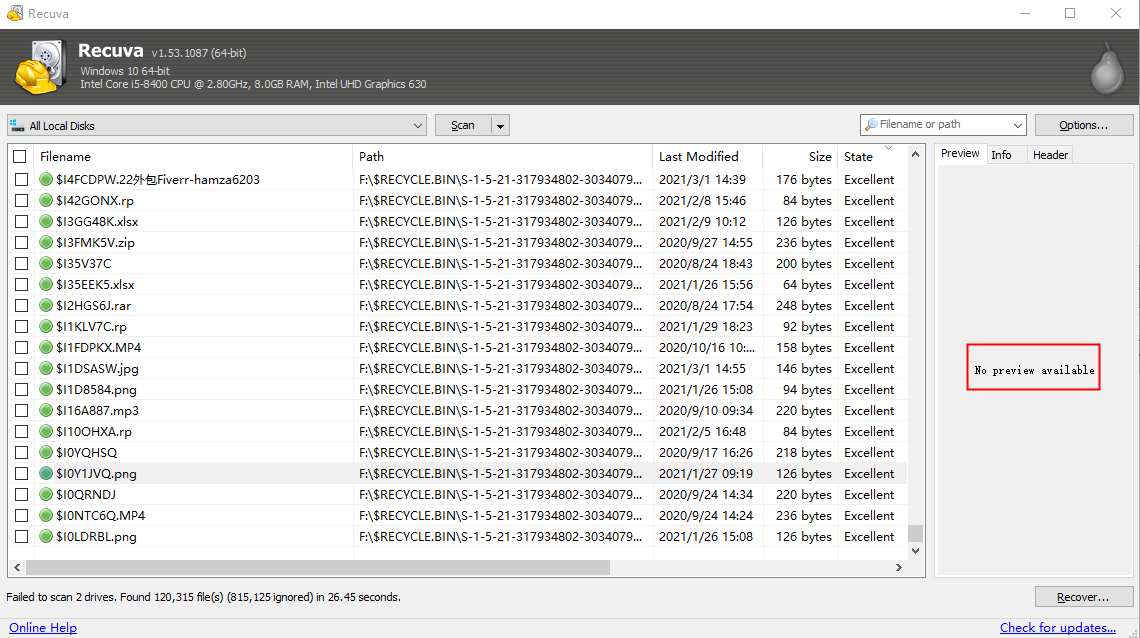
Review the list of found files. Recuva for windows uses a color-coded system:
- Green: The file is intact.
- Orange: Some data is overwritten; it might be corrupt.
- Red: The file is completely overwritten and likely unrecoverable.Select your files and click “Recover.”
Critical Warning: Always save the recovered files to a different drive than the one they were lost on.
Method 2: Professional-Grade Rescue with PandaOffice Drecov
While recuva is excellent for simple deletions, it sometimes hits a wall when dealing with partition loss, formatted drives, or complex system errors. For these high-stakes scenarios, PandaOffice Drecov is the specialized alternative that professionals often turn to. It features a more robust scanning engine capable of reconstructing fragmented file parts that simpler tools might miss.
Beyond standard Windows issues, these tools address a wide range of data crises:
- Accidental Desktop Deletions: Instantly retrieving files wiped from your Windows 11.
- Disk Formatting Errors: Salvaging files from drives that have been completely wiped or reformatted.
- External Media Rescue: Recovering lost data from formatted or corrupted SD cards and USB flash drives.
- Sync Conflict Resolution: Reversing data loss caused by synchronization errors between your PC and the OneDrive cloud.
- Browser Metadata Recovery: Restoring lost Chrome bookmarks and other essential application data.”
Step-by-Step Guide for PandaOffice Drecov
Step 1: Interface and Drive Selection
Launch PandaOffice Drecov. You will notice a highly intuitive dashboard. Under the “Hard Drives” or “External Devices” section, identify the partition where your data vanished.

Step 2: Deep Analysis
Click the “Scan” button. Unlike basic tools, PandaOffice Drecov performs a “Signature Search” alongside the standard directory scan. This means even if the file system is corrupted, the software recognizes the specific digital DNA of a JPEG or a PDF.
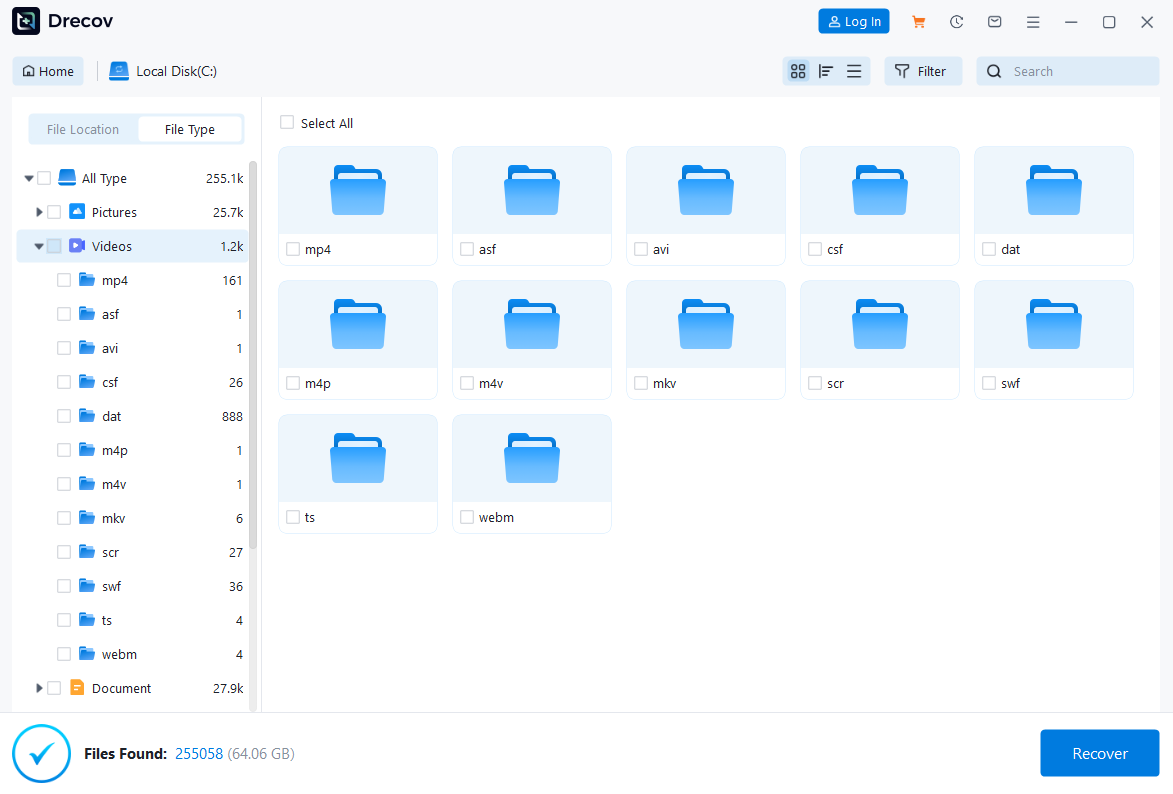
Step 3: Preview and Filter
One of the strongest features here is the real-time preview. As the scan progresses, you can double-click on images or documents to see if they are actually readable. Use the “Filter” sidebar to sort by file size or date modified to find your target quickly.

Step 4: Final Restoration
Once you have verified your files in the preview window, click the “Recover” button. Select a secure destination—ideally an external hard drive or a cloud-synced folder—and let the software finalize the transfer.
Visual Learning: Video Tutorial
For users who prefer a visual walkthrough, we have integrated a comprehensive guide below. This video demonstrates the “Three-Click” recovery method and shows exactly what a successful file preview looks like within the software environment.
Method 3: Command-Line Recovery (Windows File Recovery)
For those who are comfortable with the Windows terminal and want an official tool from Microsoft, Windows File Recovery is a free command-line utility available in the Microsoft Store.
- Step 1: Download and open the app. It will launch a Command Prompt window.
- Step 2: Use the basic syntax:
winfr source-drive: destination-drive: [/mode] [/switches]. - Step 3: For a standard NTFS drive, use the “Regular” mode:
winfr C: D:\RecoveryFolder /regular. - Step 4: If you are recovering from a formatted drive or a different file system (FAT/exFAT), use the “Extensive” mode:
winfr E: D:\RecoveryFolder /extensive.
Comparing Windows Data Recovery Solutions
Choosing the right tool depends on your specific situation. The following table highlights the differences:
| Feature | Recuva for Windows | PandaOffice Drecov | Windows File Recovery |
| User Interface | Simple Wizard | Modern & Intuitive | Command Line Only |
| Deep Scan Power | Moderate | Superior (Signature-Based) | High |
| File Preview | Basic/Limited | Full High-Res Preview | None |
| Success on Formatted Drives | Variable | Extremely High | Moderate |
| Technical Support | Community/Forums | Dedicated Support | Documentation Only |
| Best For | Accidental Deletions | Complex/Mission Critical Data | Advanced Users |
How to Prevent Future Data Loss
Mastering recuva for windows is a great “Plan B,” but a “Plan A” (Prevention) is much more effective. Follow these steps to ensure you never have to panic again:
1. Enable File History
Windows has a built-in feature called File History.
- Go to Settings > Update & Security > Backup.
- Add a drive (external) and turn on “Automatically back up my files.” This creates versions of your documents every hour.
2. The 3-2-1 Backup Rule
- Keep 3 copies of your data.
- Use 2 different media types (e.g., Internal HDD and External SSD).
- Keep 1 copy off-site (Cloud storage like OneDrive or Google Drive).
3. Use S.M.A.R.T. Monitoring
Install a utility that monitors your hard drive’s “S.M.A.R.T.” status. If your drive is about to physically fail, these tools will warn you weeks in advance, giving you plenty of time to move your data before software like recuva becomes necessary.
Frequently Asked Questions about Windows Recovery
1.Can recuva for windows recover files from a physically clicking hard drive?
No. If your drive is making clicking or grinding noises, this is a hardware failure. Software cannot fix a broken physical arm. Power off the device immediately and send it to a professional clean-room laboratory.
2.Is PandaOffice Drecov safe to use on SSDs?
Yes, but with a caveat. SSDs use a feature called TRIM, which actively wipes deleted data to keep the drive fast. If TRIM has already run, no software can recover the data. However, PandaOffice Drecov is excellent at catching data before the TRIM command is executed.
3.Why are my recovered files “Corrupt” or “Unreadable”?
This usually happens if the file was partially overwritten by new data before you started the recovery process. While recuva for windows might find the “header” of the file, the actual content may have been replaced by system updates or browser cache.
4.Can I recover files after a Windows Factory Reset?
Yes, but it is difficult. A factory reset writes a large amount of data to the disk. Your best bet is using the Extensive Scan mode in PandaOffice Drecov to search for file signatures left in the unallocated space.
5.Is there a limit to how much data I can recover?
Recuva for windows (Free) has no strict data limit but lacks premium support. PandaOffice Drecov offers various tiers depending on the volume and complexity of the recovery needed.
Conclusion
Data loss feels like a finality, but in the Windows ecosystem, it is often just a temporary displacement of information. By using recuva for windows for your day-to-day mishaps and keeping PandaOffice Drecov ready for more complex drive failures, you are well-equipped to handle almost any digital emergency. Remember: the moment you lose a file, stop using the drive, choose your tool based on the complexity of the loss, and always save your recovered files to a safe, secondary location.


