


We have all been there. It is a quiet Tuesday evening, you are tidying up your digital workspace, and—click—the wrong folder vanishes. Maybe it was the “Tax Returns 2020-2025” folder, or perhaps it was the “Baby’s First Steps” video. You check the Recycle Bin with a trembling hand, only to find it empty because the files were on your external hard drive. The realization hits like a physical weight: you think they are gone forever.In that split second, a million thoughts on how to recover deleted files from hard drive start racing through your mind, each one more urgent than the last.
But here is the good news: as your “Tech Companion,” I am here to tell you that data is much more resilient than you think. In the digital realm, “deleted” does not mean “destroyed.” It is simply a status update. This guide will walk you through the inner workings of your drive and provide clear, step-by-step instructions on how to recover deleted files from hard drive without losing your mind.
Part 1: The Digital Ghost – Understanding Data Recovery Principles
Before we roll up our sleeves, let’s demystify what actually happens when you hit “Delete.” To understand how to recover deleted files from hard drive, you need to understand the “Library Metaphor.”
The Librarian and the Erasable Index
Think of your external hard drive as a massive, world-class library. This library has two main components:
- The Stacks: Miles and miles of shelves where the actual books (your data) sit.
- The Card Catalog: A master index that tells the librarian exactly which shelf and which row holds a specific book.
When you delete a file, the computer does not send a shredding crew into the stacks. That would take too much energy and time. Instead, it simply takes an eraser to the Card Catalog. It removes the entry for that file and marks that specific shelf space as “Available.”
The “book” is still sitting on the shelf! It has effectively become a “ghost.” It stays there until you save a new file that is large enough to need that specific shelf space. Once a new file is written over the old one, the original data is “overwritten,” and that is when it truly vanishes. This is why the first and most important rule of how to recover deleted files from hard drive is: Stop using the drive immediately. Every second you keep it plugged in or continue to save files, you risk the librarian putting a “new book” on top of your “ghost book.”
Part 2: Core Precautions and Preparation
Before we jump into the methods, we must establish a “Safe Zone” for recovery. If you follow these steps, your success rate increases by nearly 80%.
The “Do No Harm” Checklist
- Disconnect and Breathe: If the drive is external, safely eject it and then physically unplug it until you are ready to run the recovery software.
- No Direct Downloads: Never download recovery software directly onto the drive you are trying to save. If you are recovering Drive E:, download the tools to Drive C:.
- The Power Factor: If you are using a laptop, ensure it is plugged into a power source. A sudden shutdown during a deep scan can cause permanent logical damage to the drive.
Part 3: Step-by-Step Methods to Retrieve Your Data
There are several ways to approach this problem, ranging from simple system checks to professional-grade software. We will start with the easiest and move toward the most powerful.
Method 1: The Hidden “Time Machine” (Windows Previous Versions)
Many users do not realize that Windows has a built-in “Shadow Copy” service. While this is more common for internal drives, if you frequently used this external drive with a specific PC, there might be a cached version of your folder.
- Step 1: Connect your external hard drive.
- Step 2: Navigate to the parent folder where your deleted files once lived.
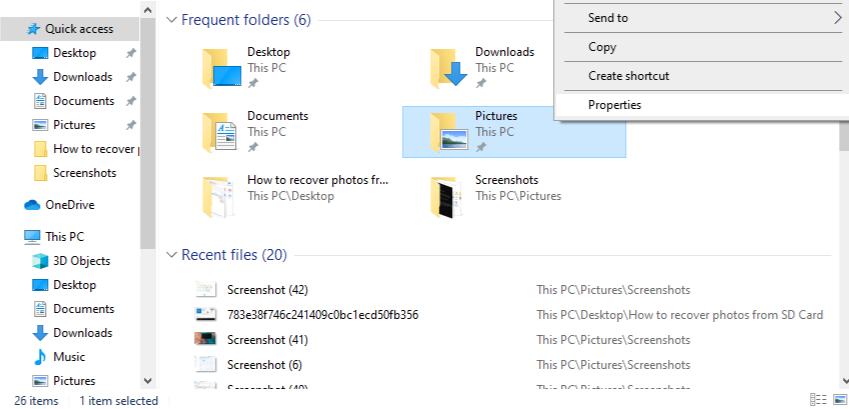
- Step 3: Right-click the folder and select Properties.
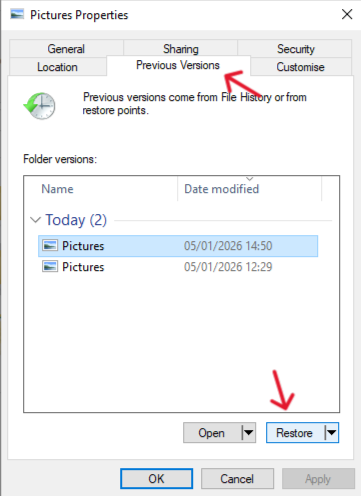
- Step 4: Look for a tab labeled Previous Versions.
- Step 5: If the list is not empty, choose the version that matches a date before the deletion.
- Step 6: Click Restore (or Open to copy specific files out).
Method 2: The Professional Choice – PandaOffice Drecov
When the “Time Machine” fails, it is time to use a tool that specializes in deep-sector reconstruction. PandaOffice Drecov is our top recommendation for how to recover deleted files from hard drive because it is built to handle complex file systems (NTFS, FAT32, exFAT) that external drives typically use.
Why choose PandaOffice Drecov?
Unlike basic tools, Drecov uses a “Deep Signature” algorithm. It doesn’t just look for the “Card Catalog” entry; it walks through every “shelf” in the library and identifies files by their unique digital DNA.
- Versatility: It recovers photos, videos, audio, compressed files (ZIP/RAR), and even system files like EXEs.
- Accidental deletion from your computer desktop.
- Files lost after emptying the Recycle Bin.
- Data loss from disk formatting.
- Accidental deletion or formatting of SD cards/U disks.
- Sync error occurring with deleted OneDrive files
- Privacy First: All recovery happens locally on your machine, so you don’t have to worry about your private data leaking to the web.
The Recovery Steps:
- Step 1: Connection. Plug in your external hard drive. Ensure the light on the drive is steady and that Windows recognizes it as a letter (e.g., Drive G:).
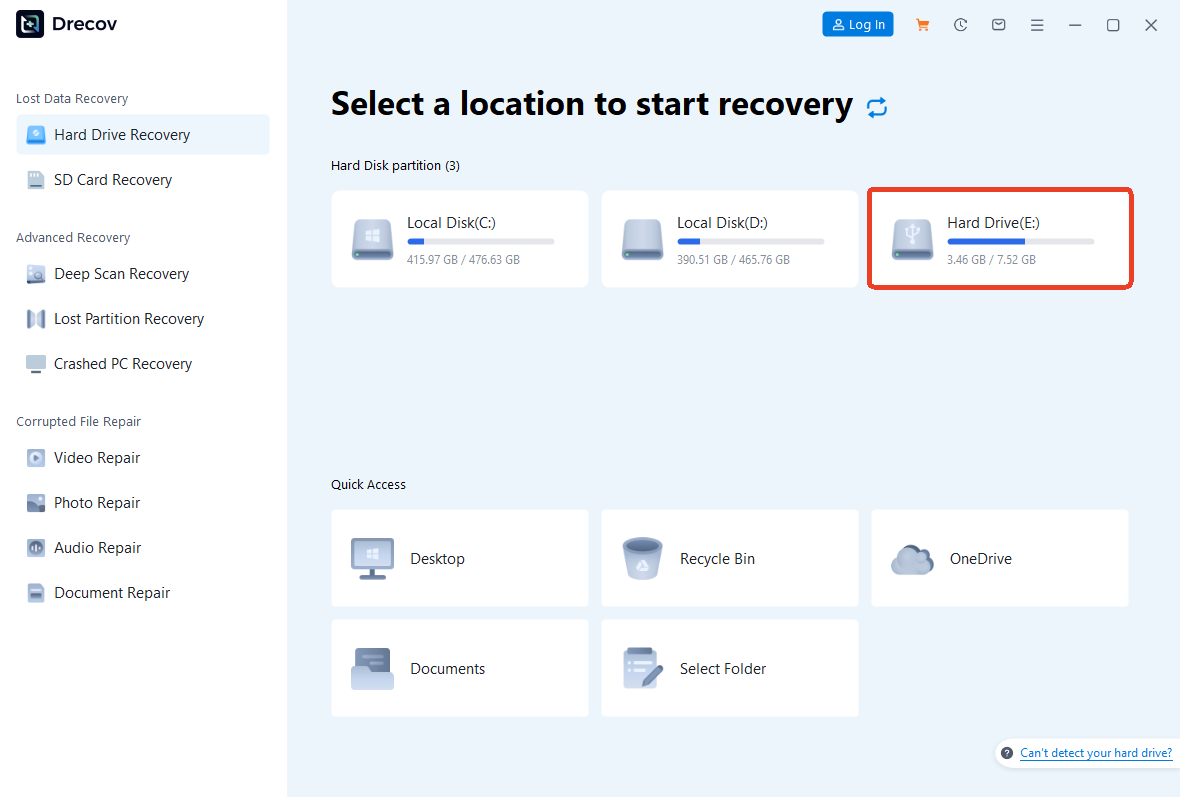
- Step 2: Target Selection. Launch PandaOffice Drecov. On the main dashboard, you will see a list of all connected drives. Click on the icon representing your external hard drive.
- Step 4: The Scanning Process. Click Scan. The software will first perform a “Quick Scan” to find recently deleted items. It will then automatically transition into a “Deep Scan.” This might take 30 minutes to a few hours depending on the size of your drive (e.g., 2TB drives take longer). Tip: You can actually preview files while the scan is still running!
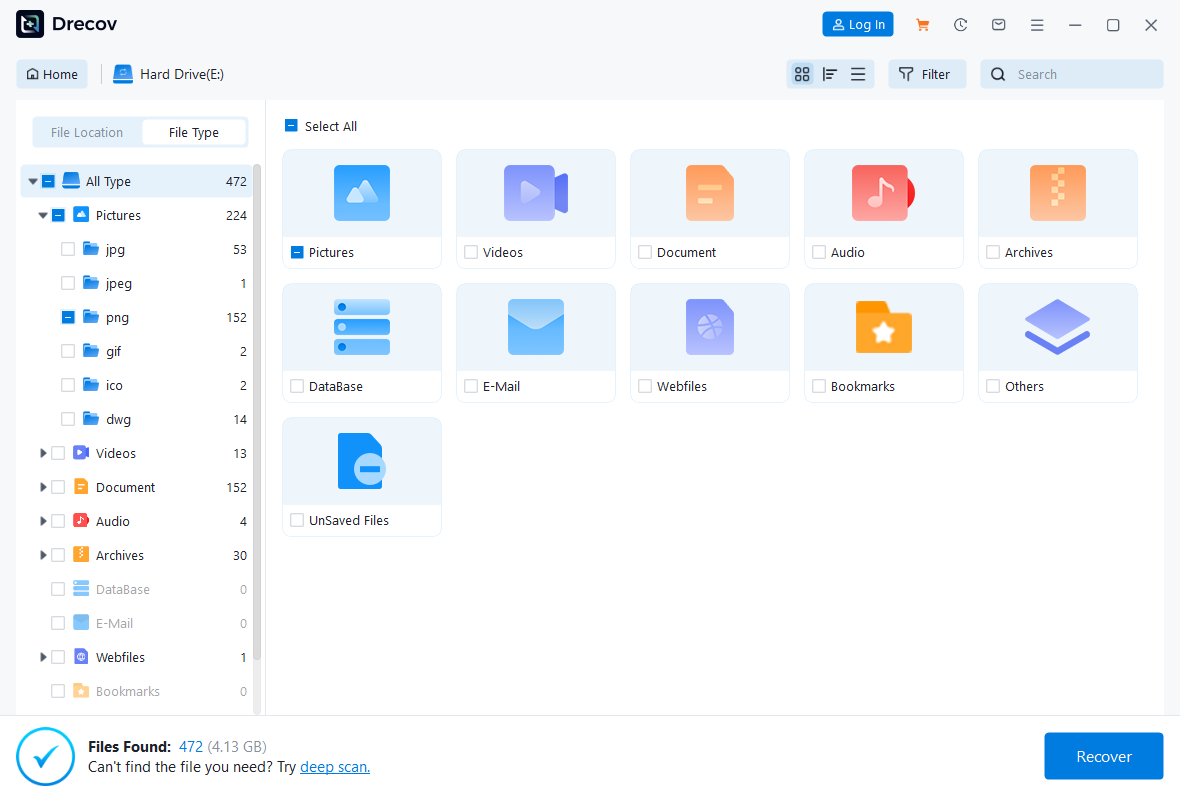
- Step 5: Filtering and Search. Once the scan is complete, don’t be overwhelmed by the thousands of files. Use the File Type filter on the left. If you lost photos, select “.jpg” or “.png”. If you lost work, select “.pdf” or “.docx”.

- Step 6: The Preview. Double-click a file to preview it. If you can see the photo or read the text in the preview window, the file is 100% recoverable.
- Step 7: The Final Rescue. Select the checkboxes for the files you want. Click the Recover button.
Warning! Choose a folder on your computer’s internal hard drive or a different USB drive to save the recovered files. Never save them back to the source drive during this step.
Method 3: Command Line (For the Tech-Savvy)
If you are comfortable with a text-based interface, Windows File Recovery (a Microsoft tool) is a free alternative. It is a bit “clunky” compared to PandaOffice Drecov, but it can be effective for simple deletions.
- Step 1: Install “Windows File Recovery” from the Microsoft Store.
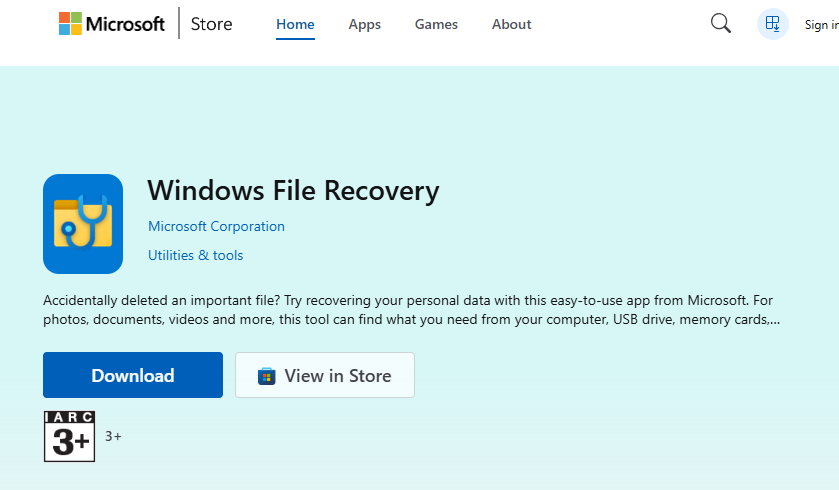
- Step 2: Open the app, which will launch a Command Prompt window.

- Step 3: Use the syntax:
winfr [Source-drive:] [Destination-drive:] [/mode].- Example: To recover all jpgs from Drive E: to Drive C:, you would type:
winfr E: c: /extensive /n *.jpg
- Example: To recover all jpgs from Drive E: to Drive C:, you would type:
- Step 4: Type
Yto start the scan. The tool will create a folder named “Recovery_[Date]” on your destination drive.
Method 4: Registry and Driver Check (When the Drive is Missing)
Sometimes the question isn’t how to recover deleted files from hard drive, but how to get the drive to show up at all. If the drive is “missing,” it might be a driver conflict.
- Step 1: Press
Win + Xand select Device Manager.
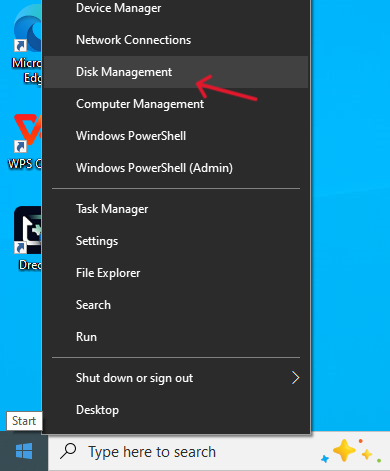
- Step 2: Expand Disk Drives. If you see a yellow exclamation mark, right-click and select Update Driver.
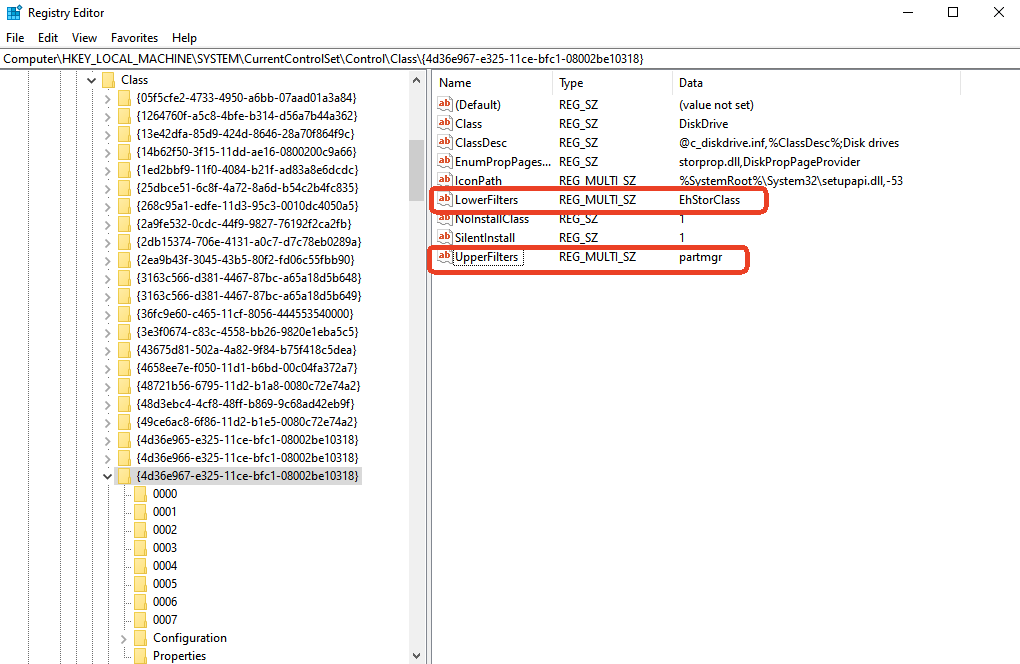
- Step 3 (Advanced): If the drive is still not appearing, press
Win + R, typeregedit, and navigate to:HKEY_LOCAL_MACHINE\SYSTEM\CurrentControlSet\Control\Class\{4d36e967-e325-11ce-bfc1-08002be10318}.Look for “UpperFilters” or “LowerFilters” on the right side. If they exist and the drive isn’t working, backing up the registry and removing these can sometimes “kickstart” the connection.
Part 4: Comparing Your Recovery Options
To help you decide which path to take, I have summarized the pros and cons of each method in the table below.
| Recovery Method | Success Rate | Ease of Use | Best Used For… |
| PandaOffice Drecov | 99.8% (High) | Very Simple | All scenarios: Formatting, Deletion, RAW drives. |
| Windows Previous Versions | 20% (Low) | Extremely Simple | Accidental “Save” over an old file. |
| Command Prompt (WinFR) | 50% (Medium) | Complex | Tech experts who want a free, basic tool. |
| Professional Lab Service | 99% (Extreme) | Very Difficult (Mail-in) | Physical damage (clicking, fire, water). |
Part 5: Prevention – Your Shield Against Future Loss
Now that you know how to recover deleted files from hard drive, let’s make sure you never have to do it again. Data recovery is a cure, but backup is the vaccine.
1. The Power of HTML Bookmark Backups
We often forget that our browser history and bookmarks are “files” too. If your drive fails, you might lose your research.
- How to Export: In your browser (Chrome/Edge), press
Ctrl + Shift + O. Click the three dots in the top right and select Export Bookmarks. Save this HTML file to at least two different cloud services (Google Drive, Dropbox, etc.).
2. The 3-2-1 Backup Strategy
- 3 Copies: Keep three copies of any important file.
- 2 Different Media: Use an external hard drive and a cloud service.
- 1 Off-site: Keep one copy in a different physical location (like your office or a friend’s house) to protect against fire or theft.
3. Drive Health Monitoring
Use a tool to check the “S.M.A.R.T.” status of your external drive once a month. If you see “Reallocated Sectors Count” rising, the drive is physically dying. Copy your data and replace the drive immediately.
Frequently Asked Questions
1.Can I recover files after 1 year of deletion?
Yes, but only if you haven’t used the drive since then. If the drive has been sitting in a drawer, the “ghost” files are likely still there. If you have been using it daily, the chance of how to recover deleted files from hard drive success drops significantly.
2.My drive makes a clicking sound. Can PandaOffice Drecov fix it?
No. A clicking sound is a “Mechanical Failure” (the physical arm is hitting the platter). Software cannot fix broken metal. Unplug it immediately and call a professional lab.
3. Is it possible to recover files from a “Quick Formatted” drive?
Absolutely. A Quick Format only clears the index (the Card Catalog). Tools like PandaOffice Drecov can scan the sectors and rebuild the files easily.
4.How long does the recovery process take?
For a 1TB drive, a thorough Deep Scan can take 2 to 4 hours. The actual recovery (copying the files) depends on your USB connection speed.
Conclusion
IfIn conclusion, mastering how to recover deleted files from hard drive is a balance of immediate action and the right technical strategy. As we have explored, the “deletion” of a file is rarely a permanent destruction but rather a temporary hiding of data within the drive’s architecture. By understanding that your files exist as “unallocated” data, you can approach recovery with a calm, methodical mindset.
The most critical factor in a successful rescue is the cessation of all write operations to the affected drive to prevent permanent overwriting. While built-in Windows tools offer a basic safety net, specialized solutions like PandaOffice Drecov provide the deep-sector scanning and signature matching necessary to recover data from formatted or RAW partitions that standard utilities simply cannot reach. By following the structured steps—from initial assessment to professional software deployment—you can effectively reverse accidental losses and structural logical errors.


