








fix corrupted drive can involve a loose connection, damaged file-system metadata, software conflicts, or failing storage. These causes require different responses. The safest plan identifies the exact device, protects important files, and delays every write operation until recovery options are understood.
Software can repair some logical structures, but it cannot repair heads, motors, platters, flash chips, or damaged electronics. Clicking, scraping, overheating, intermittent detection, or a changing capacity are stop signs rather than invitations to run more scans.
Quick Answer
Begin with read-only observation. Confirm model, capacity, cable, port, power, free space, partition state, and the exact error. If files are missing or the device is unstable, recover or image it first. Apply only the smallest documented repair after verified copies exist.
What the Symptom Really Means
A RAW volume, access error, slow read, bad-sector warning, or write failure does not identify one cause by itself. Rule out cable, enclosure, power, permissions, and free-space problems before changing the file system. Health data and logs are evidence, not a guarantee.
Protect the Source Before Repair
Stop formatting, initialization, installation, downloads, and unnecessary writes. Record the device model, serial number, capacity, partition layout, error message, and encryption state. Keep recovery keys available and choose a different healthy physical disk for output.
Safe Diagnostic Order
- Disconnect unnecessary storage and identify the affected device by model and capacity.
- Try one known-good cable, port, enclosure, or power source when applicable.
- Inspect partitions and health information without formatting or repairing.
- Copy readable critical files immediately; image a stable but questionable drive when possible.
- Use recovery software for missing files and save results to another physical disk.
- Only after verification, use a documented logical repair or replace the device.
Recover Files Before Repair
File-system repair may reconnect, rename, truncate, or remove damaged entries. That is why recovery comes first. Install Drecov on a healthy volume, scan the exact source, preview representative files, and restore selected results to a separate destination.
Recover Files with Drecov
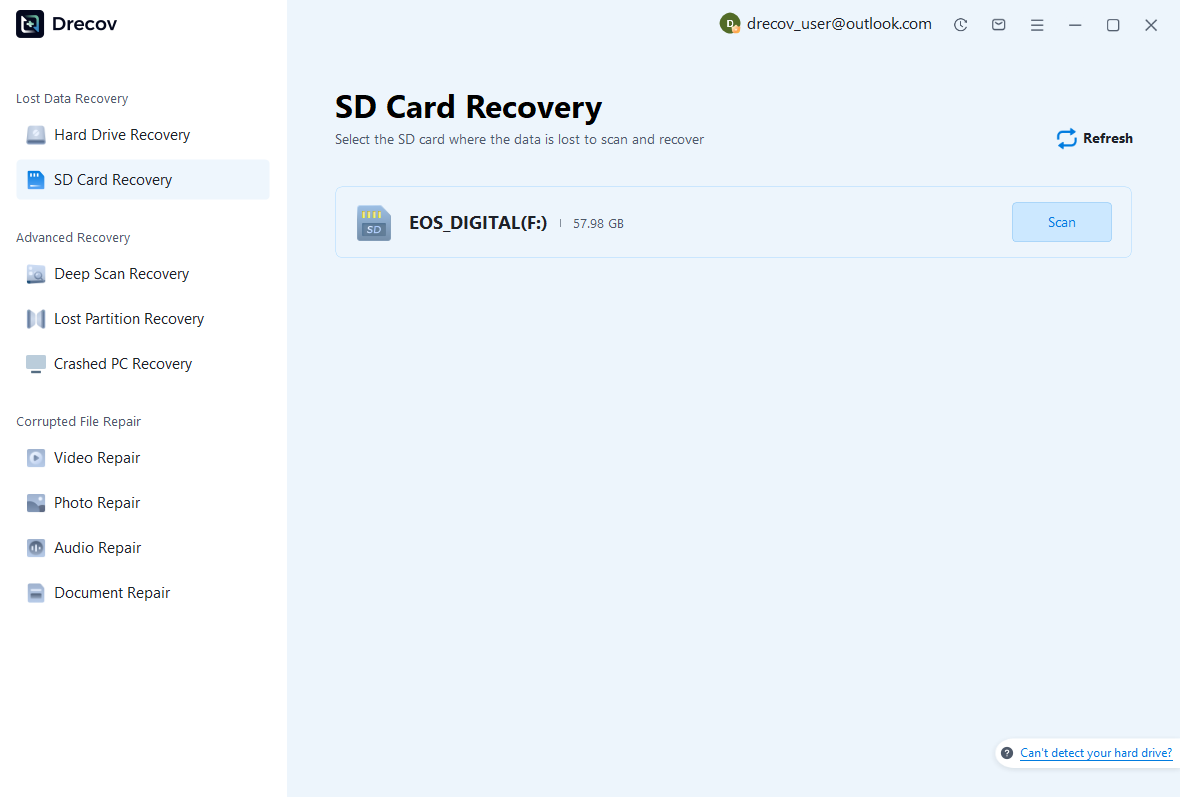
Step 1: Select the source
Open Drecov from a healthy Windows drive. Select the affected disk, partition, USB device, or SSD only after confirming its model and capacity.
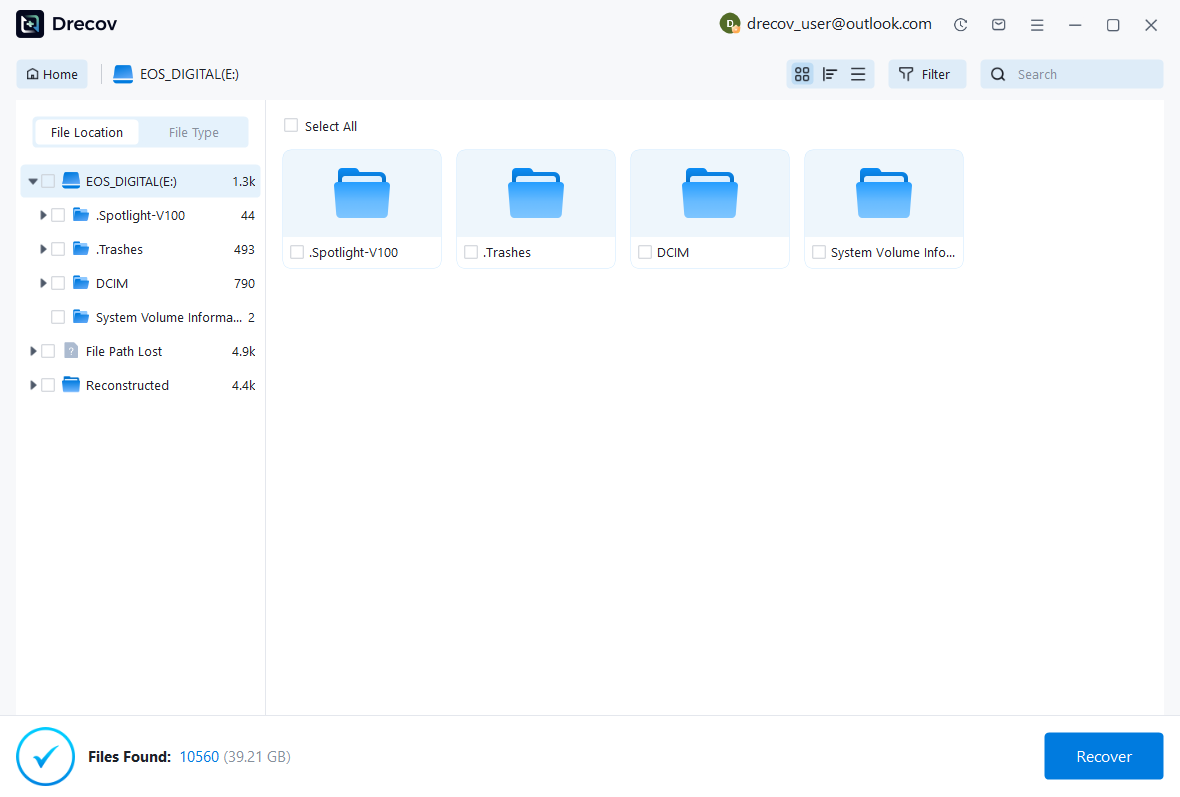
Step 2: Scan and filter
Run the initial scan. Use Deep Scan only when expected files are missing and the hardware remains stable. Filter by path, type, name, size, or date.
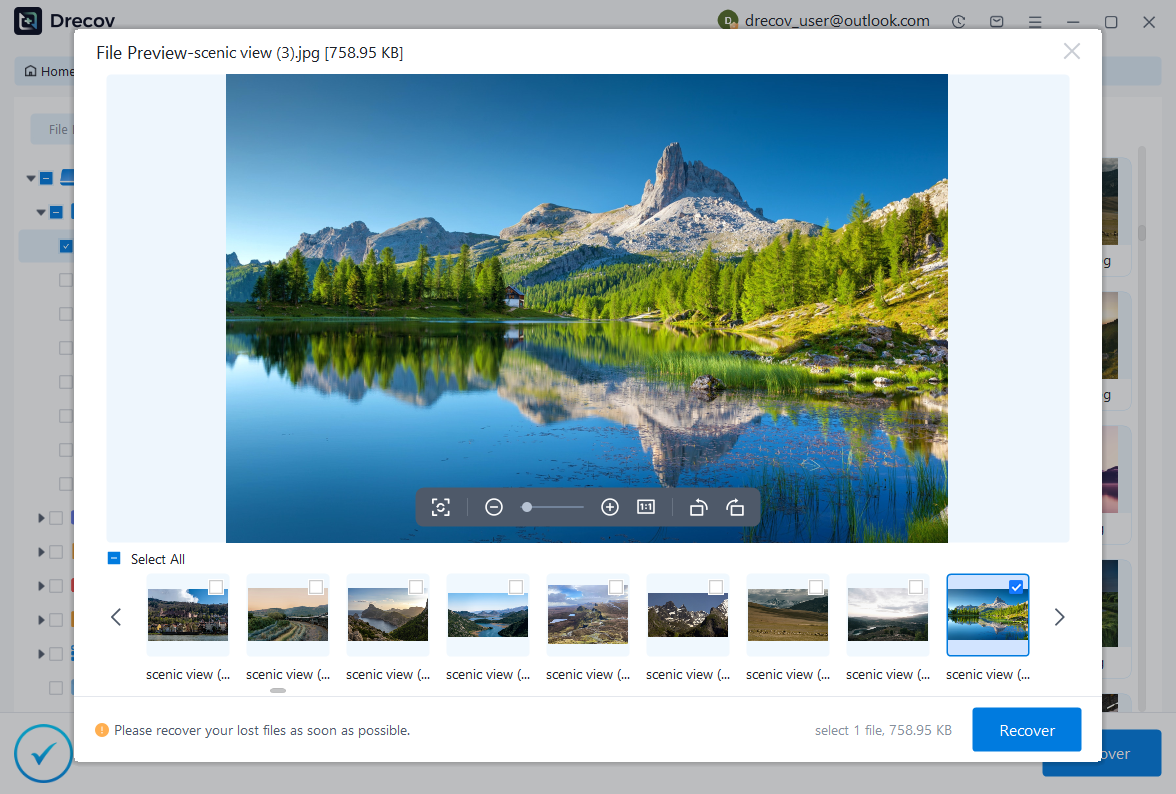
Step 3: Preview and save elsewhere
Preview supported files, select what you need, and recover to a different physical disk. Open several restored files before repairing or reusing the source.
Recovery, Repair, or Replacement?
Use diagnostics to identify the device and collect evidence. Use recovery software to copy missing files. Use CHKDSK or another file-system repair only after backup because repair switches write metadata. Replace a device that continues to report errors. Choose a professional service for physical symptoms or irreplaceable data.
Mistakes to Avoid
- Formatting a RAW or unreadable volume before recovery.
- Running CHKDSK repair switches before copying important files.
- Opening a hard drive outside a qualified clean environment.
- Installing recovery software on the affected volume.
- Saving recovered files back to the source.
- Repeating scans on a clicking or disconnecting drive.
Frequently Asked Questions
Can software fix physical damage?
No. Physical problems require appropriate professional equipment and handling.
Should I format when prompted?
Not before recovery. Formatting writes a new file-system structure.
Where should recovered files go?
To a different healthy physical disk.
Does a successful repair prove the files are intact?
No. Open representative recovered files and maintain backups.
Final Verdict
Fix a Corrupted Drive Without Losing Data. The safe order is identify, protect, recover, verify, then repair or replace. Keeping those stages separate avoids turning a manageable logical problem into permanent data loss.






