


Losing precious memories is frustrating, but don’t panic! Whether you accidentally hit “delete” or your SD card somehow got corrupted, there is a very high chance you can recover deleted photos from an SD card. This guide will walk you through the underlying principles, practical solutions, and essential tips to safeguard your photos.
The Magic Behind Photo Recovery
When you delete a photo from an SD card, the file isn’t actually erased; it’s just hidden. Let’s use a table of contents analogy to explain the file recovery principle.
Imagine your SD card is a massive book, and the Table of Contents (TOC) is the part that tells your camera or computer where each file (like a photo) begins and ends.
- When a photo is saved, an entry is added to the TOC pointing to the data blocks where the photo lives.
- When you delete a photo, the system simply deletes the entry from the TOC. The actual photo data (the “words” inside the book) remains untouched on the card.
- The space occupied by the deleted file is simply marked as available for new data.
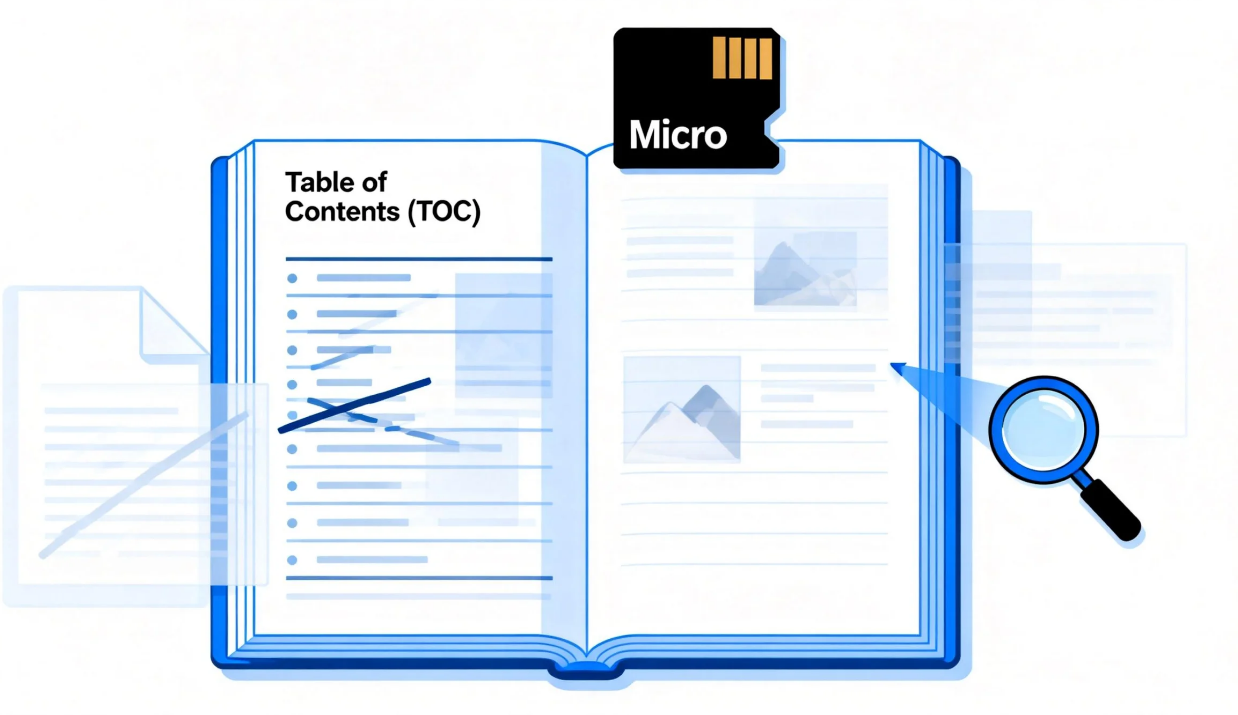
This means that data recovery software, like a detective, bypasses the TOC and scans the raw data of the “book” to find the original photo fragments and reconstruct the file.
This explains why the golden rule of photo recovery is to STOP USING THE SD CARD IMMEDIATELY after deletion. Any new photo, video, or data written to the card could permanently overwrite the old data, destroying the chances of a successful recovery.
A Common Scenario
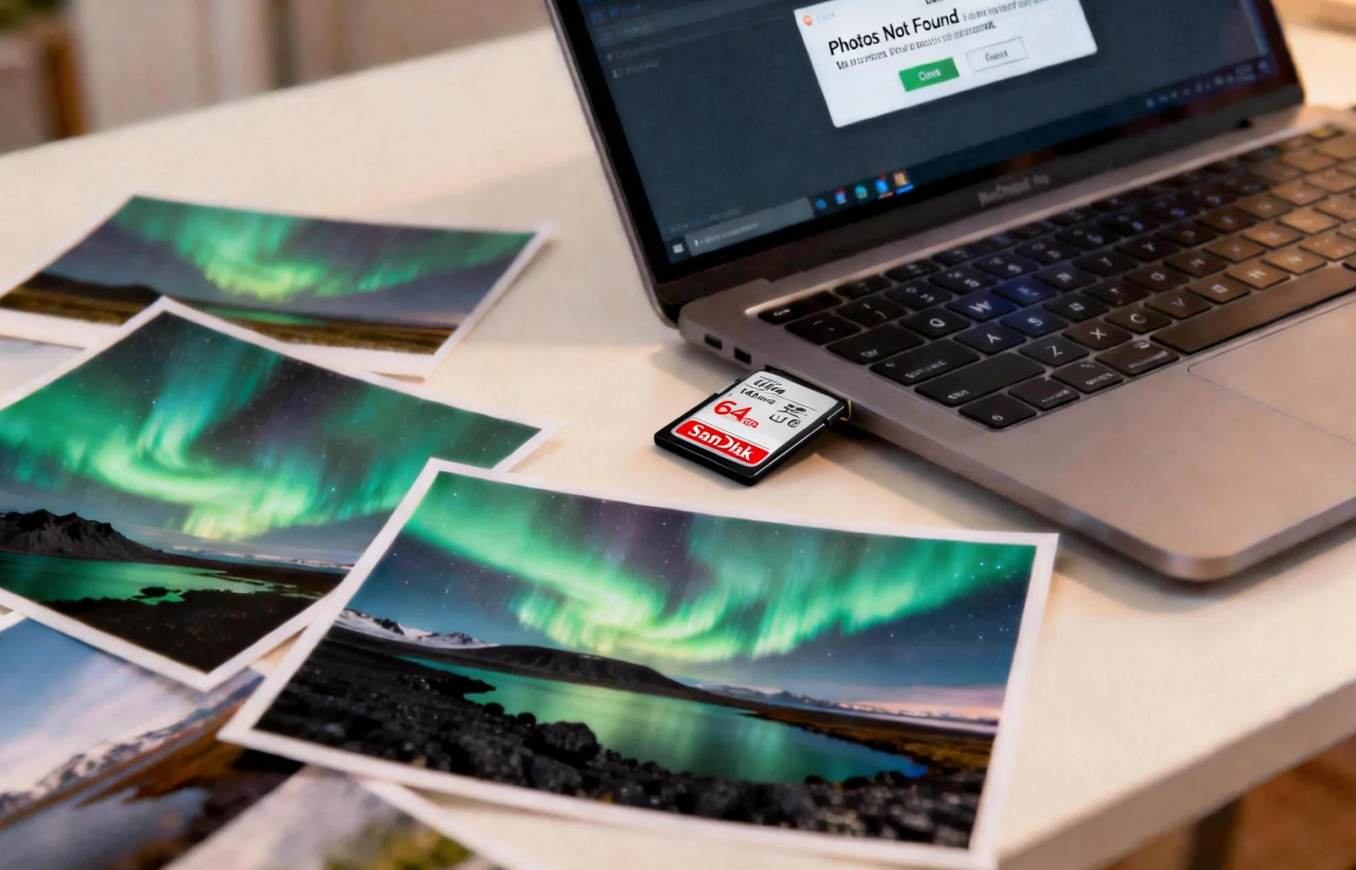
Imagine this: you’ve just returned from a fantastic trip to Iceland, and your 64GB SD card is full of stunning shots of the Northern Lights. Eager to free up space, you connect the card to your computer, select what you think are old files, and press Delete. Suddenly, you realize you just wiped out all 1,500 photos from the Iceland trip! This is an all-too-common scenario where knowing how do you recover deleted photos from an SD card becomes vital.
Essential Steps and Methods
Before diving into specific recovery methods, follow these Core Precautionary Steps:
- Stop Using the Card: Do not take any more photos, videos, or save any files onto the compromised SD card.
- Use a Card Reader: Connect the SD card to your computer using a separate, reliable card reader, not directly through your camera. This provides a more stable connection.
- Work with a Copy (If Possible): If you are technically savvy, try to create a disk image (a byte-for-byte copy) of the SD card first and perform the recovery on the image. This protects the original data.
Method 1: Checking the ‘Hidden’ Files and System Settings
Sometimes, photos are not deleted but simply hidden or moved by the camera or computer.
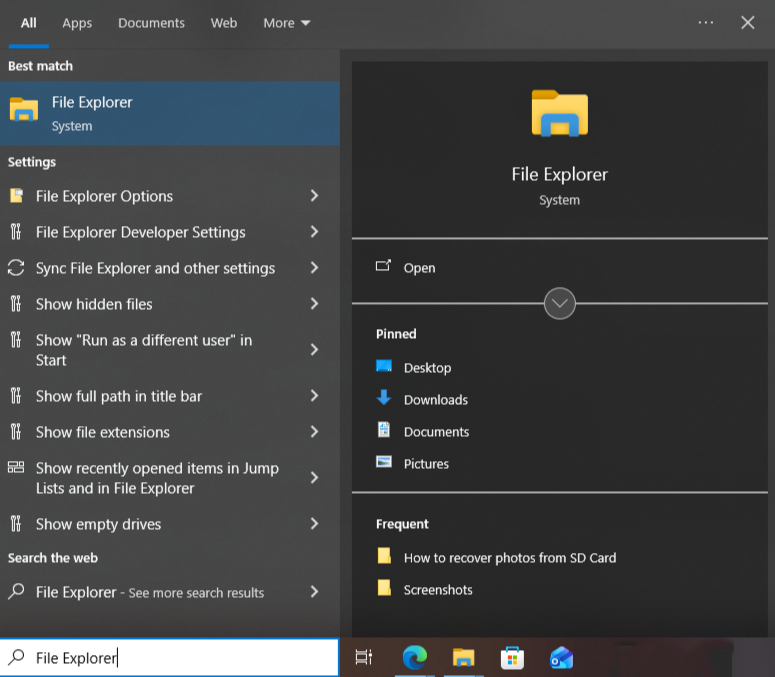
- Step 1: Insert the SD card into your computer. Open File Explorer and navigate to the SD card.
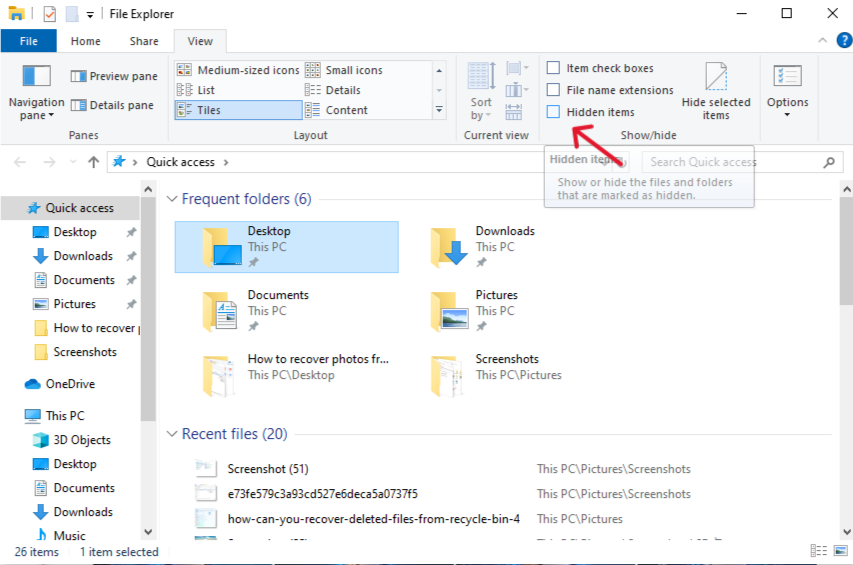
- Step 2: Click the “View” tab at the top. Check the box next to “Hidden items”. Sometimes, files are moved to a hidden folder named “LOST.DIR” by the Android operating system.
- Step 3: Look for a “Recycle Bin” folder on the card itself, as some cameras or devices create their own.
Method 2: Professional Recovery with PandaOffice Drecov
Dedicated, easy-to-use software like PandaOffice Drecov significantly increases your chances of a full recovery because it bypasses the file system index and scans the raw data sectors.
- Step 1: Download and install PandaOffice Drecov on your computer (install it on a different drive than the SD card to avoid overwriting data) Launch the application and select the SD card as the location to be scanned.
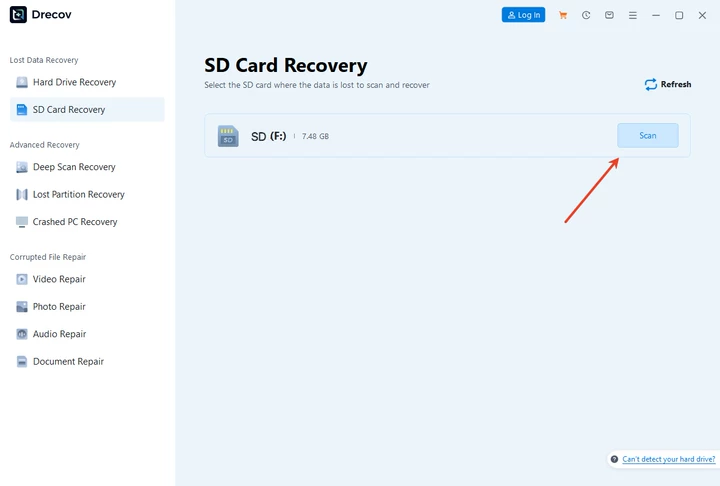
- Step 2: Click “Scan”. The program will run a deep scan, which may take some time depending on the card size.
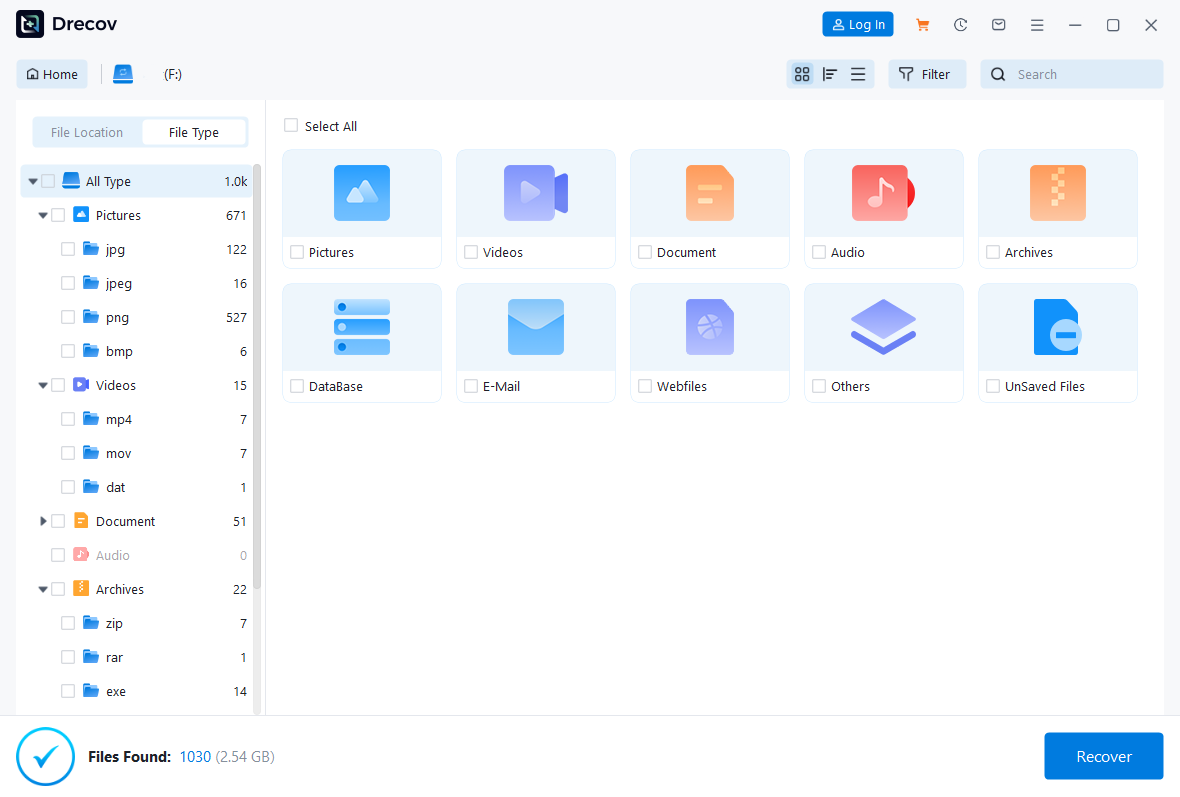
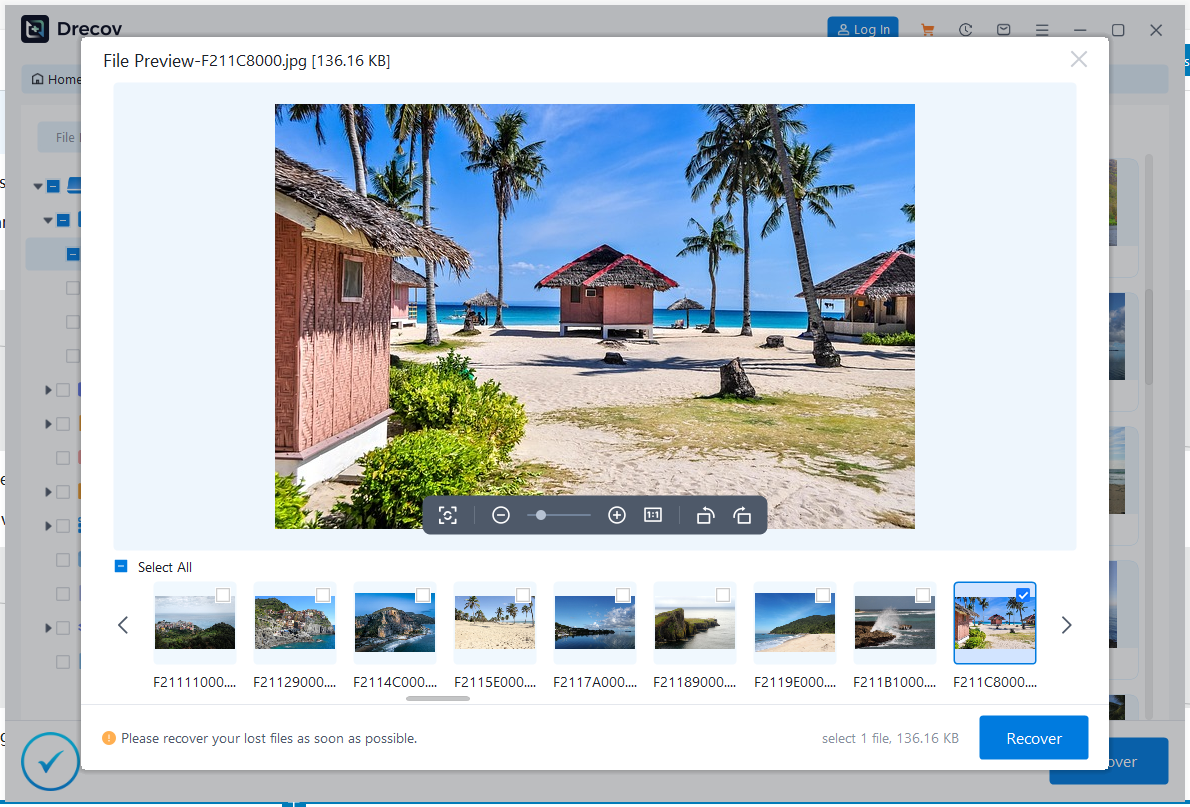
- Step 3: Choose the file types you want to recover (e.g., “Photos” or specific formats like .JPG, .RAW). Preview the recoverable files. Select the desired photos and click “Recover”.
🚨 CRUCIAL WARNING: Always save the recovered files to a different location (like your computer’s main hard drive), NOT back onto the same SD card. This prevents the recovered files from immediately overwriting other still-lost files.
PandaOffice Drecov is also excellent for recovering accidentally deleted documents, videos, and music files from other storage types, like internal hard drives and USB drives.
Method 3: Using the Windows Command Prompt (Advanced Users)
If you suspect the card’s file system is damaged or it has a virus, you can attempt to use the built-in Windows utility.
- Step 1: Press the Windows Key + R to open the Run dialog. Type
cmdand hit Enter to open the Command Prompt.

- Step 2: Type the following command and replace E with the letter of your SD card:
chkdsk E /.Hit Enter. This command will check the card for errors and fix any corrupted file system entries, sometimes bringing files back into visibility.

- Step 3: Next, type this command and again replace H with the SD card letter:
attrib -h -r -s /s /d E:\*.\*This command attempts to remove the Hidden, Read-only, and System file attributes from all files on the card. - Step 4: Check your SD card in File Explorer for any recovered files.
🚨 A Friendly Warning for Non-Technical Users: The Command Prompt is a powerful tool that directly communicates with your computer’s operating system. If you are a novice user, it is highly recommended that you skip this method. Typing even a single character incorrectly in the Command Prompt can lead to unintended changes or even data loss on your computer or the SD card.
For a safer, simpler, and more effective approach, stick with Method 2 (Professional Recovery with PandaOffice Drecov), which provides a user-friendly graphical interface and minimizes the risk of human error.
Proactive Photo Protection
Knowing how do you recover deleted photos from an SD card is great, but avoiding the problem is even better! By adopting a multi-layered approach, you can dramatically reduce the risk of permanent data loss.
A. Digital Habit Checklist
These are simple, actionable steps to integrate into your photo workflow.
| Action | Description | Frequency |
| Import and Format | After importing photos to your computer, use your camera’s built-in “Format” option to clear the card, not the computer’s delete function. | After every major shoot. |
| Immediate Backup | Transfer photos from the SD card to your computer and an external drive immediately after a shoot. | After every shoot. |
| Safe Eject | Always use the computer’s “Eject” or “Safely Remove Hardware” function before physically pulling the card out. | Every time. |
| Check Card Health | Monitor the physical condition of the card. Replace it if you notice physical damage or frequent corruption warnings. | Periodically. |
B. The 3-2-1 Backup Rule
This robust strategy ensures your data survives most disasters.
- 3 copies of your data (The original on the SD card/computer + 2 backups).
- 2 different media types (e.g., Local Hard Drive and Cloud Storage).
- 1 copy off-site (e.g., Cloud storage like Google Drive, or a physically separate backup drive).
C. Card Maintenance and Integrity
Preventing file system errors minimizes the need for recovery.
- Use High-Quality Cards: Invest in reliable, high-speed SD cards from reputable brands (e.g., Sandisk Extreme, Lexar Professional). Cheap cards are prone to failure.
- Avoid Filling to Max: Never fill the card to 100% capacity. Leaving a small amount of space (about 5-10%) can prevent file system errors and corruption.
- Do Not Use the Card on Multiple Cameras/Devices: Dedicate each SD card to one camera or device. Swapping cards between different devices can lead to file system conflicts and corruption.
Conclusion
The key to successfully recovering your lost photos is acting quickly and not writing any new data to the card, guided by the understanding that deleted files are merely unindexed. By immediately stopping usage and employing a dedicated tool like PandaOffice Drecov, you significantly maximize your chances of recovering those valuable memories. Protect your future photos by establishing a robust, multi-layered backup and card maintenance routine.


