


The Heart-Stopping “Empty” Click
We have all experienced that split-second of pure dread when we realize we desperately need to Recover Files from Emptied Recycle Bin. Perhaps you were tidying up your desktop, selected a stack of folders you thought were duplicates, and performed the final “Empty Recycle Bin” command, only to realize your primary work presentation or a decade of family photos was in that batch. You look at the empty folder icon, and your heart sinks as the reality of the loss sets in.
Is it gone forever? Most users assume that “emptying” is the final act of digital destruction. However, learning how to recover files from emptied recycle bin is not just possible; it is a scientifically grounded process. This guide will walk you through the “why” and “how” of data rescue, ensuring you have the best chance of a full recovery even if you aren’t a “tech person.”
Part 1: The Science of “Invisible” Data
Before we jump into the steps, we must address a common misconception. When Windows “permanently” deletes a file, it does not actually erase the data from the magnetic or flash storage cells of your hard drive immediately.
The File System Index
Think of your hard drive as a massive encyclopedia. When you save a file, the system creates a “Table of Contents” entry that tells the computer exactly which page (sector) the data lives on. When you empty the Recycle Bin, Windows simply takes a digital eraser to the Table of Contents. It marks the space as Available.
The Overwriting Risk
The actual data—the photos, the text, the code—stays on the disk. It remains there until the computer needs that specific “page” to write something new. This is why the most critical rule is to stop using the computer immediately. If you continue browsing the web or downloading updates, the system might write new data over your lost files, making them unrecoverable.
Furthermore, modern operating systems use background processes that might overwrite sectors. Therefore, the faster you begin the recovery process, the higher your success rate will be. Understanding this underlying logic is the first step in mastering how to recover files from emptied recycle bin.
Part 2: Proven Recovery Methods
To successfully navigate how to recover files from emptied recycle bin, you should follow these methods in order. Start with built-in system tools and move to professional software if the files are not found.
Method 1: Harnessing Windows File History
Windows has a built-in “time machine” called File History. If you had this turned on prior to the deletion, your files are likely sitting in a hidden backup.
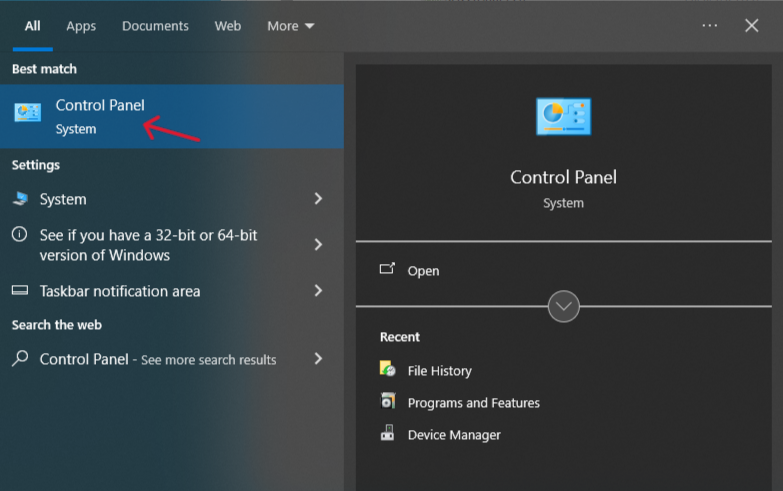
- Step 1: Open the Control Panel by typing it into your Windows search bar.
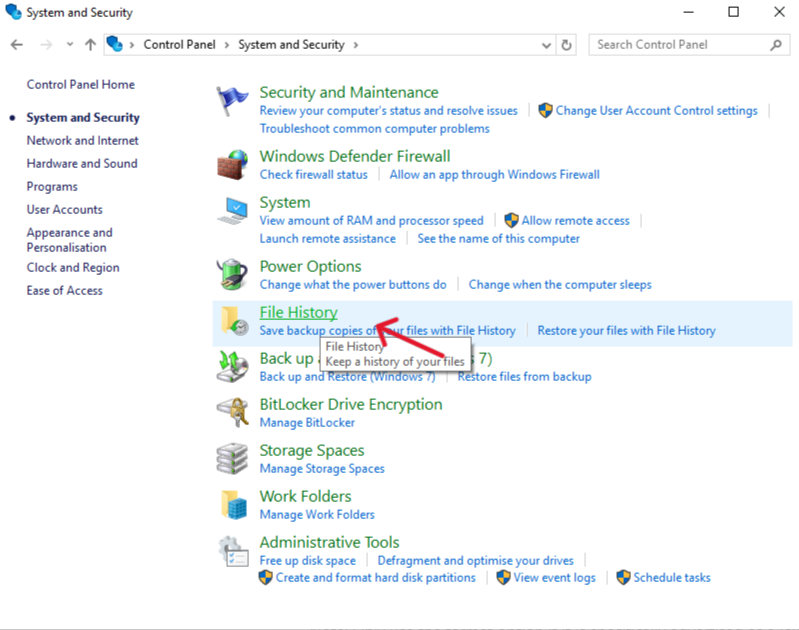
- Step 2: Navigate to System and Security and then click on File History.
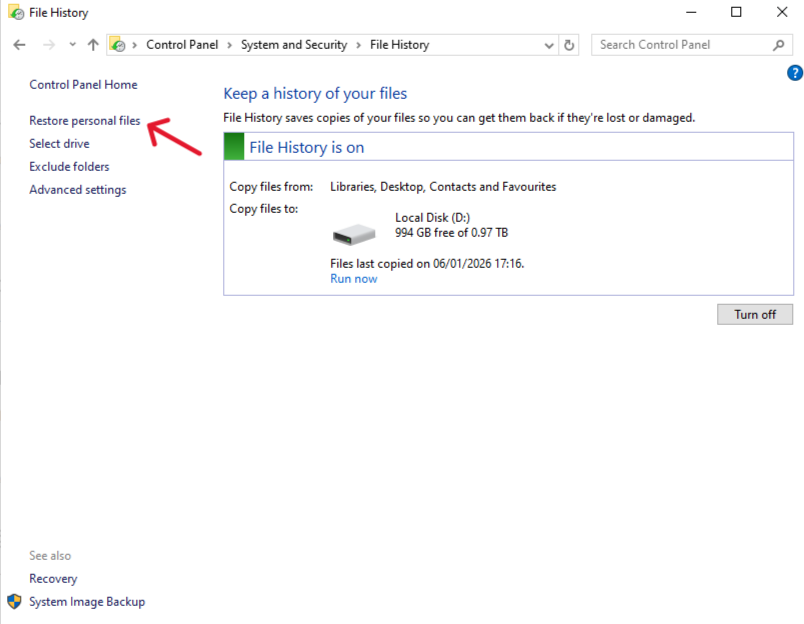
- Step 3: On the left-hand sidebar, click the link labeled Restore personal files.
- Step 4: Browse through the time-stamped versions of your folders using the left and right arrows. Find the version containing your deleted files.
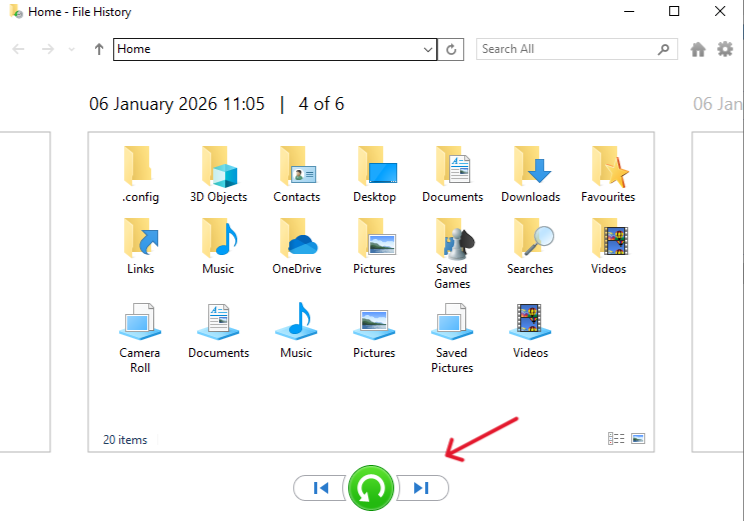
- Step 5: Select the files or folders you need and click the green Restore button to return them to their original home.
💡 Pro Tip for Beginners: If the “Restore personal files” screen is blank, it means File History wasn’t turned on. Don’t worry! Move immediately to Method 2.
Method 2: Professional Restoration with PandaOffice Drecov
If you didn’t have a backup, you need a tool that can read the “unindexed” parts of your drive. PandaOffice Drecov is a premier choice for 2026, offering high success rates for emptied bins. This software bypasses the OS’s file table to find the raw data still residing on your platters or flash memory.
Why is PandaOffice Drecov Highly Recommended?
This software is a favorite among IT professionals, maintaining strong reputations on Trustpilot and collaborating with industry leaders like the Microsoft Store, TechBullion, and Sourceforge. It serves as a comprehensive “safety net,” capable of retrieving everything from accidentally deleted desktop files to formatted SD cards.
- Versatility: It recovers photos, videos, audio, compressed files (ZIP/RAR), and even system files like EXEs.
- Accidental deletion from your computer desktop.
- Files lost after emptying the Recycle Bin.
- Data loss from disk formatting.
- Accidental deletion or formatting of SD cards/U disks.
- Simple for Beginners: You don’t need to know a single line of code. It’s a “point-and-click” experience.
- File Repair: It can often fix files that are “corrupted” or “unreadable” during the recovery process.
- Privacy First: All recovery happens locally on your machine, so you don’t have to worry about your private data leaking to the web.
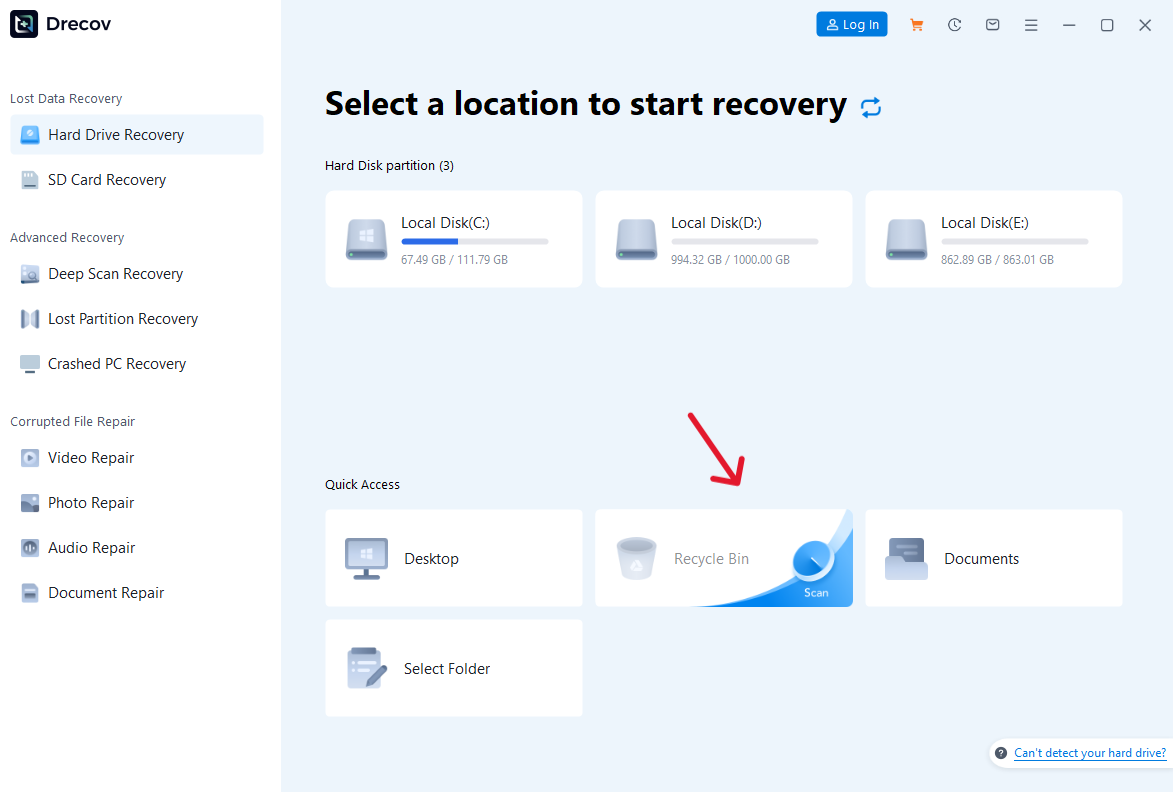
- Step 1: Download PandaOffice Drecov and launch the application. You will see a clean dashboard showing a list of drives and common locations. Save the installer to a USB drive or a different partition (like D: instead of C:) to prevent overwriting.
- Step 2: Select the Recycle Bin icon specifically from the interface. This focuses the scan on the areas where deleted file headers usually reside.
- Step 3: Click Scan. The software starts with a “Quick Scan” for recently deleted items and transitions into a “Deep Scan” to find older data.

- Step 4: Use the Preview function once the scan completes. If you can see the image thumbnail or read the text in the preview window, the file is healthy and ready for rescue.
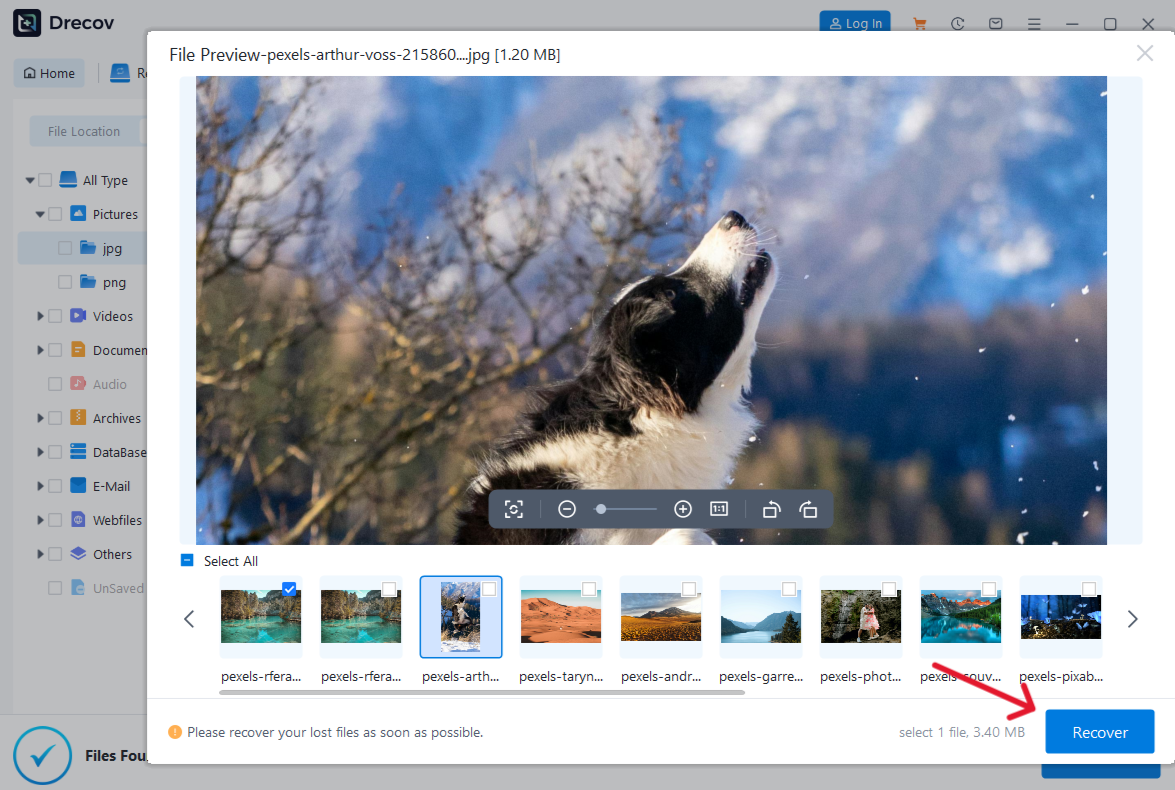
- Step 5: Mark the checkboxes for your files and click Recover.
Important: When it asks where to save them, pick a different drive (like a USB stick). Saving them back to the original drive is like trying to write on a piece of paper you are currently trying to read—it might blur the data!
Method 3: Using the Windows File Recovery App (Command Line)
Microsoft provides a free utility for those who prefer a more technical approach to how to recover files from emptied recycle bin.
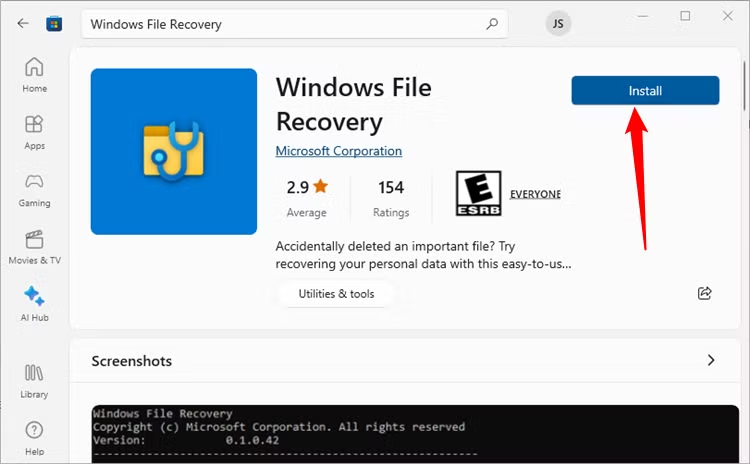
- Step 1: Install Windows File Recovery from the Microsoft Store.
- Step 2: Open Command Prompt as an Administrator by right-clicking the Start button.
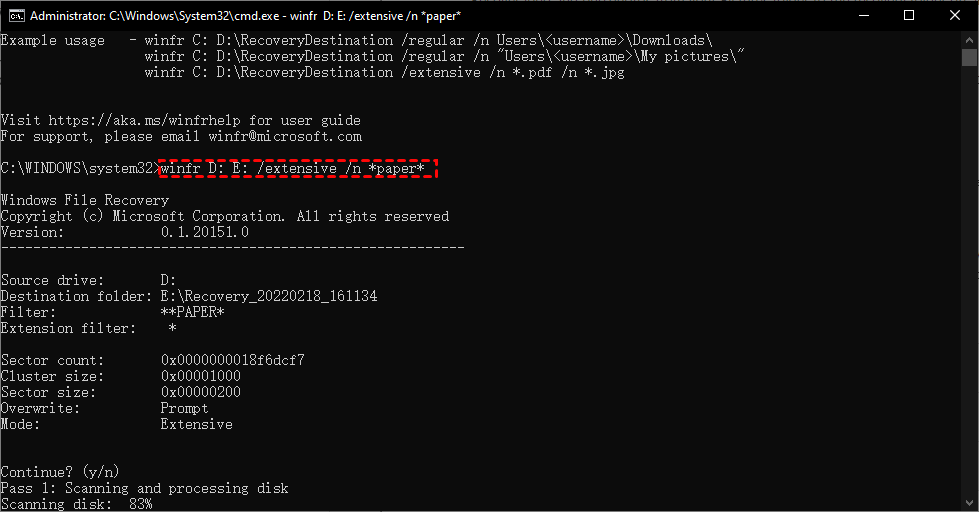
- Step 3: Use the following syntax:
winfr source-drive: destination-drive: /regular. For example:winfr C: E: /regular /n \Users\YourName\Documents\. - Step 4: Type Y when prompted to start the recovery. The tool will create a folder named “Recovery_[Date]” on your target drive containing the extracted data.
The following information can help you decide which file system you have and which mode to use.
File systems
| File system | Examples |
| FAT and exFAT | SD cards, flash or USB drives (< 4GB) |
| NTFS | Computers (HDD, SSD), external hard drives, flash or USB drives (> 4GB) |
There are several file systems supported by Windows that vary depending on the storage device or operating system. Recovering files from non-NTFS file systems is only supported by extensive mode. To see which file system you have, right click a drive in File Explorer and select Properties.
Deciding which mode to use
Use the following table to help you decide which mode to use. If you are not sure, start with Regular mode.
| File system | Circumstances | Recommended mode |
| NTFS | Deleted recently | Regular |
| NTFS | Deleted a while ago | Extensive |
| NTFS | After formatting a disk | Extensive |
| NTFS | A corrupted disk | Extensive |
| FAT and exFAT | Any | Extensive |
Part 3: Common Concerns on How to Recover Files from Emptied Recycle Bin
1.Can I recover files from an SSD?
Recovering from an SSD is more challenging due to a feature called TRIM, which clears data faster than traditional HDDs. However, PandaOffice Drecov can often still find fragments if you act within minutes of the deletion.
2.Does a “System Restore” bring back my deleted photos?
No. System Restore only affects system files, drivers, and registry settings. It does not monitor or restore personal user files like documents or images.
3.Is there a 100% guarantee for file recovery?
No tool can guarantee 100% success if the data has been physically overwritten. However, following the “stop usage” rule and using PandaOffice Drecov offers the highest statistical probability of success.
Conclusion: Act Now to Save Your Data
Knowing how to recover files from emptied recycle bin is an essential digital survival skill in our data-driven world. By understanding that deletion is a “logical” marker rather than a “physical” erasure, you can act with confidence instead of despair. Whether you leverage the safety net of File History or the deep-scanning power of PandaOffice Drecov, the key to success remains the same: speed and caution.


