


If you have ever opened a brand-new Windows computer and wondered, “Why is this cloud thing already here?” — you are certainly not alone. Many users find that Microsoft’s cloud service is more of a hindrance than a help. Whether it is the constant pop-ups, the limited storage, or the way it takes over your file system, learning how to get rid of OneDrive has become a top priority for PC enthusiasts and casual users alike. In this comprehensive guide, we will explore every method available to reclaim your privacy and system resources.
What Is OneDrive and Why Is It on Your PC?
Before we dive into the technical steps to get rid of OneDrive, it is essential to understand what the software actually does and why Microsoft is so insistent on keeping it there.
What OneDrive Actually Does
Microsoft OneDrive is a cloud storage service created by Microsoft. It automatically syncs your files — like your Desktop, Documents, and Pictures — to the cloud. Think of it as a digital safety deposit box that follows you everywhere. By default, it creates a bridge between your local hardware and Microsoft’s servers. This sounds useful in theory, but when the integration becomes too aggressive, users start searching for ways to get rid of OneDrive to regain a sense of local control.
Why Microsoft Installs It by Default
If you are using Windows 10 or Windows 11, OneDrive comes pre-installed. Microsoft integrates it deeply into the system to encourage cloud usage and account syncing. This ecosystem strategy ensures that your data is available across devices, but it also serves as a gateway to Microsoft 365 subscriptions. Consequently, many users feel that the software is “bloatware” rather than a helpful tool.
Why You Might Want to Get Rid of OneDrive
There are several valid reasons why a user might decide that the cloud-first approach isn’t for them. Understanding these reasons can help you decide which removal method is best for your specific situation.
Storage Limit Frustrations
The free plan offers very limited storage, often capping out at 5GB. Once you hit this cap, you will start seeing persistent upgrade prompts. These notifications can interrupt your workflow and become incredibly annoying very fast. If you don’t plan on paying for a subscription, it makes sense to get rid of OneDrive entirely.
Privacy Concerns
Not everyone feels comfortable storing personal files, financial records, or private photos on remote servers. Even though Microsoft claims high-level security, some users prefer the absolute certainty of local-only storage. If you value your privacy, learning how to get rid of OneDrive is the first step toward a more secure digital life.
Annoying Sync Notifications
“Sync paused.” “Storage full.” “Sign-in required.” Does this sound familiar? The constant chatter from the system tray can be a major distraction. These notifications often persist even if you aren’t actively using the service, leading many to seek a permanent exit strategy.
Slower System Performance
On older machines or laptops with limited RAM, constant syncing may consume significant CPU and memory resources. If your PC already struggles with basic tasks, the background processes of a cloud sync tool can be the tipping point. By choosing to get rid of OneDrive, you free up these resources for the applications you actually care about.
Before You Remove OneDrive: Important Things to Know
Don’t rush into the deletion process just yet. Because OneDrive is so deeply integrated into Windows, there are a few nuances you need to understand to avoid losing data.
Difference Between Unlinking, Disabling, and Uninstalling
- Unlinking: This disconnects your Microsoft account from the PC but keeps the app installed.
- Disabling: This stops the app from running or starting up, effectively silencing it.
- Uninstalling: This completely removes the application files from your operating system.
Depending on your comfort level with Windows, you might choose one over the other.
Back Up Your Files First
This is the most critical step. If your Desktop or Documents folder is currently synced, removing the app without a proper backup could make your files seem to disappear. Always copy important data to an external hard drive or a different cloud provider before you get rid of OneDrive.
Pro Tip: Check the Official Microsoft Support Page to verify which files are currently stored only in the cloud versus those stored locally.
How Do I Get Rid of OneDrive? Using the Unlink Method
If you want to stop the syncing process but aren’t ready to delete the app entirely, unlinking is the best “soft” approach. This is often the first step for people asking, “How do I get rid of OneDrive without breaking my system?”
Step-by-Step Instructions
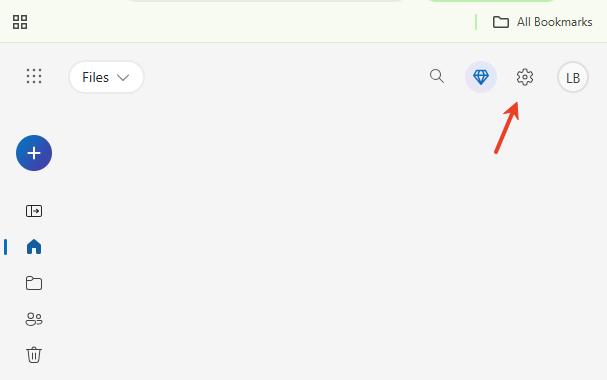
- Step 1: Locate the OneDrive cloud icon in your system tray (bottom right corner of your screen).
- Step 2: Click the icon, then select the Gear Icon (Settings).
- Step 3: Within the menu, navigate to the Account tab.
- Step 4: Look for the link that says Unlink this PC.
- Step 5: Confirm your choice in the pop-up window.
Once confirmed, your files stay local, and the syncing stops immediately. This effectively helps you get rid of OneDrive activity without a permanent uninstallation.
Introducing PandaOffice Drecov: Your Safety Net for Data Recovery
Whenever you are moving files around or disabling sync services, there is a risk of accidental deletion. This is where PandaOffice Drecov becomes an essential tool in your kit. PandaOffice Drecov is a professional-grade data recovery product designed to rescue files that have been lost due to sync errors, accidental formatting, or software uninstallation.
If you find that your files have vanished after you tried to get rid of OneDrive, don’t panic. PandaOffice Drecov can scan your local hard drive for the remnants of those “cloud-only” files that might not have downloaded correctly before the sync was severed.
How to Use PandaOffice Drecov to Recover Missing Files
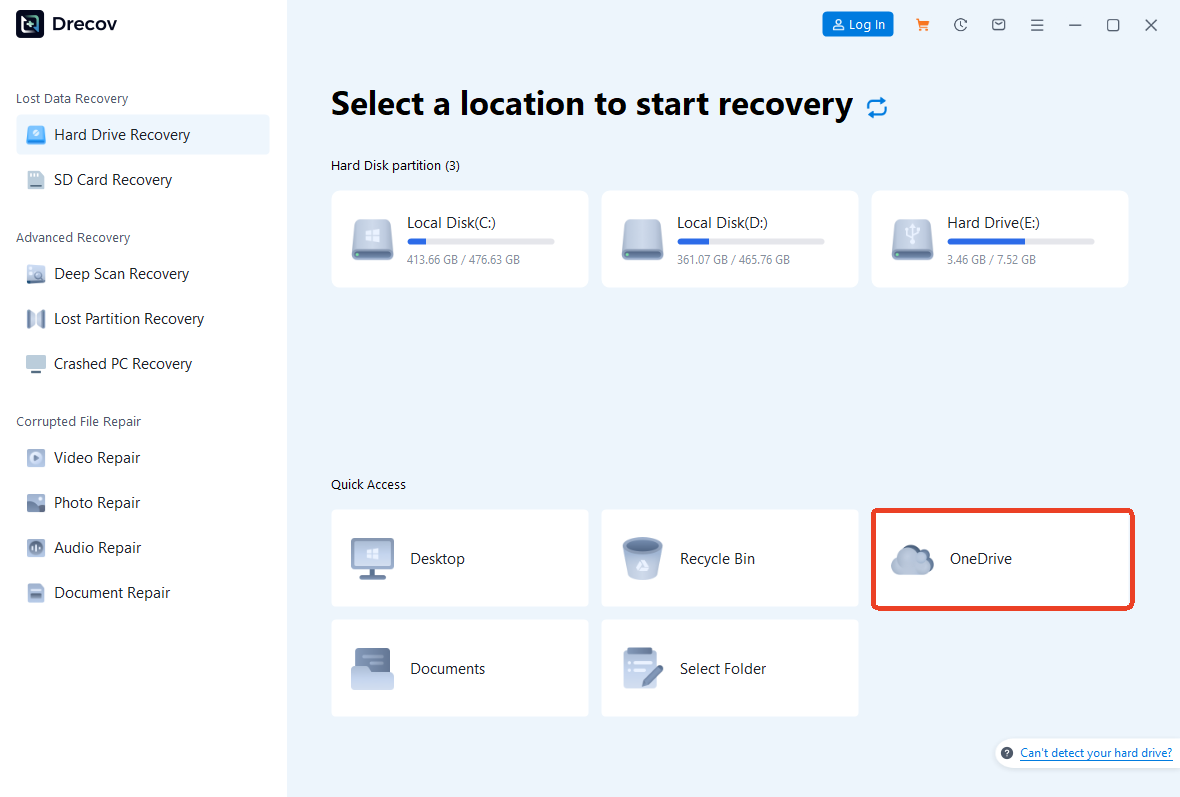
- Step 1: Select the drive where your OneDrive folder was located (usually the C: drive).
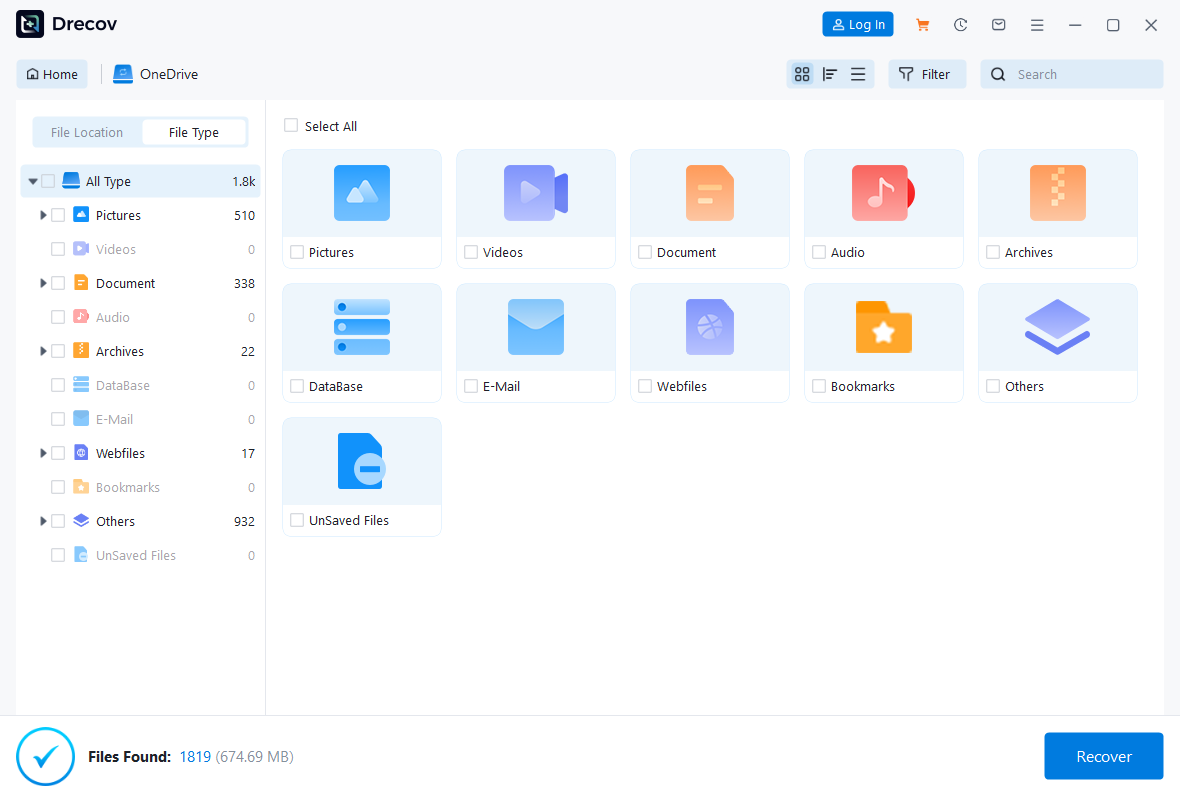
- Step 2: Run a Deep Scan to identify any files that the system marked as deleted.
- Step 3: Preview the found files to ensure they are intact.
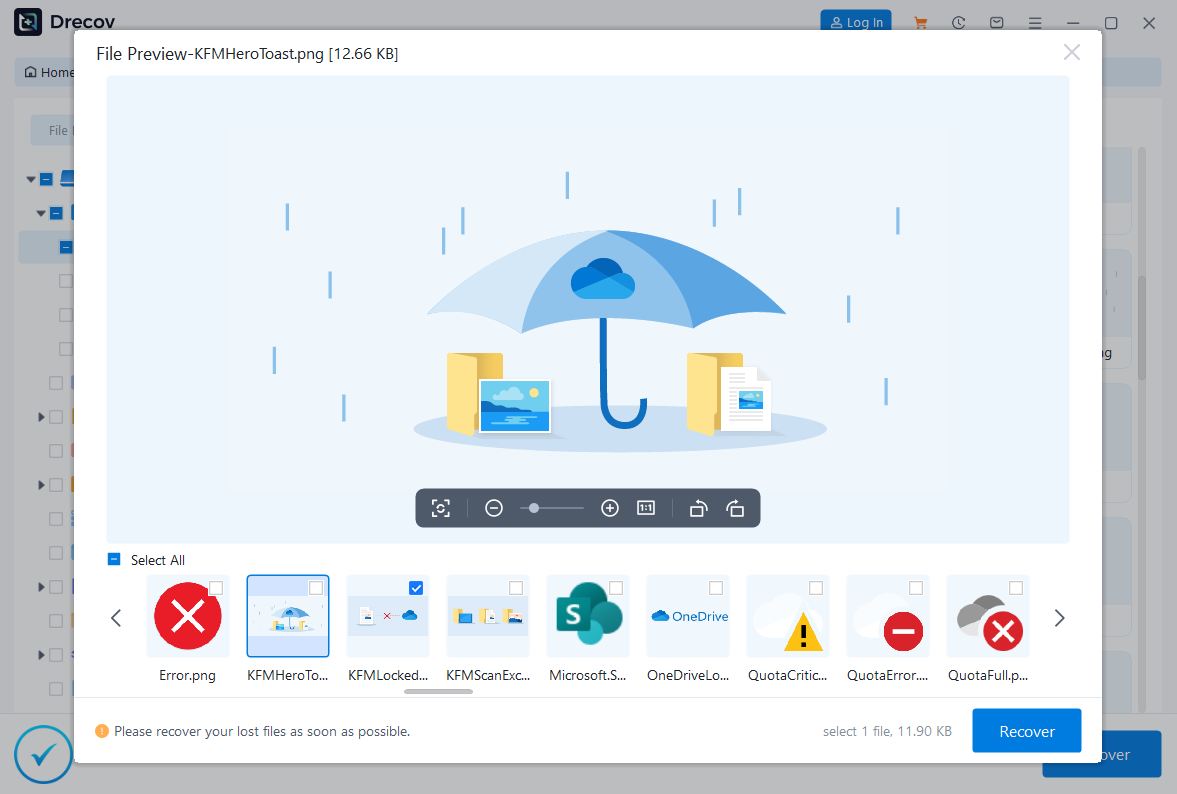
- Step 4: Select the files you need and click Recover to save them to a safe, non-OneDrive location.
For more detailed information on managing cloud-related data loss, you can read this comprehensive guide on recovering deleted files on OneDrive.
How to Pause or Disable OneDrive Temporarily
Sometimes you don’t need to permanently get rid of OneDrive; you just need it to be quiet while you finish a task or play a game.
Stop Syncing Without Deleting the App
- Step 1: Click the OneDrive icon in the system tray.
- Step 2: Click the gear icon and select Pause syncing.

- Step 3: Choose a duration: 2 hours, 8 hours, or 24 hours.
This is like putting your cloud storage on “Silent Mode.” It is a great middle-ground for those who aren’t ready to fully get rid of OneDrive but hate the performance lag during high-intensity tasks.
Get Rid of OneDrive on Windows 10
If you are a Windows 10 user, the process is quite straightforward through the traditional settings menu.
Using Settings
- Step 1: Press the Windows Key + I to open the Settings menu.
- Step 2: Click on Apps.
- Step 3: In the “Apps & features” list, scroll down or use the search bar to find Microsoft OneDrive.
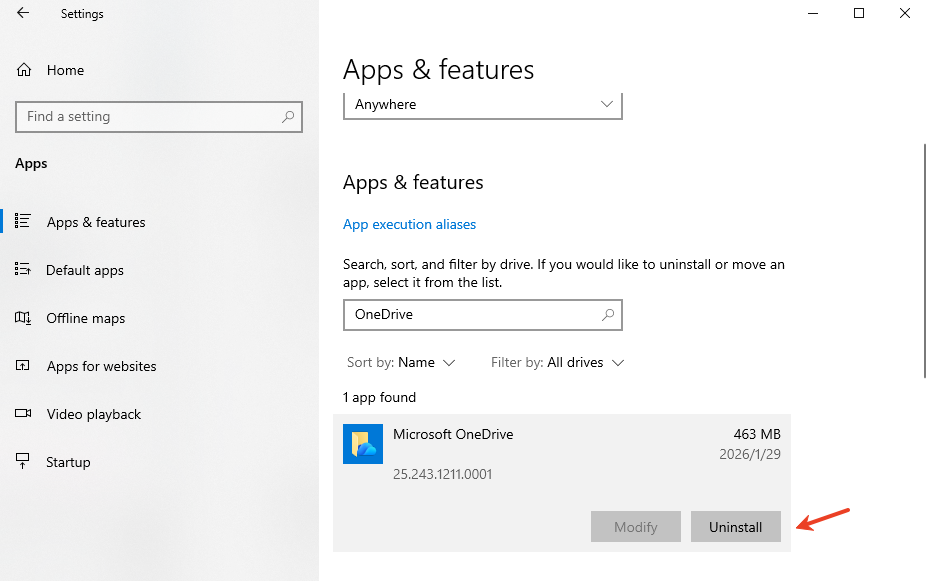
- Step 4: Click the entry and select Uninstall.
Using Control Panel
For those who prefer the classic interface:
- Step 1: Press Windows Key + R, type
appwiz.cpl, and hit Enter. - Step 2: Locate Microsoft OneDrive in the list of installed programs.
- Step 3: Right-click it and select Uninstall.
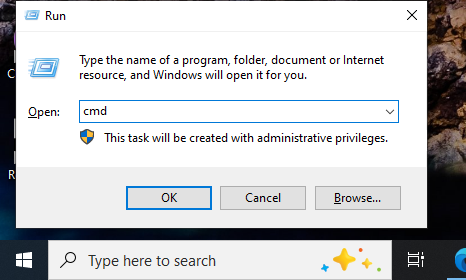
Using Command Prompt (Advanced)
If the standard methods fail, you can force the system to get rid of OneDrive using the Command Prompt.
- Step 1: Open the Start menu, type
cmd, right-click it, and select Run as Administrator.
- Step 2: Type the following command for 64-bit systems:
%SystemRoot%\SysWOW64\OneDriveSetup.exe /uninstalland press Enter. - Step 3: For 32-bit systems, use:
%SystemRoot%\System32\OneDriveSetup.exe /uninstall.
How to Uninstall OneDrive on Windows 11
Windows 11 makes it slightly easier to find the app, though the underlying logic remains the same. If you want to get rid of OneDrive on the newest OS, follow these steps.
Removing via Settings
- Step 1: Open the Settings app from your pinned icons or search bar.
- Step 2: Navigate to Apps > Installed Apps.
- Step 3: Find Microsoft OneDrive in the list.
- Step 4: Click the three dots icon on the right and select Uninstall.
Advanced Removal Method
Similar to Windows 10, the Command Prompt method works perfectly here if the GUI version hangs. Windows 11 users often find that after a major update, the app reappears. Using the terminal is often a more “permanent” way to get rid of OneDrive.
How to Remove OneDrive from File Explorer
Even after you uninstall the app, a “ghost” folder often remains in the File Explorer sidebar. This can be incredibly frustrating for users who want a clean interface. To truly get rid of OneDrive‘s visual presence, you must edit the Registry.
Using Registry Editor
Warning: Editing the registry incorrectly can cause system instability. Always export a backup of your registry before making changes.
- Step 1: Press Windows Key + R, type
regedit, and press Enter. - Step 2: Navigate to the following path:
HKEY_CLASSES_ROOT\CLSID\{018D5C66-4533-4307-9B53-224DE2ED1FE6}. - Step 3: On the right-hand side, look for the key System.IsPinnedToNameSpaceTree.
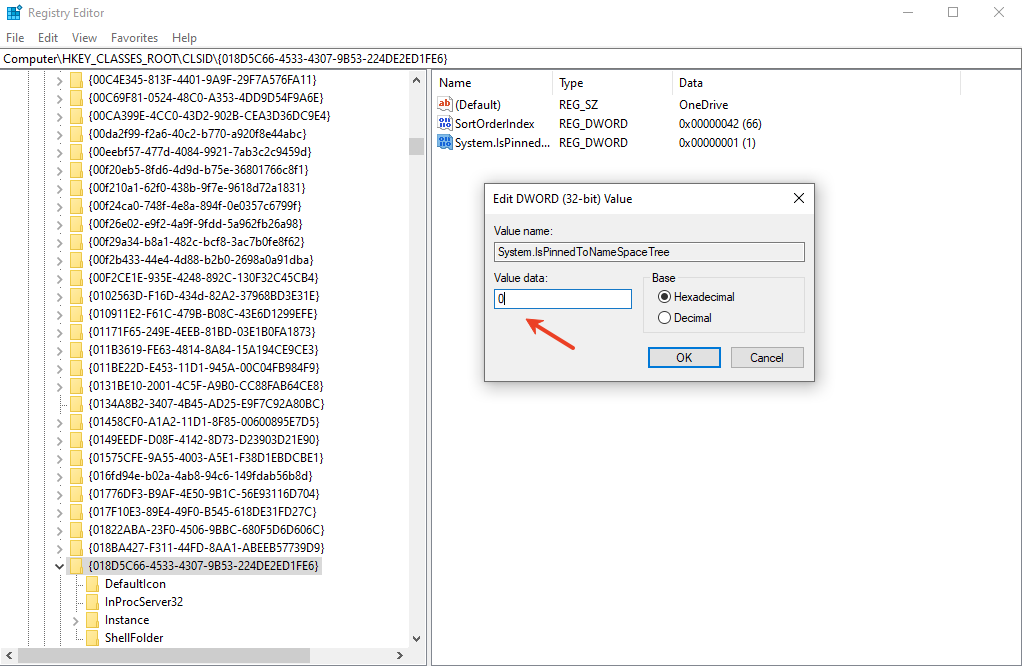
- Step 4: Double-click it and change the Value data from
1to0. - Step 5: Restart your computer.
Following these steps will ensure that you get rid of OneDrive from your sight for good.
How to Stop OneDrive from Starting Automatically
If you don’t want to uninstall it but want to ensure it never bothers you upon boot-up, you can disable its startup privileges.
Using Task Manager
- Step 1: Press Ctrl + Shift + Esc to open the Task Manager.
- Step 2: Click the Startup tab (or “Startup apps” in Windows 11).
- Step 3: Find Microsoft OneDrive in the list.
- Step 4: Right-click it and select Disable.
Using OneDrive Settings
- Step 1: Open OneDrive Settings.
- Step 2: Go to the Settings tab.
- Step 3: Uncheck the box that says Start OneDrive automatically when I sign in to Windows.
How to Get Rid of OneDrive on Mac
Apple users aren’t exempt from the reach of Microsoft. If you installed Office 365 on your Mac, OneDrive likely came with it.
Unlinking the Account
- Step 1: Click the OneDrive icon in the top Menu Bar.
- Step 2: Select Settings > Account.
- Step 3: Click Unlink this Mac.
Moving OneDrive to Trash
- Step 1: Open your Applications folder.
- Step 2: Locate the OneDrive app.
- Step 3: Drag it to the Trash and empty it.
This is the cleanest way to get rid of OneDrive on macOS without leaving behind massive library files.
Common Problems After Removing OneDrive
Once you get rid of OneDrive, you might notice a few hiccups. Windows expects the service to be there, so it can act a bit strange initially.
Missing Desktop Files
If your Desktop was being synced, your files might have been moved to a subfolder. Check C:\Users\[YourName]\OneDrive\Desktop. You will need to move these files back to the actual local Desktop folder manually. If you find that the files are missing entirely, remember to use PandaOffice Drecov to scan for the lost data.
Sync Folder Issues
Sometimes, Windows continues to point your “Documents” library to the OneDrive path. To fix this, right-click your Documents folder, go to Properties > Location, and click Restore Default.
Get rid of OneDrive FAQs
1. Will uninstalling OneDrive delete my files?
No, local files that were already downloaded to your PC will remain. However, files that were “online-only” (indicated by a blue cloud icon) will be inaccessible until you reinstall the app or download them from the OneDrive website.
2. Can OneDrive reinstall itself?
Yes, unfortunately. Major Windows “Feature Updates” occasionally reinstall bundled apps. If this happens, you will need to follow the uninstallation steps again to get rid of OneDrive.
3. Is it safe to edit the registry to remove OneDrive?
It is safe if you follow the exact path provided. However, a mistake in the registry can be serious. Always use a tool like PandaOffice Drecov to ensure your data is safe before performing advanced system tweaks.
4. Does removing OneDrive improve performance?
On machines with limited resources (like 4GB or 8GB of RAM), you will notice a slight improvement in boot times and general responsiveness once you get rid of OneDrive.
5. Can I reinstall OneDrive later?
Absolutely. You can download the latest version of the client from the official OneDrive download page at any time.
Conclusion
In summary, learning how to get rid of OneDrive is an empowering step for any Windows or Mac user who wants to take back control of their digital environment. Whether you choose to unlink your account, disable the startup, or perform a full uninstallation via the Command Prompt, the steps outlined above provide a clear roadmap.
Remember to back up your data before starting, and if anything goes wrong, PandaOffice Drecov is always available to help you recover lost files. Managing your computer should be on your terms, not Microsoft’s. By following this guide, you have the tools to customize your experience and ensure your PC runs exactly how you want it to.


