


In the digital era, hard drives are the backbone of storing memories, work assets, and daily data—holding everything from family photos to years of professional achievements. But when a hard drive starts making loud abnormal noises or becomes unrecognizable by your computer, the panic of potential permanent data loss is all too relatable, and knowing how to retrieve data from a failed hard drive becomes a critical skill.
Data is invaluable, but a hard drive failure isn’t a “data doomsday.” With the right tools and steps, you can safely extract critical data from a malfunctioning drive—this guide breaks down proven solutions to help you retrieve data from a failed hard drive effectively.
From user-friendly software fixes to professional hardware interventions, we’ll walk you through step-by-step decisions to retrieve as much valuable information as possible during a data crisis.
Core Rule: Stop All Writing Activities Immediately
Before attempting any recovery method, follow this non-negotiable data recovery principle: As soon as you suspect a hard drive physical failure, power it off immediately and never write new data to the drive. This is the first and most important step to successfully retrieve data from a failed hard drive.
Here’s why: In most cases, data isn’t truly “lost.” The issue often lies in damaged “index tables” (like the Master File Table, MFT) that track data locations, or sectors holding data being incorrectly marked as free space.
Any new writing activity—whether system-generated temporary files, software installations, or manual downloads—can overwrite sectors that still contain old data. Once overwritten, data is permanently lost and unrecoverable.
Stick to the “read-only, no writing” rule at all costs.
Method 1: Professional Data Recovery Software (Logical-Level Recovery)
This is the most accessible solution for average users, designed for hard drives with no physical damage and a top choice to retrieve data from a failed hard drive in logical failure scenarios.
Key Use Cases
- Accidental deletion or formatting (e.g., empty Recycle Bin, quick partition format)
- Lost or damaged partitions (e.g., “Unallocated Space” or RAW format in Disk Management)
- File system errors (e.g., “Format required” or “Parameter error” prompts)
- Virus/malware attacks (e.g., hidden or encrypted files that won’t open)
- Minor bad sectors (e.g., slow read speeds, unopenable files, but drive is recognizable)
Critical Warning
Never use this method if the hard drive has severe physical issues (abnormal noises, unrecognizable by the system, frequent freezing). Repeated power-on can worsen platter scratches and escalate the failure.
Recommended Tool: PandaOffice Data Recovery
If you’re ready to try software recovery, sign up for the PandaOffice Drecov to scan and preview lost files at no cost.
Step-by-Step Operation
- Preparations
- Prepare a functional external hard drive (larger capacity than the faulty drive) as the target storage for recovered data.
- Download and install PandaOffice Data Recovery on a working computer (ensure compatibility with your system Windows 11 for verification).
- Connect the faulty drive to the working computer via a SATA-to-USB cable, hard drive enclosure, or direct SATA motherboard connection (more stable for desktops).
- Scanning Process
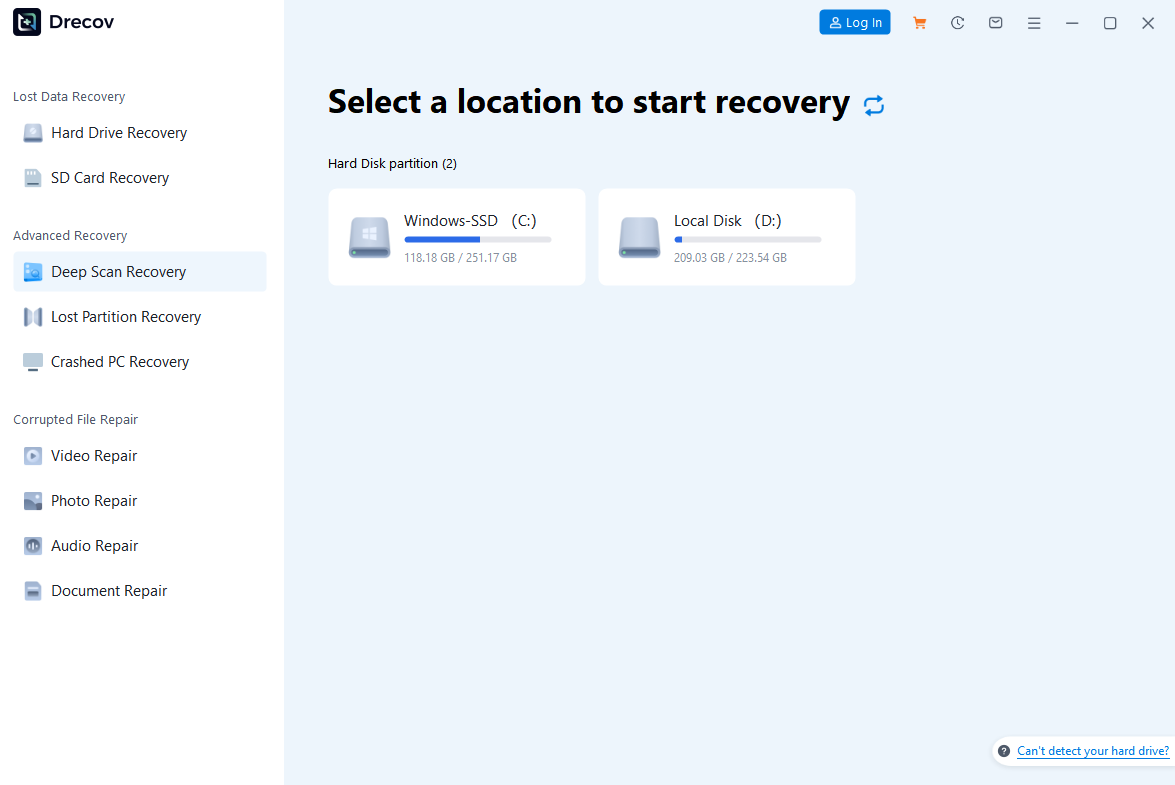
- Launch the software and select “Hard Drive Recovery” mode.
- The interface will list all detected disks with clear details—select the faulty partition or entire physical drive.
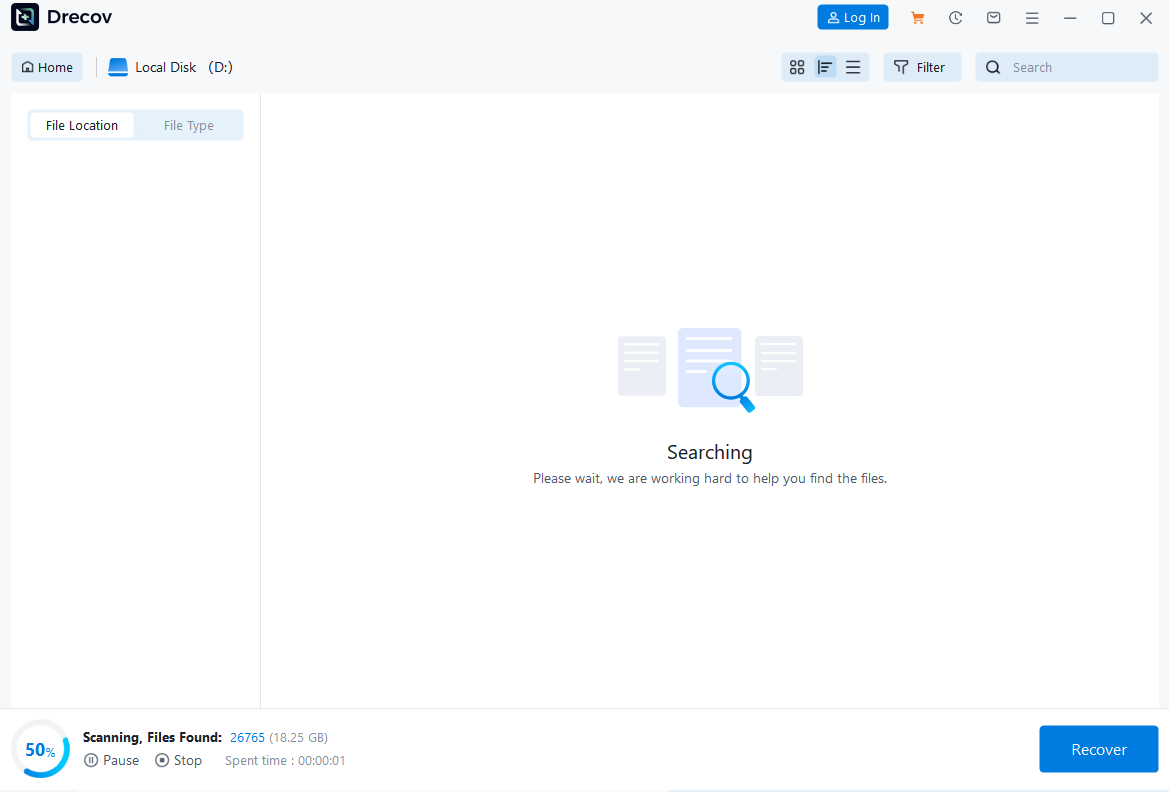
- Wait for the scan to complete; you can check identified files in real time to track progress.
3.Preview and Recovery
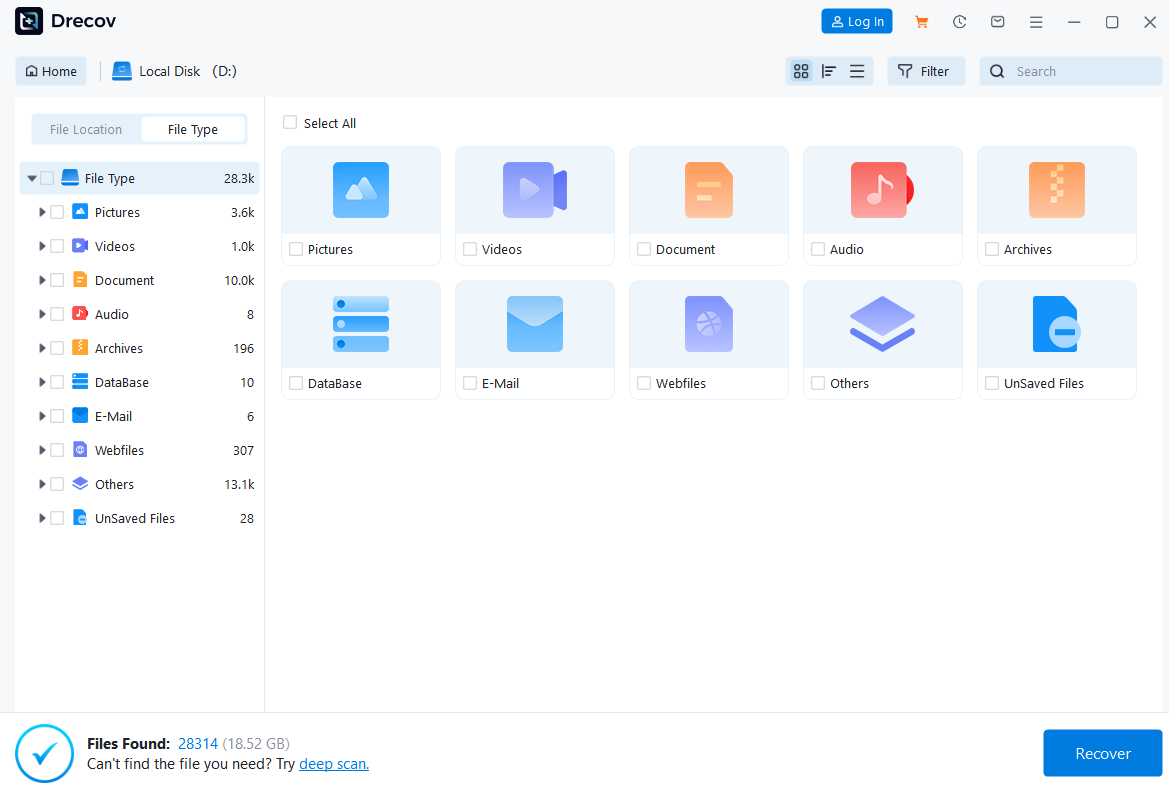
- After scanning, files are displayed by type or original path for easy location.
- Use the preview feature (supports images, documents, videos) to verify file integrity—avoids recovering corrupted files.
- Select desired files/folders, choose the prepped target drive as the save location (never recover directly to the faulty drive), and click “Recover.”

Pro Tips
- Software Selection: Try multiple tools if needed—different algorithms work better for specific data loss scenarios.
- Patience is Key: Larger drives take longer to scan; ensure stable power and avoid interrupting the process.
- Recovery Timing: The sooner you act after data loss, the higher the chance of full recovery (less risk of overwriting).
- Free Version Limits: Most free tools cap recovery at 2GB—purchase a license via our for large-scale data recovery.
- Error Fixes: For minor file system errors, you can use the CHKDSK command as a preliminary fix—refer to the detailed syntax and usage.
Method 2: Professional Data Recovery Services (Physical-Level Recovery)
When software can’t detect the drive or physical faults are obvious, this is the only viable option to retrieve data from a failed hard drive with physical damage.
Key Use Cases
- Clicking/clicking noises (classic sign of read/write head failure)
- No spinning after power-on, or stops spinning quickly (spindle motor or PCB failure)
- Detectable but shows 0GB capacity with grinding noises (platter scratches)
- Severe physical damage (water, fire, drops, external impacts)
- Failed software recovery attempts
Step-by-Step Process
- Choose a Reliable Provider: Select a company with a strong reputation, Class 100 cleanroom , professional engineers, and positive customer reviews/case studies.
- Initial Consultation: Describe the drive issue via phone/online for preliminary diagnosis and price estimate.
- Safe Shipping/Delivery: Package the drive as instructed (anti-static bag + bubble wrap + sturdy box) to prevent secondary damage.
- Inspection and Quotation: Engineers inspect the drive in a cleanroom, identify the fault, list recoverable data, and provide a detailed quote.
- Authorization and Recovery: After your approval, they perform repairs (replace heads/motors, platter transplantation) and use tools like PC-3000 to create a disk image.
- Data Delivery: Recovered data is copied to your provided external drive.
| Fault Type | Recovery Price Range (USD) | Time Required |
| Accidental File Deletion/Formatting | $100 -$400 | 1 – 3 days |
| Partition Loss/System Crash | $200 – $700 | 2 – 5 days |
| Head Damage/Abnormal Noise | $800 – $2,000 | 3 – 7 days |
| Platter Scratches/Severe Damage | $1,500 – $4,000+ | Over 1 week |
| SSD Data Recovery | $400 – $2,500+ | 3 – 10 days |
| RAID Array Recovery | $1,200 – $4,000+ | 1 – 2 weeks |
Important Notes
- Cost: Physical recovery fees range from hundreds to thousands of USD, depending on fault severity.
- No Recovery, No Fee: Reputable companies follow this policy (inspection fees may apply or be waived).
- Data Privacy: Ensure the provider has strict privacy agreements to protect sensitive information.
- Do Not Open the Drive Yourself: Dust particles can cause irreversible platter damage—only professionals should handle physical repairs.
- Pre-Diagnosis Reference: For common physical failure symptoms and preliminary checks, Refer to Kingston’s official guide.
Method 3: Linux Live CD/USB System Rescue
A technical but effective solution, ideal for Windows system crashes where the hard drive itself is functional. For a more detailed walkthrough.
Key Use Cases
- Corrupted Windows boot files (can’t access files via the OS)
- Persistent virus/malware infections (need to bypass the original system)
- Linux-compatible drive formats (NTFS/FAT) with no severe physical bad sectors
Step-by-Step Operation
- Create a Bootable USB: Download a Linux ISO (e.g., Ubuntu—get the official image from Ubuntu Live CD ) on a working computer, and use Rufus to write it to a USB drive.
- Set Boot Priority: Insert the USB into the faulty computer, restart, enter BIOS/UEFI, and set USB as the primary boot device.
- Launch Live System: Select “Try Ubuntu without installing” to access a memory-based Linux desktop (no changes to existing data).
- Mount the Hard Drive: The system usually mounts the internal drive automatically; manually mount it via the “Files” browser if needed.
- Copy Data: Browse the drive like in Windows and copy desired files to an external storage device (FAT32/exFAT for cross-system compatibility).
Pro Tips
- File System Compatibility: Linux supports NTFS well, but rare/corrupted formats may require additional software packages.
- Permission Issues: Use Terminal and
sudocommands to fix permission errors if file copying fails. - Logical-Only Solution: This method only works if the BIOS recognizes the hard drive—ineffective for physical damage.
Hard Drive Failure Recovery Decision Flowchart
Stay calm and follow this step-by-step decision process:
- Identify Failure Type
- Detectable by BIOS/Disk Management + no abnormal noises → Logical issue: Try Method 1 (software) or Method 3 (Linux rescue).
- Undetectable or abnormal noises → Physical failure: Power off immediately to avoid further damage.
- Evaluate Data Value
- Critically important/irreplaceable data → Choose Method 2 (professional services) for highest recovery success.
Final Thoughts
Hard drive failure doesn’t have to mean permanent data loss. By quickly identifying the failure type and choosing the right recovery method, you can significantly improve your chances of retrieving valuable files. Whether you’re tackling a logical error or a physical fault, the steps above will guide you to retrieve data from a failed hard drive successfully.
Remember: Data recovery is a race against time—prompt, informed action is key. And the most reliable way to avoid data crises? Regular backups.
Whether you’re dealing with accidental deletion, system crashes, or physical damage, this guide equips you with the tools to navigate hard drive data recovery successfully in 2025.


