


Imagine the sinking feeling in your chest when you plug in your external hard drive, expecting to browse through years of family photos or critical work projects, only to find the folder empty. For most users, data recovery from hard drives is a mysterious and stressful process that often follows an accidental deletion or a disk error.
However, understanding the mechanics of how data is stored can turn a digital catastrophe into a manageable minor task. This guide will provide deep insights into the world of data retrieval, ensuring you have the tools to protect your digital legacy and master the art of data recovery from hard drives with confidence.
Part 1: The Invisible Archive—Understanding Data Recovery Principles
To effectively perform data recovery from hard drives, one must first understand that a “deleted” file is rarely actually destroyed. Think of your hard drive as a massive, world-class library. Every file you save is like a book placed on a shelf, and the operating system maintains a “Master Table of Contents” (the File System) that tells the computer exactly which shelf and row hold that specific book.
When you delete a file or format a drive, the computer does not send a shredder to the shelves. Instead, it simply takes an eraser to the Table of Contents. It marks the space where that “book” sits as “available for reuse.” To the average user, the file has vanished. However, the physical magnetic imprints of your data remain on the disk platters until a new file is written over that exact spot.
This leads to the most critical principle of data recovery from hard drives: The window of opportunity. As long as you do not save new files to the drive, the “ghost” of your data remains retrievable. This is why professional tools can scan the physical sectors of a disk to find files that the operating system has long since forgotten.
Part 2: Critical Precautions Before You Begin
Before attempting any method of data recovery from hard drives, you must adhere to strict safety protocols. Data is fragile, and the wrong move can turn a logical error into permanent physical destruction.
- Stop All Activity: The moment you realize data is missing, eject the drive. Continued use increases the risk of the system writing background logs or temporary files over your deleted data.
- The “Target Drive” Rule: Never install recovery software onto the drive you are trying to rescue. Always install tools on your internal system drive (C:) and save recovered files to a completely different storage device.
- Identify the Sound: If your external hard drive is making clicking, grinding, or whirring noises, unplug it immediately. Physical mechanical failure cannot be fixed with software, and running a failing drive will physically scrape the data off the platters.
Part 3: Step-by-Step Methods for Data Recovery from Hard Drives
Method 1: Basic Troubleshooting and Logical Visibility
Sometimes the data is not lost; it is simply obscured by the operating system or a faulty connection.
- Step 1: Check Connectivity. Swap the USB cable and try a port directly on the computer’s motherboard (for desktops) rather than a USB hub.
- Step 2: Assign a Drive Letter. Press
Win + Xand select Disk Management. If your drive appears but has no letter, right-click the partition and select “Change Drive Letter and Paths.” - Step 3: Show Hidden Files. In File Explorer, go to View > Options > View tab and select “Show hidden files, folders, and drives.”
⚠️ WARNING: If Disk Management shows your drive as “Not Initialized” or “No Media,” do not attempt to initialize it, as this may overwrite the master boot record.
Method 2: Professional Retrieval with PandaOffice Drecov
When logical checks fail, you need a high-performance tool. PandaOffice Drecov stands out as a premier solution for data recovery from hard drives.The software utilizes an advanced “Deep Analysis” engine that can reconstruct over 1,000 file types even from RAW or corrupted partitions.
Why PandaOffice Drecov Is Especially Effective
Most importantly, PandaOffice Drecov operates in read-only mode, which is essential for safe data recovery from external hard drive.
- Recover data from external hard drives, USB drives, SD cards, and SSDs
- Support recovery after accidental deletion, formatting, RAW errors, and partition loss
- Preserve original file names and folder structures whenever possible
- Perform deep scans without modifying original data
Step-by-Step Guide: Using PandaOffice Drecov
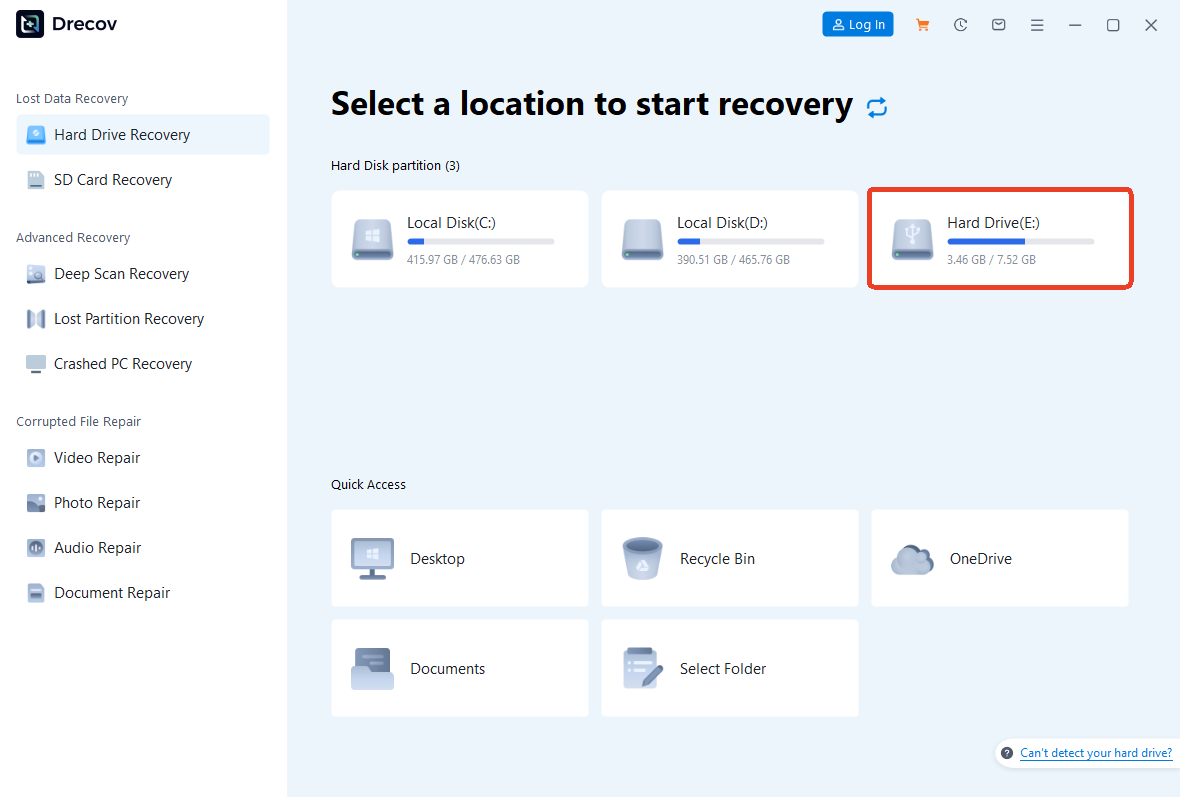
- Step 1: Select the Location.Launch PandaOffice Drecov on your PC. The main interface displays all connected storage. Under the “External Devices” section, click on the specific external hard drive you wish to scan.
- Step 2: Scan and Preview.Click the “Start” button. The software automatically initiates a dual-mode scan: a “Quick Scan” for recently deleted items and a “Deep Scan” for formatted or lost partitions.
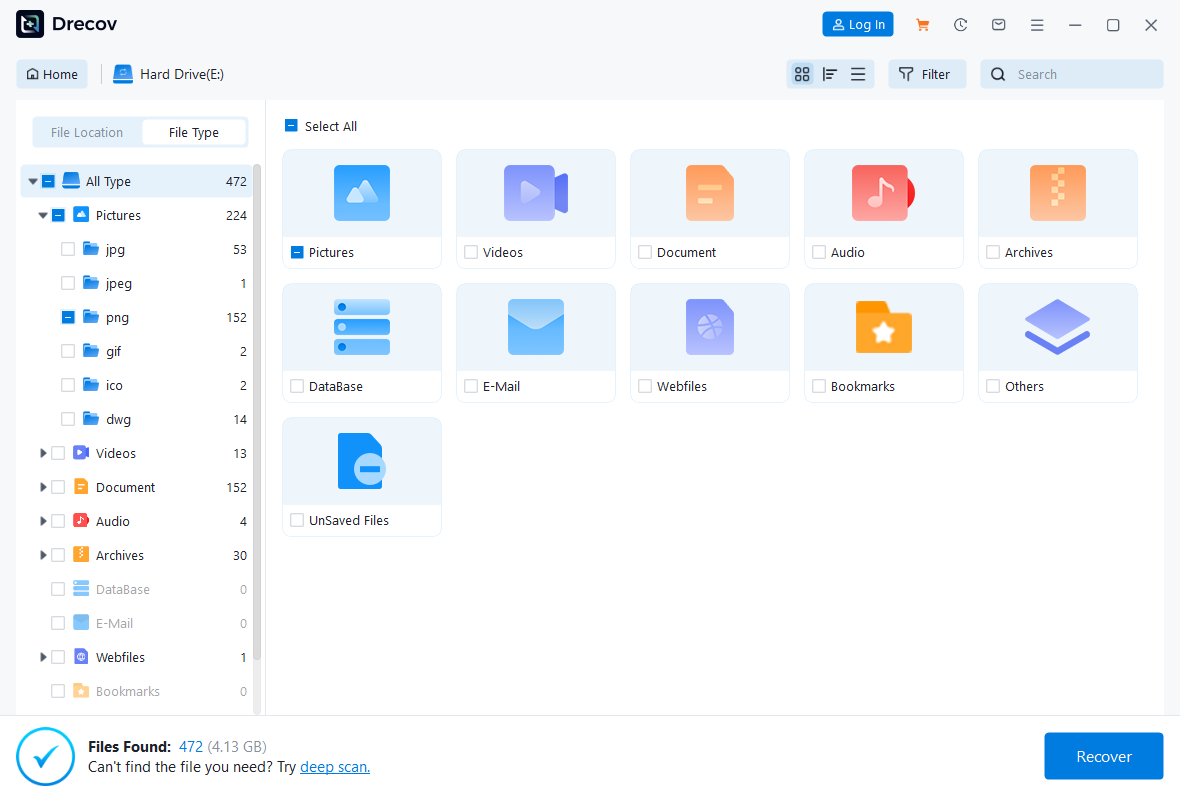
Pro Tip: You can use the “Filter” feature during the scan to narrow down results by file type (e.g., .jpg, .docx) or size. You can even preview photos or documents in real-time to verify their integrity before the scan finishes.
- Step 3: Recover and Save.Once you find the files you need, check the boxes next to them and click “Recover.”

🔔 CRITICAL REMINDER: Always choose a destination path on a different drive (such as your computer’s desktop or a separate cloud folder). Saving back to the source drive will cause permanent data overwriting.
The advantage of PandaOffice Drecov lies in its ability to handle “Raw” drives—disks where the file system has collapsed and Windows asks you to “Format before use.” While Windows sees a blank slate, Drecov sees the underlying data.
🎬 Prefer a Step-by-Step Visual Walkthrough?
If you learn better through visual demonstration, watch our comprehensive video tutorial below. This concise guide simplifies the process of data recovery from external hard drives, covering everything from the initial device connection to the final file export. See exactly how the PandaOffice Drecov interface handles complex scans to rescue your lost documents and photos in just a few clicks.
Method 3: Official Windows File Recovery (Microsoft Utility)
For users comfortable with a more manual, command-line approach to data recovery from hard drives, Microsoft offers a free utility.
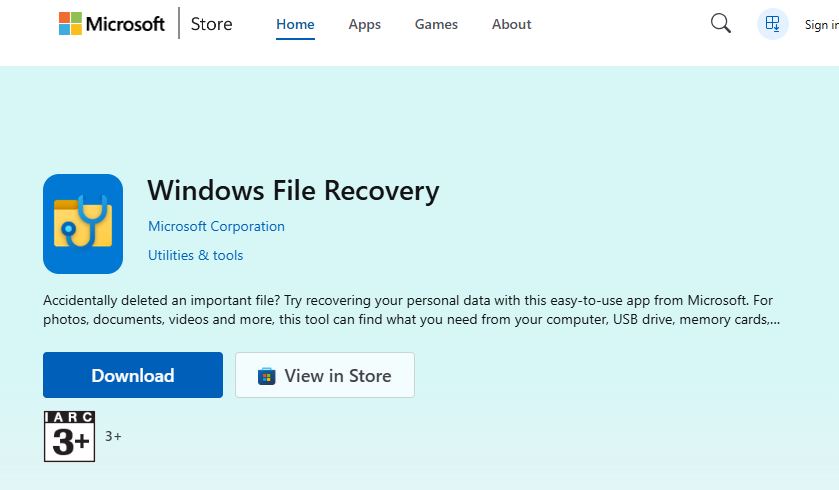
- Step 1: Download Windows File Recovery from the Microsoft Store.
- Step 2: Open the application. A Command Prompt window will appear.
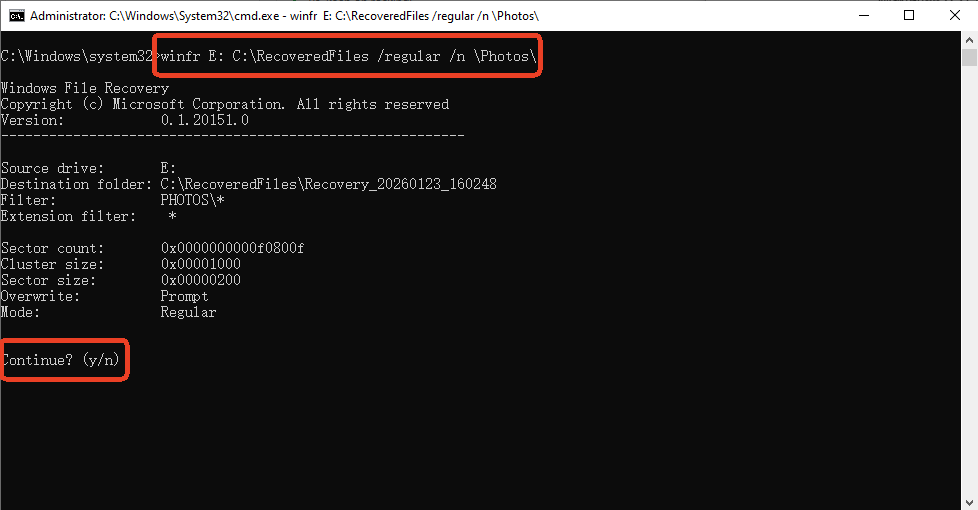
- Step 3: Enter the recovery command. For example, to recover a folder named “Photos” from your external drive (E:) to your C: drive, type:
winfr E: C:\RecoveredFiles /regular /n \Photos\ - Step 4: Type “Y” to start the process.
⚠️ WARNING: This tool lacks a preview feature. You will not know if a file is corrupted until the process finishes. It is also less effective on formatted drives compared to professional software.
Method 4: Using CHKDSK for File System Repair
If your drive is accessible but shows “File or directory is corrupted,” the Check Disk utility can sometimes repair the index.
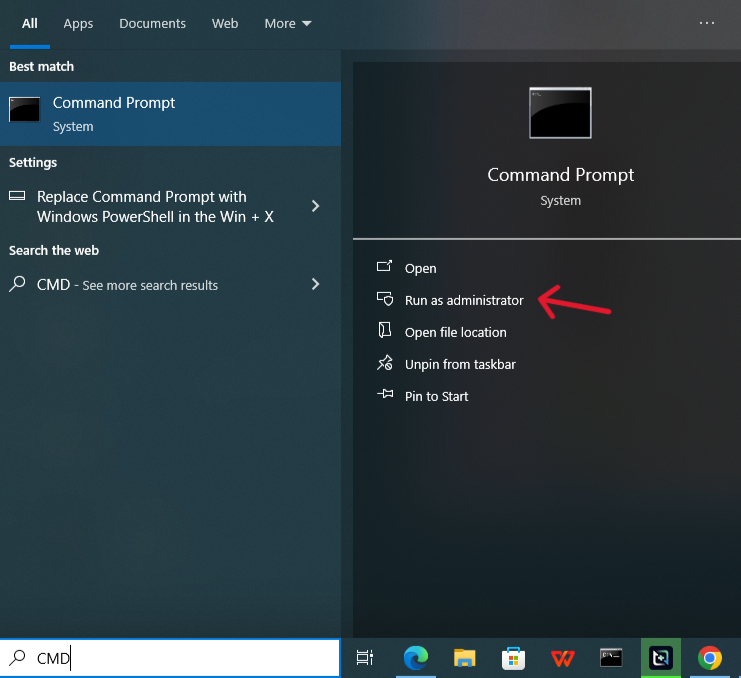
- Step 1: Type
cmdin the Windows search bar, right-click, and Run as Administrator.
- Step 2: Type
chkdsk X: /f(Replace X with your drive letter) and press Enter.
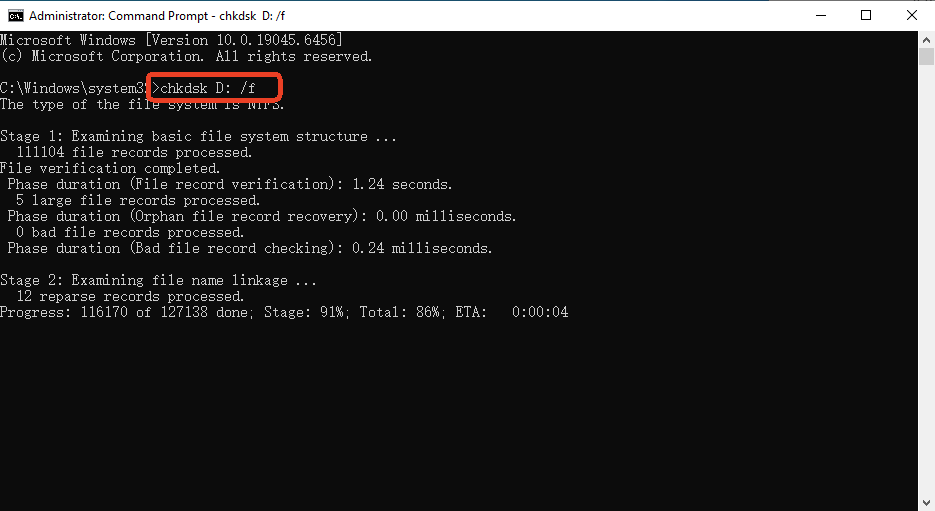
- Step 3: Wait for the process to complete. It will attempt to fix logical errors in the file system table.
🔔 REMINDER: CHKDSK is a “repair” tool, not a “recovery” tool. It may discard fragments of corrupted data to make the drive readable again. If you need to recover specific deleted files, use Method 2 before attempting CHKDSK.
Part 4: Comparative Analysis of Recovery Methods
The following table summarizes the different approaches to data recovery from hard drives to help you choose the best path.
| Feature | PandaOffice Drecov | Windows File Recovery | CHKDSK Utility |
| Ease of Use | Highest (Visual UI) | Low (Command Line) | Moderate |
| Success Rate | Excellent (Deep Scan) | Moderate | Low (Fixes errors only) |
| File Preview | Yes (Visual) | No | No |
| Best For | Formatted, RAW, or Deleted files | Recently deleted files | Fixing “Drive not accessible” |
| Recovery Speed | High | Moderate | Fast |
| Safety | High (Read-only scan) | High | Moderate (May write to disk) |
Part 5: Prevention—The Only Guaranteed Solution
While data recovery from hard drives has a high success rate, it is never 100% guaranteed. Protecting your data proactively is much easier than rescuing it from a digital grave.
- The 3-2-1 Backup Strategy: Keep 3 copies of your data, on 2 different types of media (e.g., External Drive and SSD), with 1 copy stored off-site (Cloud storage).
- Monitor S.M.A.R.T. Health: Use utility software to check your drive’s “Self-Monitoring, Analysis, and Reporting Technology” status. If the “Reallocated Sectors Count” starts rising, replace the drive immediately.
- Safe Ejection: Always use the “Safely Remove Hardware” icon. Removing a drive during a write operation is the leading cause of logical corruption.
- Environmental Care: External hard drives are sensitive to magnetism, heat, and physical shocks. Store them in padded cases and avoid placing them near speakers or high-heat areas.
Conclusion
Mastering data recovery from hard drives is about patience and using the right tools at the right time. By understanding that your data remains on the disk even after deletion, you can use the PandaOffice Drecov Three-Step Method to efficiently scan and retrieve lost files. Whether you encounter a formatted partition or a simple accidental deletion, remember to stop using the drive immediately to prevent overwriting. With the right precautions and a solid backup plan, you can ensure that a hardware glitch never becomes a permanent loss.


